Quarkus - 認可コードフローのOpenID Connectを使用してWebアプリケーションを保護
Quarkus OIDCエクステンションでQuarkus OpenID Connect(OIDC)の認可コードフローメカニズムを使用して、アプリケーションのHTTPエンドポイントを保護し、堅牢な認証と認可を実現する方法をご覧ください。
詳細については、 ウェブアプリケーションを保護するためのOIDCコードフロー メカニズムを参照してください。
Apple、Facebook、GitHub、Google、Mastodon、Microsoft、Spotify、Twitch、X(旧Twitter)などの有名なソーシャルプロバイダをQuarkus OIDCで使用する方法については、 有名なOpenID Connectプロバイダの設定 を参照してください。 Quarkusの認証メカニズム も参照してください。
OIDCベアラートークン認証を使用してサービスアプリケーションを保護したい場合は、 OIDCベアラートークン認証 を参照してください。
前提条件
このガイドを完成させるには、以下が必要です:
-
約15分
-
IDE
-
JDK 17+がインストールされ、
JAVA_HOMEが適切に設定されていること -
Apache Maven 3.9.12
-
動作するコンテナランタイム(Docker, Podman)
-
使用したい場合は、 Quarkus CLI
-
ネイティブ実行可能ファイルをビルドしたい場合、MandrelまたはGraalVM(あるいはネイティブなコンテナビルドを使用する場合はDocker)をインストールし、 適切に設定していること
ソリューション
次のセクションの指示に従って、ステップバイステップでアプリケーションを作成してください。あるいは、完成した例にすぐに進むこともできます。
git clone https://github.com/quarkusio/quarkus-quickstarts.git コマンドを実行して Git リポジトリをクローンします。あるいは、https://github.com/quarkusio/quarkus-quickstarts/archive/main.zip[archive]をダウンロードしてください。
ソリューションは security-openid-connect-web-authentication-quickstart ディレクトリ にあります。
1. Maven プロジェクトの作成
まず、新しいプロジェクトが必要です。以下のコマンドを実行して新しいプロジェクトを作成します:
Windowsユーザーの場合:
-
cmdを使用する場合、(バックスラッシュ
\を使用せず、すべてを同じ行に書かないでください)。 -
Powershellを使用する場合は、
-Dパラメータを二重引用符で囲んでください。例:"-DprojectArtifactId=security-openid-connect-web-authentication-quickstart"
すでにQuarkusプロジェクトが設定されている場合は、プロジェクトのベースディレクトリーで以下のコマンドを実行することで、プロジェクトに oidc エクステンションを追加することができます。
quarkus extension add oidc./mvnw quarkus:add-extension -Dextensions='oidc'./gradlew addExtension --extensions='oidc'これにより、ビルドファイルに以下の依存関係が追加されます:
<dependency>
   <groupId>io.quarkus</groupId>
   <artifactId>quarkus-oidc</artifactId>
</dependency>implementation("io.quarkus:quarkus-oidc")2. アプリケーションの記述
認可コードグラントレスポンスで返されるすべてのトークンを注入した、単純な Jakarta REST リソースを書いてみましょう:
package org.acme.security.openid.connect.web.authentication;

import jakarta.inject.Inject;
import jakarta.ws.rs.GET;
import jakarta.ws.rs.Path;
import jakarta.ws.rs.Produces;

import org.eclipse.microprofile.jwt.Claims;
import org.eclipse.microprofile.jwt.JsonWebToken;

import io.quarkus.oidc.IdToken;
import io.quarkus.oidc.RefreshToken;

@Path("/tokens")
public class TokenResource {

   /**
    * Injection point for the ID token issued by the OpenID Connect provider
    */
   @Inject
   @IdToken
   JsonWebToken idToken;

   /**
    * Injection point for the access token issued by the OpenID Connect provider
    */
   @Inject
   JsonWebToken accessToken;

   /**
    * Injection point for the refresh token issued by the OpenID Connect provider
    */
   @Inject
   RefreshToken refreshToken;

   /**
    * Returns the tokens available to the application.
    * This endpoint exists only for demonstration purposes.
    * Do not expose these tokens in a real application.
    *
    * @return an HTML page containing the tokens available to the application.
    */
   @GET
   @Produces("text/html")
   public String getTokens() {
       StringBuilder response = new StringBuilder().append("<html>")
               .append("<body>")
               .append("<ul>");


       Object userName = this.idToken.getClaim(Claims.preferred_username);

       if (userName != null) {
           response.append("<li>username: ").append(userName.toString()).append("</li>");
       }

       Object scopes = this.accessToken.getClaim("scope");

       if (scopes != null) {
           response.append("<li>scopes: ").append(scopes.toString()).append("</li>");
       }

       response.append("<li>refresh_token: ").append(refreshToken.getToken() != null).append("</li>");

       return response.append("</ul>").append("</body>").append("</html>").toString();
   }
}
このエンドポイントには、ID、アクセス、およびリフレッシュ・トークンが注入されています。ID トークンからの preferred_username クレーム、アクセストークンからの scope クレーム、リフレッシュトークンの可用性ステータスを返します。
トークンを注入する必要があるのは、エンドポイントが ID トークンを使って現在認証されているユーザーとやり取りする必要がある場合、あるいはアクセストークンを使ってそのユーザーに代わって下流のサービスにアクセスする必要がある場合だけです。
詳細については、リファレンス・ガイドの アクセスIDとアクセストークン のセクションを参照してください。
3. アプリケーションの設定
OIDCエクステンションでは、 src/main/resources ディレクトリにある application.properties ファイルを使用して設定を定義できます。
%prod.quarkus.oidc.auth-server-url=http://localhost:8180/realms/quarkus
quarkus.oidc.client-id=frontend
quarkus.oidc.credentials.secret=secret
quarkus.oidc.application-type=web-app
quarkus.http.auth.permission.authenticated.paths=/*
quarkus.http.auth.permission.authenticated.policy=authenticated
これは、アプリケーションへの認証を有効にする際に最もシンプルな設定です。
quarkus.oidc.client-id プロパティは OIDC プロバイダが発行した client_id を参照し、 quarkus.oidc.credentials.secret プロパティはクライアントシークレットを設定します。
quarkus.oidc.application-type プロパティを web-app に設定することで、OIDC認可コードフローを有効にし、ユーザーが認証のためにOIDCプロバイダにリダイレクトされるようにQuarkusに指示します。
最後に、保護するパスについてQuarkusに伝えるために、 quarkus.http.auth.permission.authenticated パーミッションを設定します。
この場合、すべてのパスは、 authenticated ユーザのみがアクセスできるようにするポリシーによって保護されます。詳細については、 セキュリティ認可ガイド を参照してください。
|
暗号化のシークレットは32文字にすることを推奨します。例えば |
4. Keycloakサーバーの起動と設定
Keycloakサーバーを起動するには、Dockerを使用し、以下のコマンドを実行します:
docker run --name keycloak -e KC_BOOTSTRAP_ADMIN_USERNAME=admin -e KC_BOOTSTRAP_ADMIN_PASSWORD=admin -p 8180:8080 quay.io/keycloak/keycloak:{keycloak.version} start-devwhere keycloak.version is set to 26.4.7 or later.
Keycloak サーバーには localhost:8180 からアクセスできます。
Keycloak管理コンソールにアクセスするには、 admin ユーザーでログインします。ユーザー名とパスワードはいずれも admin です。
新しいレルムを作成するには、 レルム設定ファイル をインポートします。 新しいrealmを作成して設定 する方法について詳しくはKeycloakのドキュメントを参照してください。
5. devモードとJVMモードでアプリケーションを実行
アプリケーションを開発モードで実行するには、次を使用します:
quarkus dev./mvnw quarkus:dev./gradlew --console=plain quarkusDev開発モードでアプリケーションを試した後、標準の Java アプリケーションとして実行できます。
まず、コンパイルします:
quarkus build./mvnw install./gradlew buildそして、実行してみてください:
java -jar target/quarkus-app/quarkus-run.jar6. Native モードでアプリケーションを実行
この同じデモをネイティブ・コードにコンパイルすることができます。修正は必要ありません。
これは、生成されたバイナリーにランタイムテクノロジーが含まれ、 最小限のリソースで実行するように最適化されているため、 実稼働環境に JVM をインストールする必要がなくなることを意味します。
コンパイルには時間がかかるので、このステップはデフォルトでオフになっています。ネイティブビルドを有効にすれば、再度ビルドできます:
quarkus build --native./mvnw install -Dnative./gradlew build -Dquarkus.native.enabled=trueしばらくすると、このバイナリを直接実行できるようになります:
./target/security-openid-connect-web-authentication-quickstart-runner7. アプリケーションのテスト
アプリケーションの動作確認は、ブラウザを起動して以下のURLにアクセスしてください:
すべてが期待通りに動作すると、認証のためにKeycloakサーバーにリダイレクトされます。
アプリケーションを認証するには、Keycloakログインページで以下のクレデンシャルを入力してください:
-
Username: alice
-
Password: alice
Login ボタンをクリックすると、アプリケーションにリダイレクトされ、セッションクッキーが作成されます。
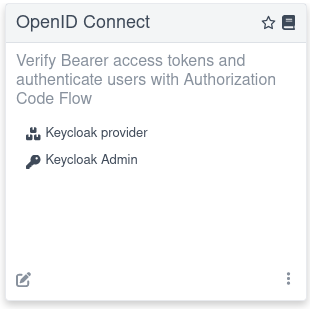
このデモのセッションは短時間有効で、ページ更新のたびに再認証を求められます。セッションタイムアウトを増やす方法については、Keycloak セッションタイムアウトの ドキュメントを参照してください。例えば、 Dev Services for Keycloak をdevモードで使用している場合、 Keycloak Admin リンクをクリックすることで、dev UIから直接Keycloak Adminコンソールにアクセスすることができます:

Dev Services for Keycloak に依存する統合テストの書き方については、 Dev Services for Keycloak のセクションを参照してください。
まとめ
アプリケーションの HTTP エンドポイントを保護し、テストするために、OIDC 認可コードフローメカニズムを設定し、使用する方法を学びました。 このチュートリアルを終えたら、 OIDC ベアラー認証 や その他の認証メカニズム を調べてみてください。
