Getting started with WebSockets-Next
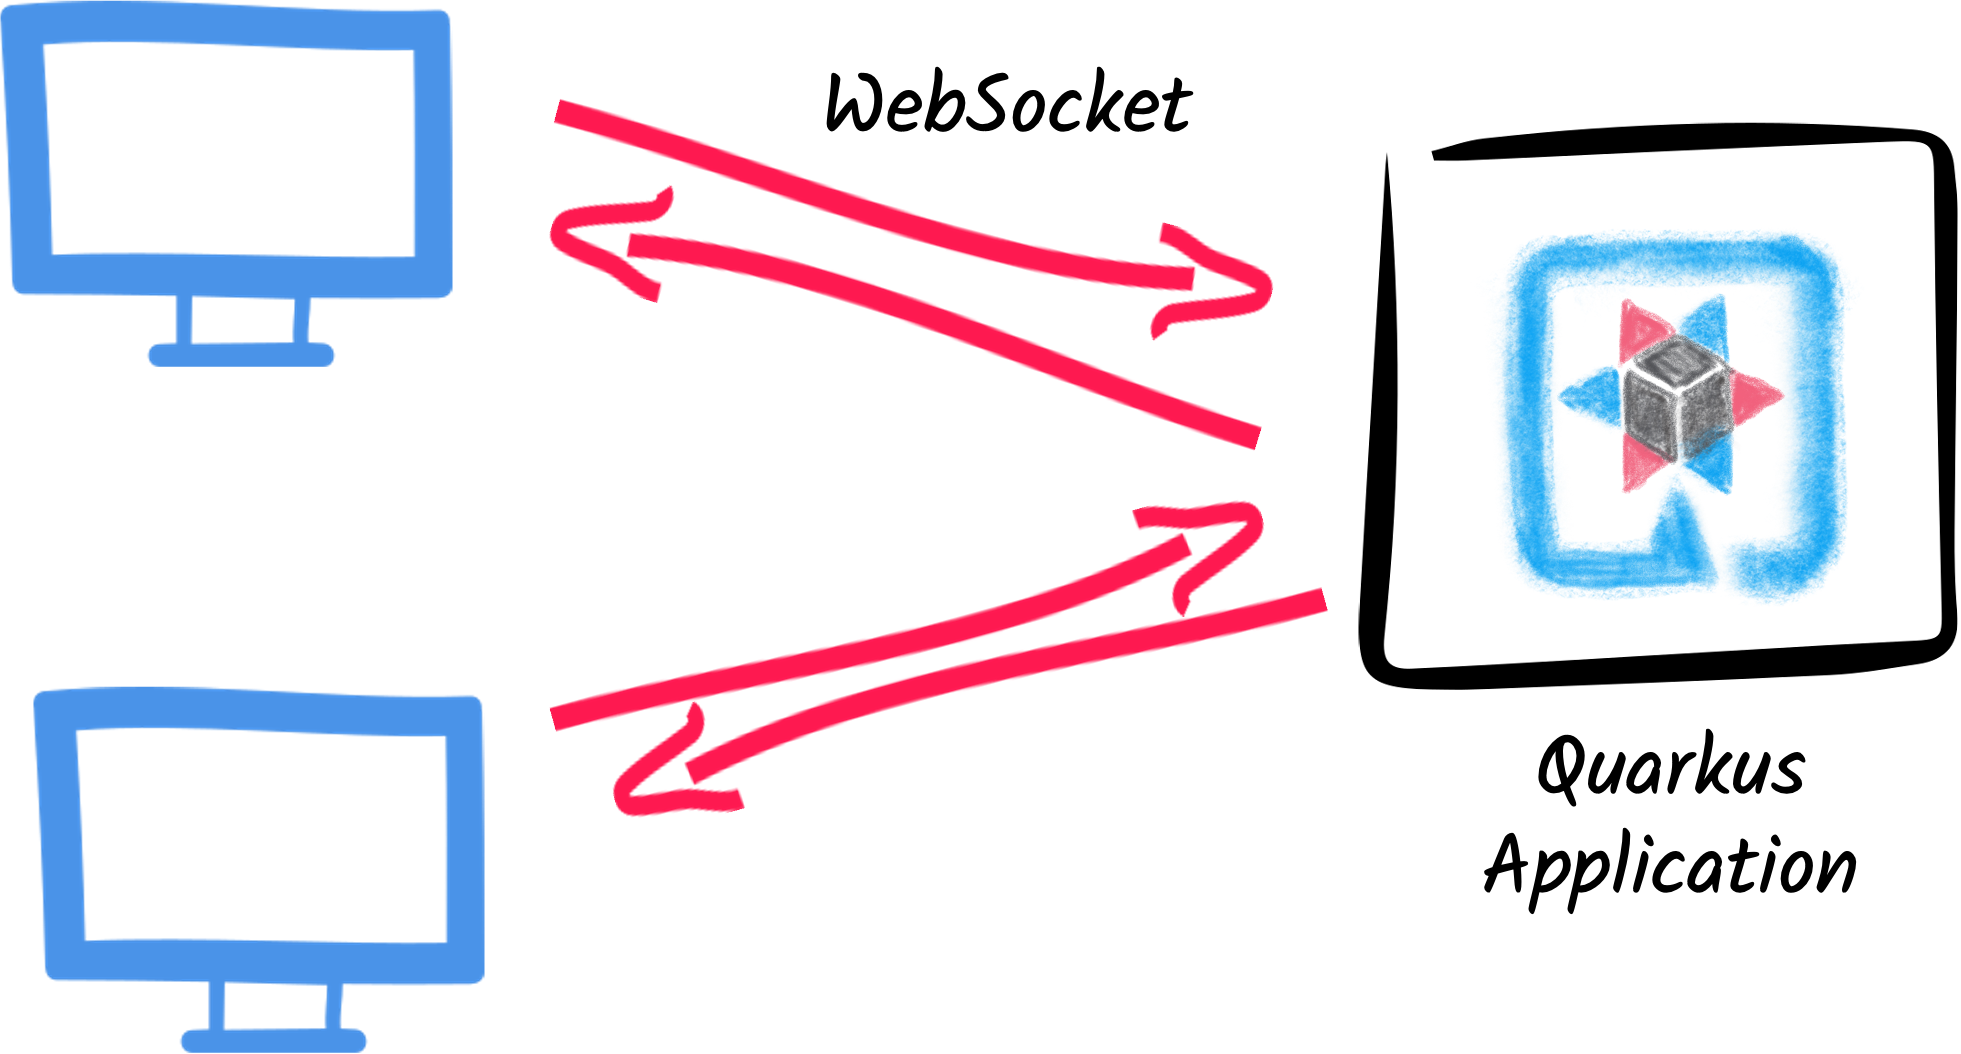
This guide explains how your Quarkus application can utilize web sockets to create interactive web applications. In this guide, we will develop a very simple chat application using web sockets to receive and send messages to the other connected users.
The websockets-next extension is experimental. The proposal API may change in future releases.
|
前提条件
このガイドを完成させるには、以下が必要です:
-
約15分
-
IDE
-
JDK 17+がインストールされ、
JAVA_HOMEが適切に設定されていること -
Apache Maven 3.9.6
-
使用したい場合は、 Quarkus CLI
-
ネイティブ実行可能ファイルをビルドしたい場合、MandrelまたはGraalVM(あるいはネイティブなコンテナビルドを使用する場合はDocker)をインストールし、 適切に設定していること
Quarkus WebSockets vs. Quarkus WebSockets Next
This guide uses the quarkus-websockets-next extension.
This extension is a new implementation of the WebSocket API that is more efficient and easier to use than the original quarkus-websockets extension. The original quarkus-websockets extension is still available and will continue to be supported.
Unlike quarkus-websockets, quarkus-web-socket-next does NOT implement Jakarta WebSocket.
Instead, it provides a simplified and more modern API that is easier to use.
It is also designed to work efficiently with Quarkus' reactive programming model and the Quarkus' networking layer.
What you’ll learn
-
How to use the
quarkus-websockets-nextextension -
How to declare a web socket endpoint
-
How to send and receive messages using web sockets
-
How to broadcast messages to all connected users
-
How to be notified of new connections and disconnections
-
How to use path parameters in web socket URLs
ソリューション
次の章で紹介する手順に沿って、ステップを踏んでアプリを作成することをお勧めします。ただし、すぐに完成した例に飛んでも構いません。
Gitレポジトリをクローンするか git clone https://github.com/quarkusio/quarkus-quickstarts.git 、 アーカイブ をダウンロードします。
The solution is located in the websockets-next-quickstart directory.
Mavenプロジェクトの作成
まず、新しいプロジェクトが必要です。以下のコマンドで新規プロジェクトを作成します。
Windowsユーザーの場合:
-
cmdを使用する場合、(バックスラッシュ
\を使用せず、すべてを同じ行に書かないでください)。 -
Powershellを使用する場合は、
-Dパラメータを二重引用符で囲んでください。例:"-DprojectArtifactId=websockets-quickstart"
This command generates the project (without any classes) and imports the websockets-next extension.
If you already have your Quarkus project configured, you can add the websockets-next extension
to your project by running the following command in your project base directory:
quarkus extension add websockets-next./mvnw quarkus:add-extension -Dextensions='websockets-next'./gradlew addExtension --extensions='websockets-next'これにより、以下がビルドファイルに追加されます。
<dependency>
    <groupId>io.quarkus</groupId>
    <artifactId>quarkus-websockets-next</artifactId>
</dependency>implementation("io.quarkus:quarkus-websockets-next")Declaring a WebSocket endpoint
Our application contains a single class that handles the web sockets.
Create the org.acme.websockets.ChatWebSocket class in the src/main/java directory.
Copy the following content into the created file:
package org.acme.websockets;

import io.quarkus.websockets.next.OnClose;
import io.quarkus.websockets.next.OnOpen;
import io.quarkus.websockets.next.OnTextMessage;
import io.quarkus.websockets.next.WebSocket;
import io.quarkus.websockets.next.WebSocketConnection;
import jakarta.inject.Inject;

@WebSocket(path = "/chat/{username}")  (1)
public class ChatWebSocket {

    // Declare the type of messages that can be sent and received
    public enum MessageType {USER_JOINED, USER_LEFT, CHAT_MESSAGE}
    public record ChatMessage(MessageType type, String from, String message) {
    }

    @Inject
    WebSocketConnection connection;  (2)

    @OnOpen(broadcast = true)       (3)
    public ChatMessage onOpen() {
        return new ChatMessage(MessageType.USER_JOINED, connection.pathParam("username"), null);
    }

    @OnClose                    (4)
    public void onClose() {
        ChatMessage departure = new ChatMessage(MessageType.USER_LEFT, connection.pathParam("username"), null);
        connection.broadcast().sendTextAndAwait(departure);
    }

    @OnTextMessage(broadcast = true)  (5)
    public ChatMessage onMessage(ChatMessage message) {
        return message;
    }

}| 1 | Declares the web socket endpoint and configure the path. Note that the path can contain a path parameter: username. |
| 2 | A session scoped bean that represents the connection to the client. It allows sending messages programmatically and retrieve the path parameters. |
| 3 | This method is called when a new client connects. The broadcast = true attribute indicates that the returned message should be sent to all connected clients. |
| 4 | This method is called when a client disconnects. The method uses the WebSocketConnection to broadcast a message to all remaining connected clients. |
| 5 | This method is called when a client sends a message. The broadcast = true attribute indicates that the returned message should be sent to all connected clients. Here, we just returns the received (text) message. |
As you can see, Quarkus handles the web socket lifecycle and message handling using annotations. It also serializes and deserializes messages using JSON automatically.
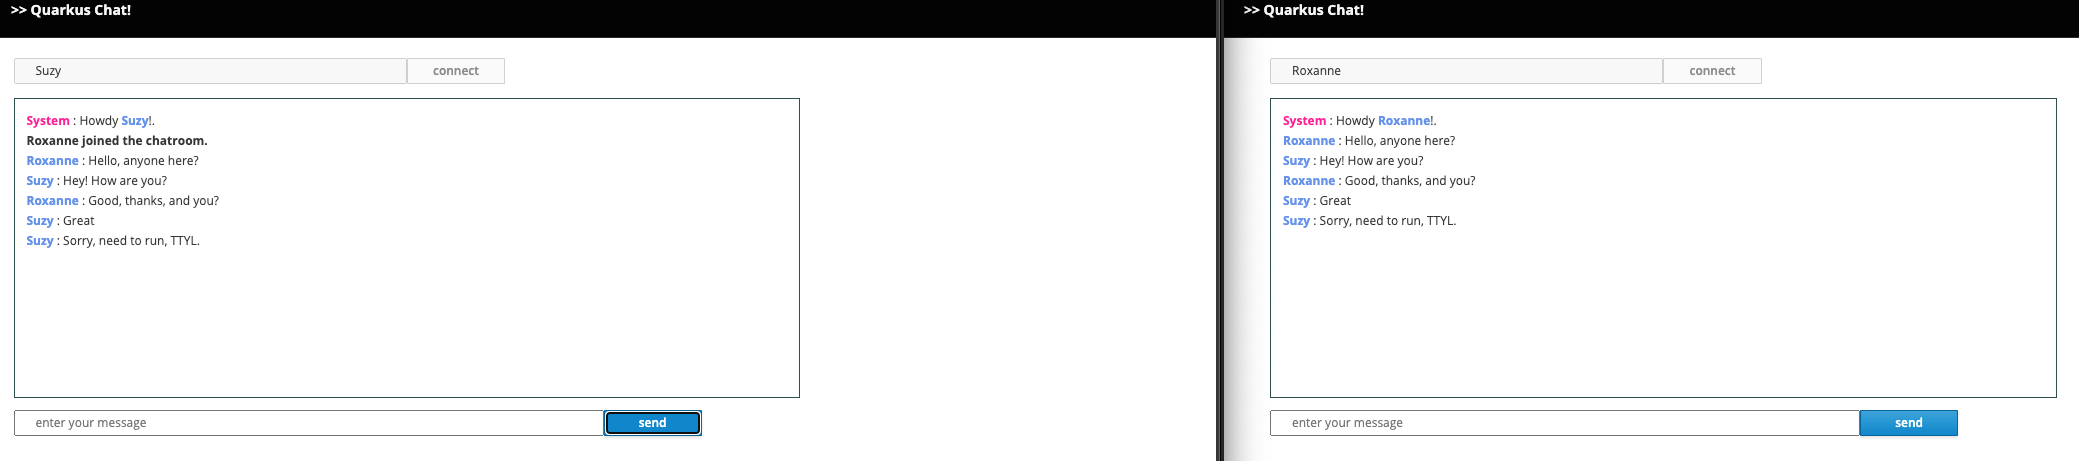
洗練されたWebフロントエンド
All chat applications need a nice UI, well, this one may not be that nice, but does the work.
Quarkus automatically serves static resources contained in the META-INF/resources directory.
Create the src/main/resources/META-INF/resources directory and copy this index.html file in it.
アプリケーションの実行
では、実際にアプリケーションを見てみましょう。以下のように実行してみてください:
quarkus dev./mvnw quarkus:dev./gradlew --console=plain quarkusDevそして、ブラウザウィンドウを2つ開いて、 http://localhost:8080/ に移動します:
-
上部のテキストエリアに名前を入力します(2種類の名前を使用します)。
-
connectをクリック
-
メッセージの送受信
いつものように、アプリケーションは以下の方法でパッケージ化できます:
quarkus build./mvnw install./gradlew buildそして、 java -jar target/quarkus-app/quarkus-run.jar を使って実行します。
ネイティブ実行可能ファイルを次のようにビルドすることもできます。
quarkus build --native./mvnw install -Dnative./gradlew build -Dquarkus.package.type=nativeまとめ
This short getting started guide has shown you how to create a simple chat application using the quarkus-websockets-next extension.
Learn more about this extension on the dedicated reference guide.
