SmallRye GraphQL
このガイドでは、 MicroProfile GraphQL 仕様の実装である SmallRye GraphQL をQuarkusアプリケーションで使用する方法を説明します。
GraphQL の仕様のWebサイトにも記載されているように
GraphQLは、APIのクエリ言語であり、既存のデータでこれらのクエリを実行するためのランタイムです。 GraphQLは、API内のデータの完全で理解しやすい説明を提供し、クライアントが必要なものだけを正確に要求できるようにし、時間の経過とともにAPIを進化させやすくし、強力な開発者ツールを実現にします。
GraphQL はもともと2012年に Facebook が開発したもので、2015年からはオープンスタンダードとなっています。
GraphQLはREST APIの仕様を置き換えるものではなく、単なる別の手段です。RESTとは異なり、GraphQL APIは以下のようにクライアントに利益をもたらす機能を持っています。
- オーバーフェッチとアンダーフェッチの防止
-
REST API は、クライアントが決定できないサーバー主導の固定データレスポンスです。クライアントはすべてのフィールドを必要としなくても、クライアントはすべてのデータを取得しなければならないため、
Over-fetchingです。クライアントはまた、必要とされるすべてのデータを取得するために、最初の呼び出し(HATEOAS)に応じて複数のREST API呼び出しを必要とする場合があり、Under-fetchingです。 - APIの進化
-
GraphQL APIはクライアントから要求されたデータを返すので、既存のAPIにフィールドや機能を追加しても、既存のクライアントに大きな変更を加えることはありません。
前提条件
このガイドを完成させるには、以下が必要です:
-
約15分
-
IDE
-
JDK 17+がインストールされ、
JAVA_HOMEが適切に設定されていること -
Apache Maven 3.9.15
-
使用したい場合は、 Quarkus CLI
-
ネイティブ実行可能ファイルをビルドしたい場合、MandrelまたはGraalVM(あるいはネイティブなコンテナビルドを使用する場合はDocker)をインストールし、 適切に設定していること
アーキテクチャ
このガイドでは、 /graphql で GraphQL API を公開するシンプルな GraphQL アプリケーションを構築します。
この例は、人気のある GraphQL API にインスパイアされたものです。
ソリューション
次の章で紹介する手順に沿って、ステップを踏んでアプリを作成することをお勧めします。ただし、完成した例にそのまま進んでも構いません。
Gitレポジトリをクローンするか git clone https://github.com/quarkusio/quarkus-quickstarts.git 、 アーカイブ をダウンロードします。
ソリューションは microprofile-graphql-quickstart ディレクトリ にあります。
Mavenプロジェクトの作成
まず、新しいプロジェクトが必要です。以下のコマンドで新規プロジェクトを作成します:
Windowsユーザーの場合:
-
cmdを使用する場合、(バックスラッシュ
\を使用せず、すべてを同じ行に書かないでください)。 -
Powershellを使用する場合は、
-Dパラメータを二重引用符で囲んでください。例:"-DprojectArtifactId=microprofile-graphql-quickstart"
このコマンドは、 smallrye-graphql エクステンションをインポートした Maven プロジェクトを生成します。
すでにQuarkusプロジェクトが設定されている場合は、プロジェクトのベースディレクトリーで以下のコマンドを実行することで、プロジェクトに smallrye-graphql エクステンションを追加することができます。
quarkus extension add quarkus-smallrye-graphql./mvnw quarkus:add-extension -Dextensions='quarkus-smallrye-graphql'./gradlew addExtension --extensions='quarkus-smallrye-graphql'これにより、ビルドファイルに以下が追加されます:
<dependency>
    <groupId>io.quarkus</groupId>
    <artifactId>quarkus-smallrye-graphql</artifactId>
</dependency>implementation("io.quarkus:quarkus-smallrye-graphql")アプリケーションの準備: GraphQL API
このセクションでは、GraphQL APIの作成を開始します。
まず、はるか彼方の銀河系の映画を表す以下のエンティティを作成します:
package org.acme.microprofile.graphql;

public class Film {

    public String title;
    public Integer episodeID;
    public String director;
    public LocalDate releaseDate;

}

public class Hero {

    public String name;
    public String surname;
    public Double height;
    public Integer mass;
    public Boolean darkSide;
    public LightSaber lightSaber;
    public List<Integer> episodeIds = new ArrayList<>();

}

enum LightSaber {
    RED, BLUE, GREEN
}| 可読性の為にpublicなフィールドを持つクラスを使用していますが、publicなゲッターとセッターを持つprivateなフィールドを持つクラスも使用できます。 |
先ほど作成したクラスは、クライアントがアクセス可能なデータ(オブジェクト、フィールド、リレーションシップ)のセットであるGraphQLスキーマを記述しています。
引き続き、リポジトリとして動作するCDI Beanの例を見てみましょう。
@ApplicationScoped
public class GalaxyService {

    private List<Hero> heroes = new ArrayList<>();

    private List<Film> films = new ArrayList<>();

    public GalaxyService() {

        Film aNewHope = new Film();
        aNewHope.title = "A New Hope";
        aNewHope.releaseDate = LocalDate.of(1977, Month.MAY, 25);
        aNewHope.episodeID = 4;
        aNewHope.director = "George Lucas";

        Film theEmpireStrikesBack = new Film();
        theEmpireStrikesBack.title = "The Empire Strikes Back";
        theEmpireStrikesBack.releaseDate = LocalDate.of(1980, Month.MAY, 21);
        theEmpireStrikesBack.episodeID = 5;
        theEmpireStrikesBack.director = "George Lucas";

        Film returnOfTheJedi = new Film();
        returnOfTheJedi.title = "Return Of The Jedi";
        returnOfTheJedi.releaseDate = LocalDate.of(1983, Month.MAY, 25);
        returnOfTheJedi.episodeID = 6;
        returnOfTheJedi.director = "George Lucas";

        films.add(aNewHope);
        films.add(theEmpireStrikesBack);
        films.add(returnOfTheJedi);

        Hero luke = new Hero();
        luke.name = "Luke";
        luke.surname = "Skywalker";
        luke.height = 1.7;
        luke.mass = 73;
        luke.lightSaber = LightSaber.GREEN;
        luke.darkSide = false;
        luke.episodeIds.addAll(Arrays.asList(4, 5, 6));

        Hero leia = new Hero();
        leia.name = "Leia";
        leia.surname = "Organa";
        leia.height = 1.5;
        leia.mass = 51;
        leia.darkSide = false;
        leia.episodeIds.addAll(Arrays.asList(4, 5, 6));


        Hero vader = new Hero();
        vader.name = "Darth";
        vader.surname = "Vader";
        vader.height = 1.9;
        vader.mass = 89;
        vader.darkSide = true;
        vader.lightSaber = LightSaber.RED;
        vader.episodeIds.addAll(Arrays.asList(4, 5, 6));

        heroes.add(luke);
        heroes.add(leia);
        heroes.add(vader);

    }

    public List<Film> getAllFilms() {
        return films;
    }

    public Film getFilm(int id) {
        return films.get(id);
    }

    public List<Hero> getHeroesByFilm(Film film) {
        return heroes.stream()
                .filter(hero -> hero.episodeIds.contains(film.episodeID))
                .collect(Collectors.toList());
    }

    public void addHero(Hero hero) {
        heroes.add(hero);
    }

    public Hero deleteHero(int id) {
        return heroes.remove(id);
    }

    public List<Hero> getHeroesBySurname(String surname) {
        return heroes.stream()
                .filter(hero -> hero.surname.equals(surname))
                .collect(Collectors.toList());
    }
}
それでは、最初のGraphQL APIを作成してみましょう。
org.acme.microprofile.graphql.FilmResource クラスを以下のように編集します。
@GraphQLApi (1)
public class FilmResource {

    @Inject
    GalaxyService service;

    @Query("allFilms") (2)
    @Description("Get all Films from a galaxy far far away") (3)
    public List<Film> getAllFilms() {
        return service.getAllFilms();
    }
}| 1 | @GraphQLApi アノテーションは、CDI BeanがGraphQLのエンドポイントになることを示しています。 |
| 2 | @Query アノテーションは、このメソッドが allFilms という名前でクエリー可能であることを定義します。 |
| 3 | クエリー可能なメソッドのドキュメントです。 |
アノテーション @Query の値はオプションで、これがない場合は暗黙のうちにメソッド名がデフォルトになります。
|
このようにして、最初のクエリー可能なAPIが作成されましたが、これは後に拡張されます。
起動
quarkusアプリを開発モードで起動します:
quarkus dev./mvnw quarkus:dev./gradlew --console=plain quarkusDevイントロスペクト
GraphQL APIの完全なスキーマは、以下を呼び出すことで取得できます。
curl http://localhost:8080/graphql/schema.graphqlサーバーは、GraphQL APIの完全なスキーマを返します。
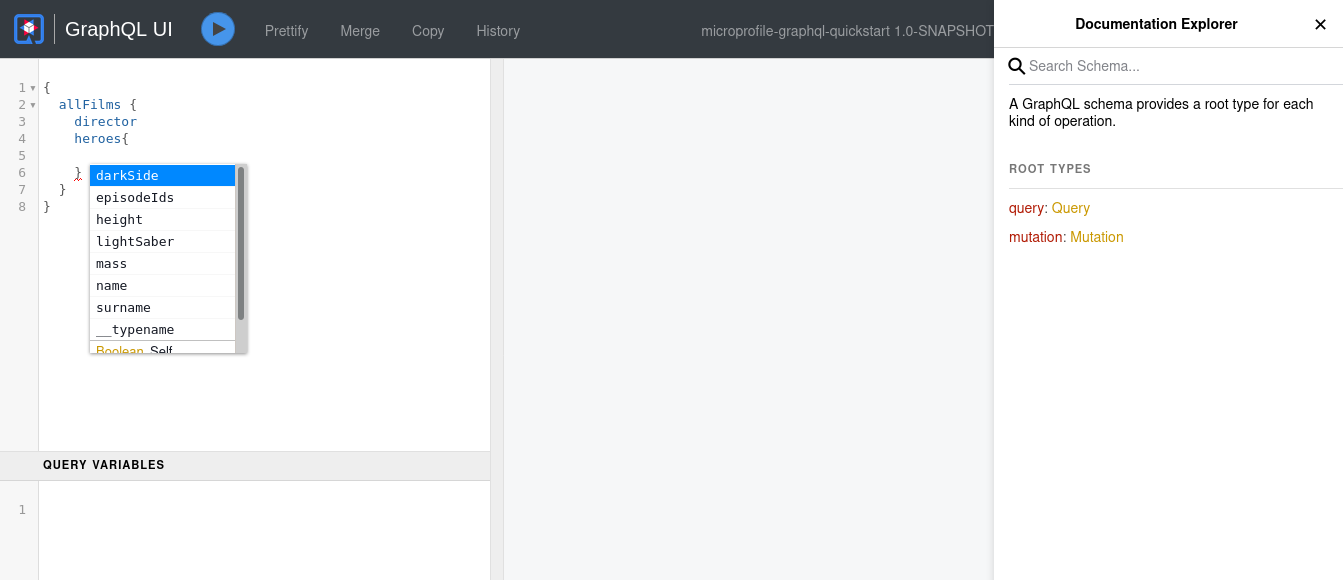
GraphQL UI
| 実験的 - MicroProfileの仕様に含まれません |
GraphQL UIは、GraphQL APIとの簡単なやり取りを可能にする素晴らしいツールです。
Quarkusの smallrye-graphql エクステンションは、 GraphiQL と一緒に出荷され、 dev と test モードでデフォルトで有効になりますが、 quarkus.smallrye-graphql.ui.always-include 設定プロパティを true に設定することで production モードでも明示的に有効にすることができます。
GraphQLは、 http://localhost:8080/q/graphql-ui/ からアクセスできます。
GraphQL UIのセキュリティを追加/削除する方法については、「 Authorization of Web Endpoints Guide」を参照してください。
GraphQL APIへのクエリー
それでは、 dev モードでデプロイされたGraphQL UIページにアクセスしてみましょう。
以下のクエリをGraphQL UIに入力し、 play ボタンを押します。
query allFilms {
  allFilms {
    title
    director
    releaseDate
    episodeID
  }
}
クエリには Film クラスのすべてのフィールドが含まれているので、レスポンスではすべてのフィールドを取得します。GraphQL APIのレスポンスはクライアントが決めるものなので、クライアントはどのフィールドを必要とするかを選択することができます。
クライアントが必要としているのは title と releaseDate だけで、先ほどの API 呼び出しでは不要なデータを Over-fetching していたと仮定しましょう。
以下のクエリをGraphQL UIに入力し、 play ボタンを押します。
query allFilms {
  allFilms {
    title
    releaseDate
  }
}
レスポンスでは、必要なフィールドのみを取得していることに注意してください。そのため、 Over-fetching を防ぐことができました。
引き続き、 FilmResource クラスに以下を追加して、GraphQL API を拡張してみましょう。
    @Query
    @Description("Get a Films from a galaxy far far away")
    public Film getFilm(@Name("filmId") int id) {
        return service.getFilm(id);
    }
@Query のアノテーションで値を除外していることに注目してください。したがって、クエリの名前は、 get を除いたメソッド名が暗黙的に設定されます。
|
このクエリでは、クライアントが映画をIDで検索することができます。また、パラメータに @Name のアノテーションを付けると、パラメータ名が @Name のアノテーションを省略した場合のデフォルトの id ではなく、 filmId に変更されます。
GraphQL UIに以下の内容を入力してリクエストしてください。
query getFilm {
  film(filmId: 1) {
    title
    director
    releaseDate
    episodeID
  }
}
先ほどの例では、 film というクエリメソッドの要求フィールドがそのように決定できます。このようにして、個々の映画の情報を取得することができます。
しかし、クライアントが filmId 0 と 1 の両方の映画を必要とするとします。REST APIでは、クライアントはAPIに2回コールする必要があります。したがって、クライアントは Under-fetching となります。
GraphQLでは、一度に複数のクエリを実行することが可能です。
以下をGraphQLに入力して、2つの映画を検索します。
query getFilms {
  film0: film(filmId: 0) {
    title
    director
    releaseDate
    episodeID
  }
  film1: film(filmId: 1) {
    title
    director
    releaseDate
    episodeID
  }
}
これにより、クライアントは1回のリクエストで必要なデータを取得できるようになりました。
APIの拡張
これまでは、映画のデータを取得するための GraphQL API を作成していました。今度は、クライアントが Film の Hero データを取得できるようにしたいと考えています。
FilmResource のクラスに以下を追加します。
    public List<Hero> heroes(@Source Film film) { (1)
        return service.getHeroesByFilm(film);
}| 1 | Film で応答するクエリに List<Hero> データを追加できるようになりました。 |
このメソッドを追加することで、GraphQL APIのスキーマが事実上変更されました。 スキーマが変更されたにもかかわらず、以前のクエリはそのまま動作します。 今回は、 Film の Hero のデータを取得できるようにAPIを拡張しただけですから。
GraphQLに以下のように入力して、フィルムとヒーローのデータを取得します。
query getFilmHeroes {
  film(filmId: 1) {
    title
    director
    releaseDate
    episodeID
    heroes {
      name
      height
      mass
      darkSide
      lightSaber
    }
  }
}
今や、レスポンスには映画のヒーローたちも含まれています。
バッチ処理
今回の getAllFilms のように Collection の戻り値を公開している場合は、より効率的にヒーローを取得するために、上記のバッチ形式を使用するとよいでしょう。
    public List<List<Hero>> heroes(@Source List<Film> films) { (1)
        // Here fetch all hero lists
}| 1 | ここでは、映画を一括して受け取ることで、対応するヒーローを取り出すことができます。 |
ノンブロッキング
クエリは、例えば Uni を戻り値の型として使用するか、 @NonBlocking をメソッドに付与することでリアクティブにすることができます。
    @Query
    @Description("Get a Films from a galaxy far far away")
    public Uni<Film> getFilm(int filmId) {
        // ...
    }
または、 @NonBlocking を使用することもできます:
    @Query
    @Description("Get a Films from a galaxy far far away")
    @NonBlocking
    public Film getFilm(int filmId) {
        // ...
    }
Uni または @NonBlocking を使用すると、リクエストは Worker スレッドではなく Event-loop スレッドで実行されます。
BlockingとNon-blockingを1つのリクエストに混ぜることができます。
    @Query
    @Description("Get a Films from a galaxy far far away")
    @NonBlocking
    public Film getFilm(int filmId) {
        // ...
    }

    public List<Hero> heroes(@Source Film film) {
        return service.getHeroesByFilm(film);
    }
上記では、イベントループのスレッドで映画を取得しますが、ヒーローを取得するためにワーカスレッドに切り替えます。
RunOnVirtualThread
メソッドに @RunOnVirtualThread を追加することで、仮想スレッド上でクエリを実行することができます:
    @Query
    @Description("Get a Films from a galaxy far far away")
    @RunOnVirtualThread
    public Film getFilm(int filmId) {
        // ...
    }
仮想スレッド の使用に関する一般的なガイドラインに注意してください。
抽象型
現在のスキーマは, Hero と Film という2つの具象型だけのシンプルなものです。ここで、型を追加して拡張し、クライアントが簡単に型と対話できるような抽象化機能を追加してAPIを拡張したいと思います。
インターフェイス
ヒーローに味方をつけてみましょう。
まず、 Ally を表すエンティティを新規に作成します。
public class Ally {

    public String name;
    public String surname;
    public Hero partner;
}
GalaxyService を更新して、味方がいるようにします。
    private List<Ally> allies = new ArrayList();

    public GalaxyService() {
        // ...

        Ally jarjar = new Ally();
        jarjar.name = "Jar Jar";
        jarjar.surname = "Binks";
        allies.add(jarjar);
    }

    public List<Ally> getAllAllies() {
        return allies;
    }
また、 FilmResource を更新して、クライアントがすべての味方を照会できるようにしましょう。
    @Query
    public List<Ally> allies() {
        return service.getAllAllies();
    }
GraphQL UIに以下の内容を入力してリクエストしてください。
query getAllies {
    allies {
        name
        surname
    }
}
Ally は Hero と同じフィールドをいくつか持っていることに注目してください。 クライアントがクエリーをより簡単に行えるように、任意のキャラクターに対する抽象化を作成しましょう。
私たちの共通のキャラクターの特徴を定義した新しいJavaインタフェースを作成します。
public interface Character {

    (1)
    String getName();
    String getSurname();
}| 1 | インターフェイスで定義されたゲッターは、それが含むGraphQLフィールドを定義します。 |
さて、このインタフェースを実装するために、 Hero と Ally のエンティティを更新します。
public class Hero implements Character {
    // ...

    (1)
    public String getName() {
        return name;
    }

    (1)
    public String getSurname() {
        return surname;
    }
}

public class Ally implements Character {
    // ...

    (1)
    public String getName() {
        return name;
    }

    (1)
    public String getSurname() {
        return surname;
    }
}| 1 | インターフェースはフィールドを定義できないので、ゲッターを実装する必要があります。 |
インターフェイスを追加し、既存のエンティティを更新してそれを実装することで、事実上スキーマを変更したことになります。更新されたスキーマには、新しい型 Ally とインターフェース Character が含まれるようになりました。
(1)
interface Character {
    name: String
    surname: String
}

(2)
type Ally implements Character {
    name: String
    surname: String
    partner: Hero
}

(3)
type Hero implements Character {
    name: String
    surname: String
    # ...
}| 1 | ゲッターをフィールドとする Character インターフェイスが定義されました。 |
| 2 | Ally 型が追加され、 Character を実装しています。 |
| 3 | Hero 型を更新して Character を実装しました。 |
全キャラクターを提供するために、 GalaxyService を更新します。
    public List<Character> getAllCharacters() {
        List<Character> characters = new ArrayList<>();
        characters.addAll(heroes);
        characters.addAll(allies);
        return characters;
    }
これで、クライアントがヒーローだけでなく、すべてのキャラクターをクエリできるようになりました。
FilmResource のクラスに以下を追加します。
    @Query
    @Description("Get all characters from a galaxy far far away")
    public List<Character> characters() {
        return service.getAllCharacters();
    }
GraphQL UIに以下の内容を入力してリクエストしてください。
query getCharacters {
    characters {
        name
        surname
    }
}
ユニオン
| 実験的 - MicroProfileの仕様に含まれません |
これまで、私たちのAPIでは、エンティティやエンティティのリストに対して直接クエリを発行することだけが可能でした。今度は、クライアントが当社のすべてのエンティティを検索できるようにしたいと思います。 Hero と Ally は共有の抽象型である Character を持っていますが、 Film も含む抽象型はありません。
まず、検索結果の返り値を表す新しい抽象型を作成します。
package org.acme.microprofile.graphql;

import io.smallrye.graphql.api.Union;

@Union (1)
public interface SearchResult {

}| 1 | @Union は、このJavaインターフェースが、GraphQLインターフェースではなく、GraphQLユニオンを表していることを示すために必要です。 |
| GraphQLユニオンを表すJavaインターフェイスは空である必要はありませんが、定義されたゲッターは明示的にGraphQLスキーマを変更するものではありません。 |
SearchResult を実装するためにエンティティを更新します:
public class Film implements SearchResult {
    // ...
}

public interface Character implements SearchResult {
    // ...
}

public class Hero implements Character {
    // ...
}

public class Ally implements Character {
    // ...
}
GalaxyService を更新し、検索を提供します:
    public List<SearchResult> search(String query) {
        List<SearchResult> results = new ArrayList<>();
        List<Film> matchingFilms = films.stream()
            .filter(film -> film.title.contains(query)
                || film.director.contains(query))
            .collect(Collectors.toList());
        results.addAll(matchingFilms);
        List<Character> matchingCharacters = getAllCharacters().stream()
            .filter(character -> character.getName().contains(query)
                || character.getSurname().contains(query))
            .collect(Collectors.toList());
        results.addAll(matchingCharacters);
        return results;
    }
FilmResource のクラスに以下を追加します。
    @Query
    @Description("Search for heroes or films")
    public List<SearchResult> search(String query) {
        return service.search(query);
    }
GraphQL UIに以下の内容を入力してリクエストしてください。
query searchTheGalaxy {
    search(query: "a") {
        ... on Film {
            title
            director
        }
        ... on Character {
            name
            surname
        }
    }
}
Character インターフェースを使用できるのは、 SearchResult ユニオンにそれを実装したメンバが含まれているからです。
|
ミューテーション
ミューテーションは、データの作成、更新、削除の際に使用されます。
それでは、GraphQL APIにヒーローの追加と削除の機能を追加してみましょう。
FilmResource のクラスに以下を追加します。
    @Mutation
    public Hero createHero(Hero hero) {
        service.addHero(hero);
        return hero;
    }

    @Mutation
    public Hero deleteHero(int id) {
        return service.deleteHero(id);
    }
GraphQL UI に次のように入力すると、 Hero が挿入されます。
mutation addHero {
  createHero(hero: {
      name: "Han",
      surname: "Solo"
      height: 1.85
      mass: 80
      darkSide: false
      episodeIds: [4, 5, 6]
  	}
  )
  {
    name
    surname
  }
}
このミューテーションを利用することで、私たちのサービスに Hero エンティティを作成しました。
レスポンスの中で、作成したヒーローの name と surname を取得していることに注目してください。これは mutation クエリの { } の中で、これらのフィールドをレスポンスで取得することを選択したためです。これは、クライアントが必要とするサーバー側で生成されたフィールドである可能性があります。
それでは、エントリーを削除してみましょう。
mutation DeleteHero {
  deleteHero(id :3){
    name
    surname
  }
}
createHero の mutation 法と同様に、 { } で定義されている削除したヒーローの name と surname も取得します。
サブスクリプション
サブスクリプションは、クエリーを購読することができます。イベントを受信することができ、web socketを使用しています。詳しくは GraphQL over WebSocket Protocol 仕様をご覧ください。
例: 新しいヒーローが作成されるタイミングを知りたい。
    BroadcastProcessor<Hero> processor = BroadcastProcessor.create(); (1)

    @Mutation
    public Hero createHero(Hero hero) {
        service.addHero(hero);
        processor.onNext(hero); (2)
        return hero;
    }

    @Subscription
    public Multi<Hero> heroCreated(){
        return processor; (3)
}| 1 | 新しいHero をブロードキャストする Multi プロセッサー |
| 2 | 新しいヒーローの追加時に、ブロードキャストも行います |
| 3 | 実行時にスキーマ内で、WebSocketとしてストリームを利用できるようにする |
現在、 /graphql WebSocket接続に接続しているすべてのクライアントは、新しいHeroが作成されたときにイベントを受け取ります。
subscription ListenForNewHeroes {
  heroCreated {
    name
    surname
  }
}
フィールド別のクエリの作成
クエリは個々のフィールドに対して行うこともできます。例えば、ヒーローの名字を照会するメソッドを作ってみましょう。
FilmResource のクラスに以下を追加します。
    @Query
    public List<Hero> getHeroesWithSurname(@DefaultValue("Skywalker") String surname) {
        return service.getHeroesBySurname(surname);
    }
@DefaultValue のアノテーションを使用して、パラメータが提供されていない場合、姓の値は Skywalker になることを決定しました。
以下のクエリを GraphQL UI でテストしてみましょう。
query heroWithDefaultSurname {
  heroesWithSurname{
    name
    surname
    lightSaber
  }
}
query heroWithSurnames {
  heroesWithSurname(surname: "Vader") {
    name
    surname
    lightSaber
  }
}
コンテキスト
この実験的なSmallRye固有の機能を使えば、コードのどこにいてもGraphQLリクエストの情報を得ることができます。
@Inject
Context context;
または、 GraphQLApi クラスであれば、メソッドのパラメータとして使用します。例:
    @Query
    @Description("Get a Films from a galaxy far far away")
    public Film getFilm(Context context, int filmId) {
        // ...
    }
コンテキストオブジェクトによって、以下を取得することができます。
-
オリジナルのリクエスト(Query/Mutation)
-
引数
-
パス
-
選択されたフィールド
-
任意の変数
これにより、データストアへのダウンストリームクエリを最適化することができます。
詳細は JavaDoc を参照してください。
GraphQL-Java
また、このコンテキストオブジェクトは、リーキーな抽象化を利用することで、基礎となる graphql-java の機能にフォールダウンすることを可能にします。
DataFetchingEnvironment dfe = context.unwrap(DataFetchingEnvironment.class);また、スキーマ生成時に基盤となる graphql-java にアクセスして、独自の機能を直接追加することもできます。
public GraphQLSchema.Builder addMyOwnEnum(@Observes GraphQLSchema.Builder builder) {

    // Here add your own features directly, example adding an Enum
    GraphQLEnumType myOwnEnum = GraphQLEnumType.newEnum()
            .name("SomeEnum")
            .description("Adding some enum type")
            .value("value1")
            .value("value2").build();

    return builder.additionalType(myOwnEnum);
}
@Observer を使用することで、スキーマビルダーに何かを追加することができます。
Observerを動作させるには、イベントを有効にする必要があります。 application.properties で、以下を追加します: quarkus.smallrye-graphql.events.enabled=true 。
|
変換
スカラーへの変換
また、SmallRye特有の実験的な機能として、既存のスカラー(実装によって特定のJava型にマッピングされている)を別の型にマッピングしたり、GraphQLで通常 Type や Input を作成するような複雑なオブジェクトを既存のスカラーにマッピングしたりすることができます。
既存のスカラーを別のタイプに変換します。
public class Movie {

    @AdaptToScalar(Scalar.Int.class)
    Long idLongThatShouldChangeToInt;

    // ....
}
上記では、 Long java型を、 デフォルト の BigInteger ではなく、 Int スカラー型に変換しています。
複雑なオブジェクトをスカラー型にマッピングします:
public class Person {

    @AdaptToScalar(Scalar.String.class)
    Phone phone;

    // ....
}
これは、GraphQLで Type や Input を作成するのではなく、Stringのスカラーにマッピングされます。
上記の操作を行うためには、 Phone オブジェクトは、文字列(または Int / Date など)を受け取るコンストラクタを持つか、文字列(または Int / Date など)のセッターメソッドを持つか、 fromString (または fromInt / fromDate - スカラーの型に依存)のスタティックメソッドを持つ必要があります。
例えば、以下のようになります。
public class Phone {

    private String number;

    // Getters and setters....

    public static Phone fromString(String number) {
        Phone phone = new Phone();
        phone.setNumber(number);
        return phone;
    }
}
@ToScalar の機能については、 JavaDoc を参照してください。
AdaptWithによる変換
より複雑なケースには、アダプターを用意するという方法もあります。そうすれば、アダプターの中で自分でマッピングを行うことができます。
AdaptWith の機能については、 JavaDoc を参照してください。
例えば、以下のようになります。
    public class Profile {
        // Map this to an email address
        @AdaptWith(AddressAdapter.class)
        public Address address;

        // other getters/setters...
    }

    public class AddressAdapter implements Adapter<EmailAddress, Address> {

        @Override
        public Address from(EmailAddress email) {
            Address a = new Address();
            a.addressType = AddressType.email;
            a.addLine(email.getValue());
            return a;
        }

        @Override
        public EmailAddress to(Address address) {
            if (address != null && address.addressType != null && address.addressType.equals(AddressType.email)) {
                return new EmailAddress(address.lines.get(0));
            }
            return null;
        }
    }
@JsonbTypeAdapter もサポートされています。
|
Map の組込サポート
デフォルトでは、マップはスキーマでモデル化するのが難しいため(キーと値が実行時に動的になる可能性があるため)、 GraphQL はデフォルトでマップをサポートしません。 上記の適応により、Quarkusでは Map のサポートが追加され、オプションのキーパラメータを持つ Entry<Key,Value> にマップされるようになりました。 これにより、マップを返すことができ、オプションでキーでクエリを実行することができます。
例:
    @Query
    public Map<ISO6391, Language> language() {
        return languageService.getLanguages();
    }

    public enum ISO6391 {
        af,
        en,
        de,
        fr
    }

    public class Language {
        private ISO6391 iso6391;
        private String nativeName;
        private String enName;
        private String please;
        private String thankyou;

        // Getters & Setters
}| キーと値のオブジェクトは、 Enum 、 Scalar 、 Complex のいずれかを指定します。 |
これで、すべてのフィールドを含むマップ全体のクエリーが可能になりました:
{
  language{
    key
    value {
      enName
      iso6391
      nativeName
      please
      thankyou
    }
  }
}
これは、例えばこのような結果を返します:
{
  "data": {
    "language": [
      {
        "key": "fr",
        "value": {
          "enName": "french",
          "iso6391": "fr",
          "nativeName": "français",
          "please": "s'il te plaît",
          "thankyou": "merci"
        }
      },
      {
        "key": "af",
        "value": {
          "enName": "afrikaans",
          "iso6391": "af",
          "nativeName": "afrikaans",
          "please": "asseblief",
          "thankyou": "dankie"
        }
      },
      {
        "key": "de",
        "value": {
          "enName": "german",
          "iso6391": "de",
          "nativeName": "deutsch",
          "please": "bitte",
          "thankyou": "danke dir"
        }
      },
      {
        "key": "en",
        "value": {
          "enName": "english",
          "iso6391": "en",
          "nativeName": "english",
          "please": "please",
          "thankyou": "thank you"
        }
      }
    ]
  }
}
キーによるクエリも可能です
{
  language (key:af){
    value {
      please
      thankyou
    }
  }
}
そうすると、マップの中のその値だけが返されます:
{
  "data": {
    "language": [
      {
        "value": {
          "please": "asseblief",
          "thankyou": "dankie"
        }
      }
    ]
  }
}| デフォルトのマップアダプタは、独自の実装でオーバーライドすることができます。 |
エラーコード
(SmallRye特有の) @ErrorCode を使用することで、GraphQLレスポンスのエラー出力にエラーコードを追加することができます。
@ErrorCode("some-business-error-code")
public class SomeBusinessException extends RuntimeException {
    // ...
}
SomeBusinessException が発生した場合、エラー出力にはエラーコードが表示されます。
{
    "errors": [
        {
            "message": "Unexpected failure in the system. Jarvis is working to fix it.",
            "locations": [
                {
                    "line": 2,
                    "column": 3
                }
            ],
            "path": [
                "annotatedCustomBusinessException"
            ],
            "extensions": {
                "exception": "io.smallrye.graphql.test.apps.error.api.ErrorApi$AnnotatedCustomBusinessException",
                "classification": "DataFetchingException",
                "code": "some-business-error-code" (1)
            }
        }
    ],
    "data": {
        ...
    }
}| 1 | エラーコード |
まとめ
SmallRye GraphQL は、クライアントが Over-fetching や Under-fetching を防ぐために必要なデータを正確に取得することを可能にします。
GraphQL APIは、以前のクエリを壊すことなく拡張することができ、API evolution を容易にすることができます。
設定リファレンス
ビルド時に固定される設定プロパティ - 他のすべての設定プロパティは実行時にオーバーライド可能
Configuration property |
型 |
デフォルト |
|---|---|---|
The rootPath under which queries will be served. Default to graphql By default, this value will be resolved as a path relative to Environment variable: Show more |
string |
|
Enable Apollo Federation. If this value is unspecified, then federation will be enabled automatically if any GraphQL Federation annotations are detected in the application. Environment variable: Show more |
boolean |
|
Enable batch resolving for federation. Disabled by default. Environment variable: Show more |
boolean |
|
Enable metrics. By default, this is false. If set to true, a metrics extension is required. Environment variable: Show more |
boolean |
|
Enable tracing. By default, this will be enabled if the tracing extension is added. Environment variable: Show more |
boolean |
|
Enable eventing. Allow you to receive events on bootstrap and execution. Environment variable: Show more |
boolean |
|
Enable non-blocking support. Default is true. Environment variable: Show more |
boolean |
|
Change the type naming strategy. All possible strategies are: default, merge-inner-class, full Environment variable: Show more |
string |
|
Print the data fetcher exception to the log file. Default Environment variable: Show more |
boolean |
|
Make the schema available over HTTP. Environment variable: Show more |
boolean |
|
Subprotocols that should be supported by the server for graphql-over-websocket use cases. Allowed subprotocols are "graphql-ws" and "graphql-transport-ws". By default, both are enabled. Environment variable: Show more |
文字列のリスト |
|
Additional scalars to register in the schema. These are taken from the Environment variable: Show more |
list of |
|
The name of the key inside the client init payload which contains Authorization information. The associated value of this is treated in the same way as sent over as a Authorization header. Using headers is the preferred way, however in some languages, such as JavaScript, it is not possible to send headers over websockets. Environment variable: Show more |
string |
|
If GraphQL UI should be enabled. By default, GraphQL UI is enabled if it is included (see Environment variable: Show more |
boolean |
|
Specifies the field visibility for the GraphQL schema. This configuration item allows you to define comma-separated list of patterns (GraphQLType.GraphQLField). These patterns are used to determine which fields should be excluded from the schema. Special value Environment variable: Show more |
string |
|
Excludes all the 'null' fields in the GraphQL response’s Environment variable: Show more |
boolean |
|
Exceptions that should be unwrapped (class names). Environment variable: Show more |
文字列のリスト |
|
List of Runtime Exceptions class names that should show the error message. By default, Runtime Exception messages will be hidden and a generic Environment variable: Show more |
文字列のリスト |
|
List of Checked Exceptions class names that should hide the error message. By default, Checked Exception messages will show the exception message. Environment variable: Show more |
文字列のリスト |
|
The default error message that will be used for hidden exception messages. Defaults to "Server Error" Environment variable: Show more |
string |
|
List of extension fields that should be included in the error response. By default, none will be included. Examples of valid values include [exception,classification,code,description,validationErrorType,queryPath] Environment variable: Show more |
文字列のリスト |
|
Enable GET Requests. Allow queries via HTTP GET. Environment variable: Show more |
boolean |
|
Enable Query parameter on POST Requests. Allow POST request to override or supply values in a query parameter. Environment variable: Show more |
boolean |
|
Include the Scalar definitions in the schema. Environment variable: Show more |
boolean |
|
Include the schema internal definition in the schema. Environment variable: Show more |
boolean |
|
Include Directives in the schema. Environment variable: Show more |
boolean |
|
Include Introspection Types in the schema. Environment variable: Show more |
boolean |
|
Log the payload (and optionally variables) to System out. Environment variable: Show more |
|
|
Set to true if ignored chars should be captured as AST nodes. Default to false Environment variable: Show more |
boolean |
|
Set to true if `graphql.language.Comment`s should be captured as AST nodes Environment variable: Show more |
boolean |
|
Set to true true if `graphql.language.SourceLocation`s should be captured as AST nodes. Default to true Environment variable: Show more |
boolean |
|
The maximum number of raw tokens the parser will accept, after which an exception will be thrown. Default to 15000 Environment variable: Show more |
int |
|
The maximum number of raw whitespace tokens the parser will accept, after which an exception will be thrown. Default to 200000 Environment variable: Show more |
int |
|
Abort a query if the total number of data fields queried exceeds the defined limit. Default to no limit Environment variable: Show more |
int |
|
Abort a query if the total depth of the query exceeds the defined limit. Default to no limit Environment variable: Show more |
int |
|
This property is deprecated since If GraphQL UI should be enabled. By default, GraphQL UI is enabled if it is included (see Environment variable: Show more |
boolean |
|
型 |
デフォルト |
|
The path where GraphQL UI is available. The value Environment variable: Show more |
string |
|
Always include the UI. By default, this will only be included in dev and test. Setting this to true will also include the UI in Prod Environment variable: Show more |
boolean |
|