よく知られたOpenID Connect プロバイダーの設定
このドキュメントでは、よく知られているソーシャル OIDC および OAuth2 プロバイダの設定方法について説明します。
はじめに
OpenID Connect認可コードフロー を使用してQuarkusのエンドポイントを保護する場合は、OpenID Connectプロバイダーへの接続方法、そのようなプロバイダーへの認証方法、使用するスコープなどをQuarkusに伝えるように設定する必要があります。
プロバイダによってはOpenID Connectを完全に実装していなかったり、実際には OAuth2プロバイダのみ であったりするため、設定を使用して回避する必要がある場合があります。
このようなプロバイダーの設定は、複雑で非常に技術的になり、理解が困難になる可能性があります。
よく知られた OpenID Connect および OAuth2 プロバイダーを参照するために、 quarkus.oidc.provider 設定プロパティーが導入されました。このプロパティーを使用して、最小限のカスタマイズのみが必要な github などのプロバイダーを参照することができます。通常、アカウント固有の client id、 client secret およびいくつかのプロパティーを設定して設定を完了する必要があります。
このプロパティーは、 application.properties、複数のプロバイダーを設定する必要がある場合は マルチテナント セットアップ (たとえば、 Quarkus Renarde security documentation ) を参照)、テナント設定が動的に作成される場合はカスタムの TenantConfigResolvers で使用することができます。
よく知られたプロバイダー
GitHub
GitHub の OIDC を設定するには、 GitHub developer settings で新しい OAuth アプリケーションを作成する必要があります。
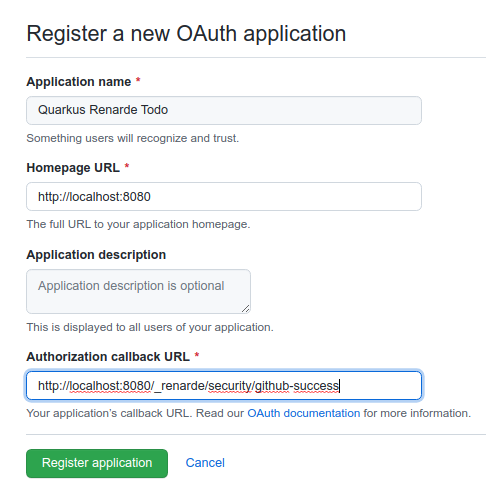
詳細を適切に入力する必要がありますが、さらに重要なのは、Authorization Callback URL を http://localhost:8080/_renarde/security/github-success に設定することです (Quarkus DEV モードを使用してテストする場合)。
次に、 Register application をクリックすると、アプリケーションページが表示されます。
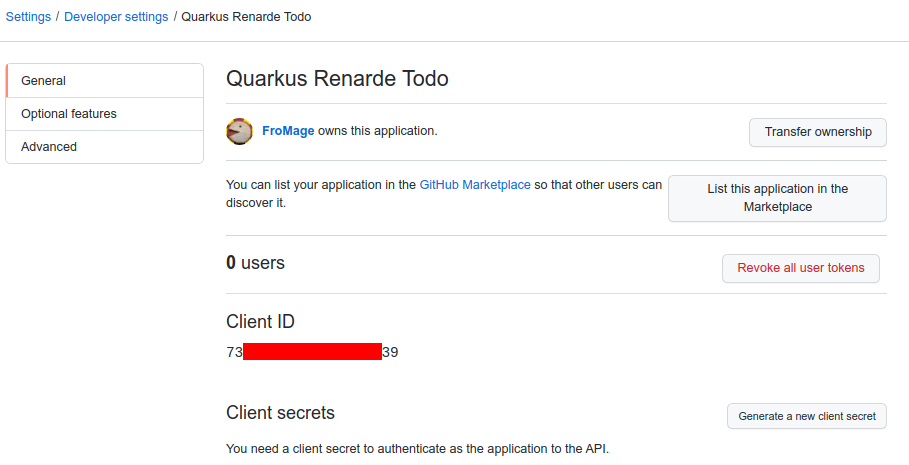
Generate a new client secret をクリックし、クレデンシャルを確認して、Client ID と Client Secret を書き留める必要があります (特に Client Secret は、後でこのページで再度見ることができないため、書き留めてください。ただし、いつでも再作成できますので、心配しすぎる必要はありません)。
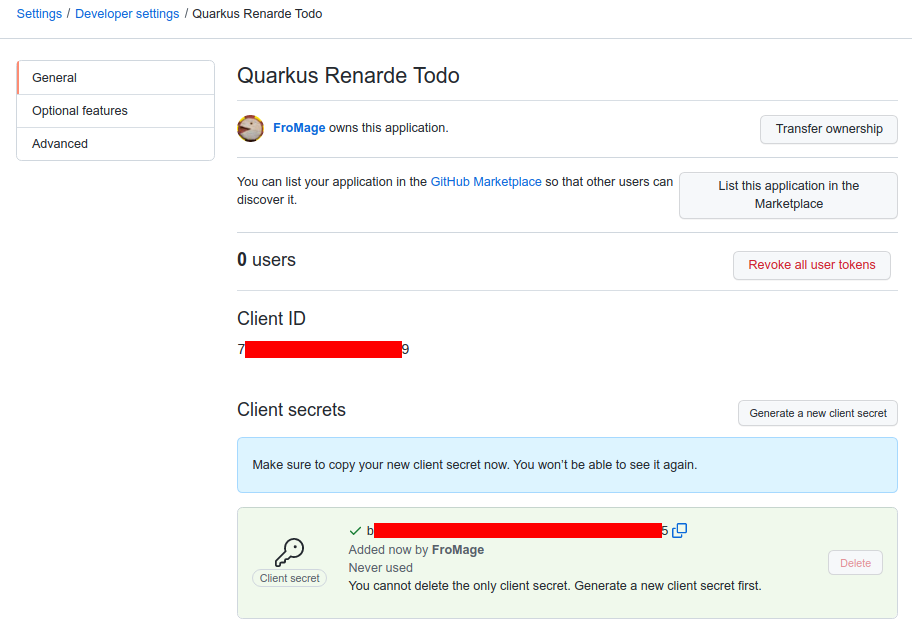
次に、以下の設定を application.properties に追加します。
quarkus.oidc.provider=github
quarkus.oidc.client-id=<Client ID>
quarkus.oidc.credentials.secret=<Secret>
quarkus.oidc.provider=github will request GitHub to add a user:email scope to issued access tokens. For information about overriding this scope or requesting more scopes, see the プロバイダーのスコープ section.
また、 GitHub が発行したアクセストークンを、 quarkus.oidc.application-type=service または quarkus.oidc.application-type=hybrid Quarkus アプリケーションに送信することもできます。
|
OIDC for Google を設定するには、 Google Cloud Platform console で新しいプロジェクトを作成する必要があります。
プロジェクト名を選択し、 CREATE をクリックします。
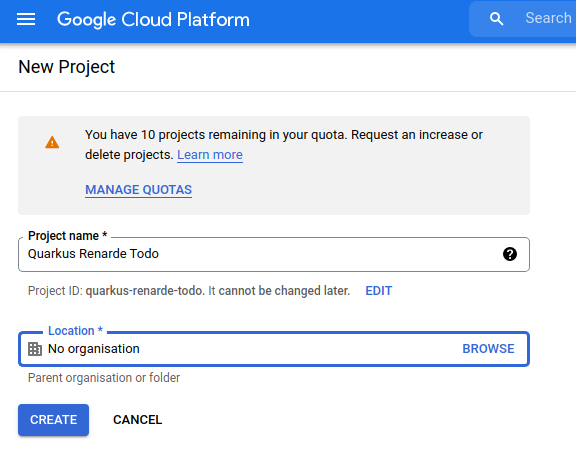
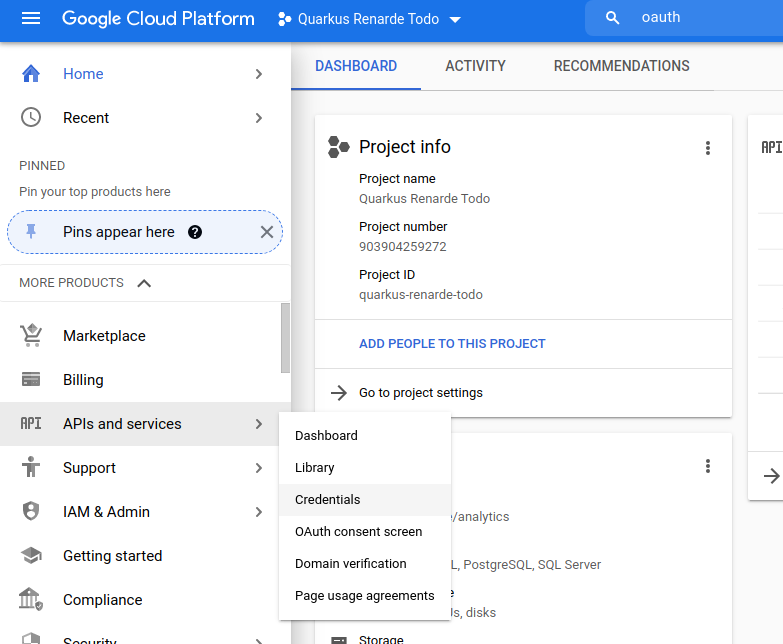
次に、トップセレクターでプロジェクトを選択し、左側のメニューバーから APIs and Services > OAuth consent screen をクリックします。
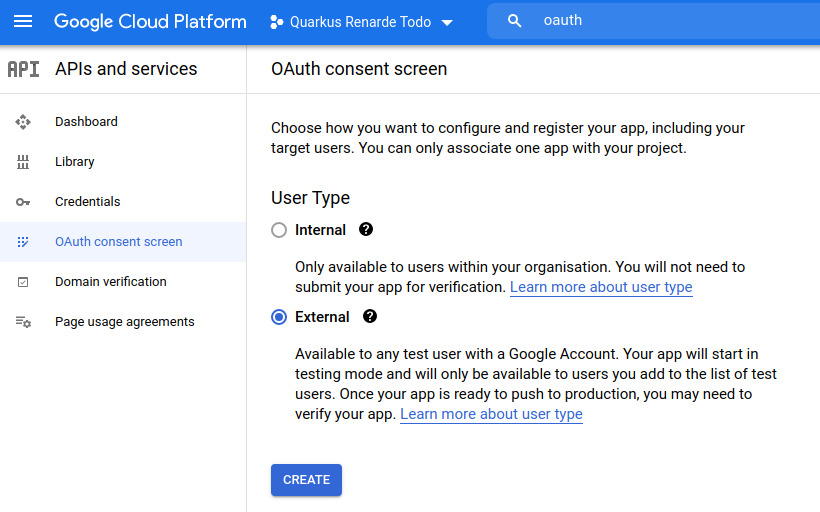
External を選択して、Google ユーザーがアプリケーションにログインすることを許可し、 CREATE を押します。
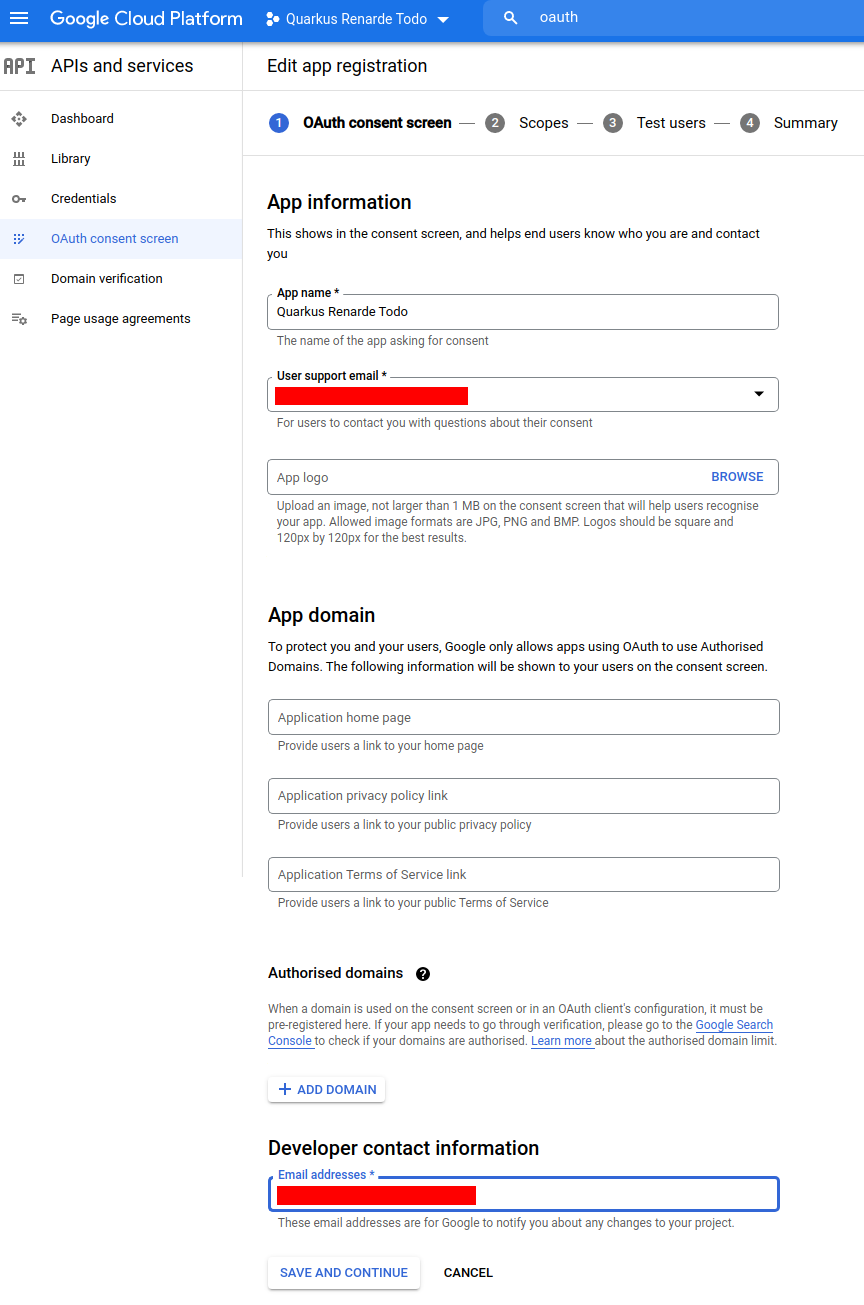
これで、アプリケーション名、サポートメール、開発者の連絡先情報を入力して、 SAVE AND CONTINUE を押すことができます。
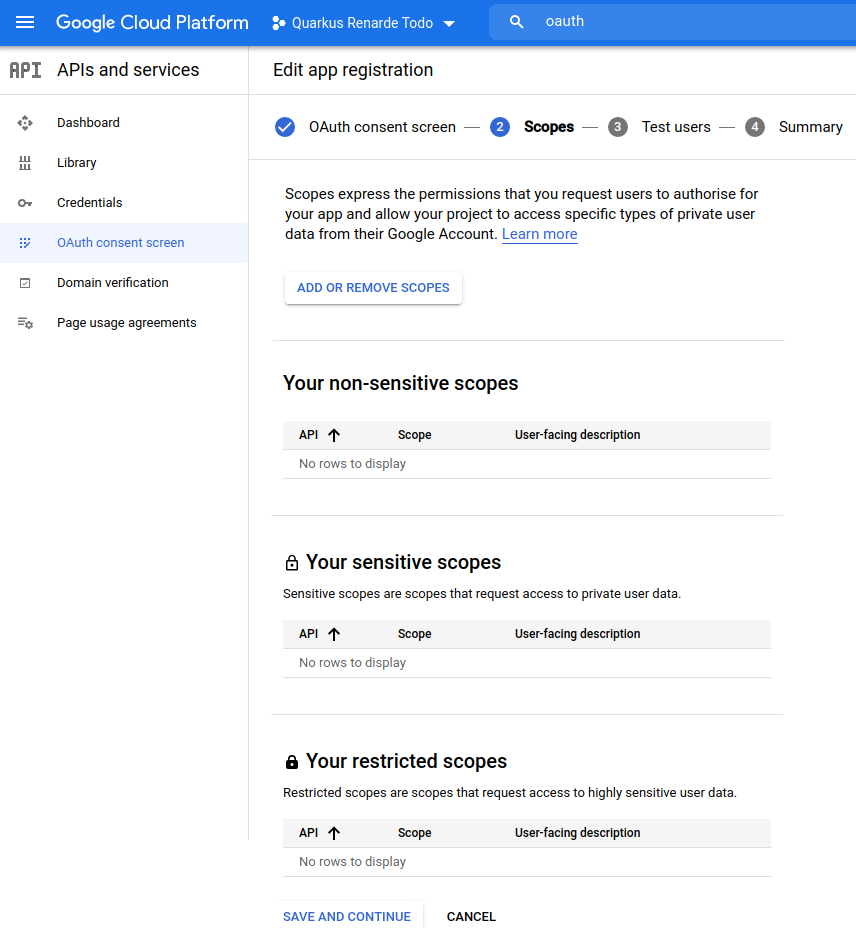
次のページにスコープを追加せずに、 SAVE AND CONTINUE を押します。
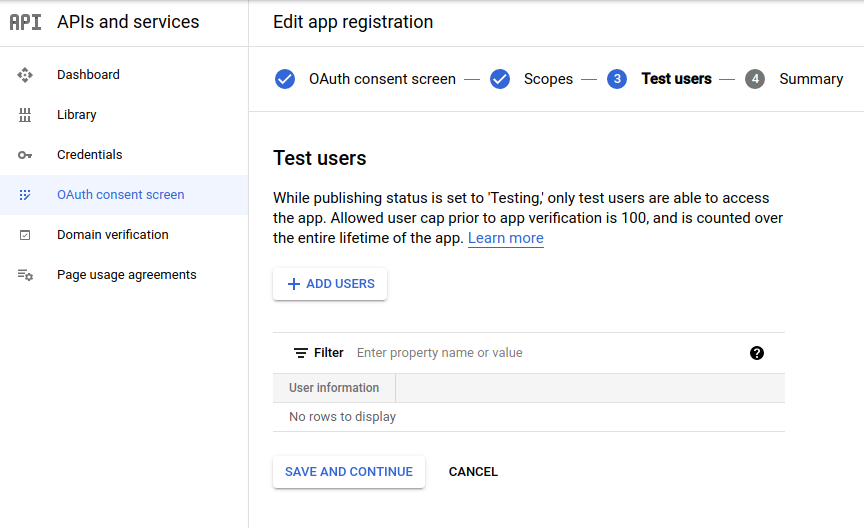
次のページにテストユーザーを追加せずに、 SAVE AND CONTINUE を押します。
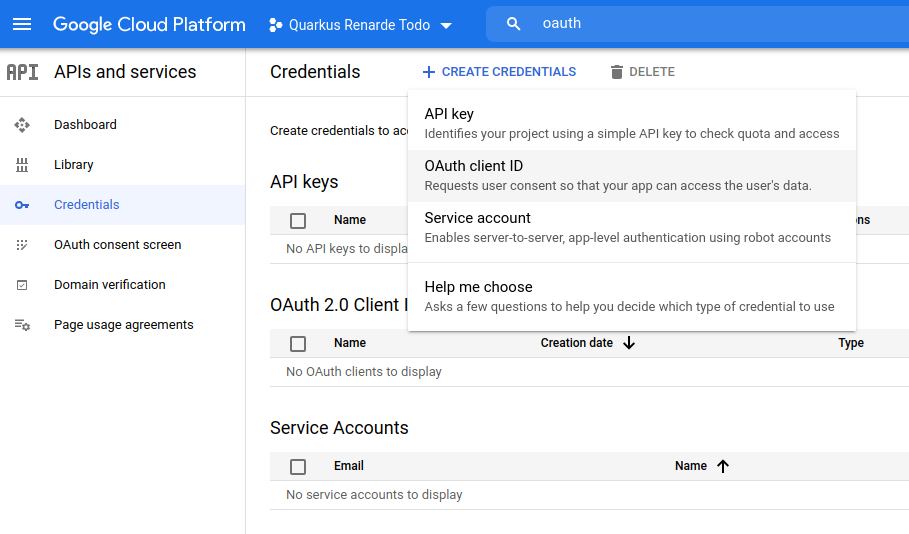
トップメニューの CREATE CREDENTIALS > OAuth client ID をクリックします。
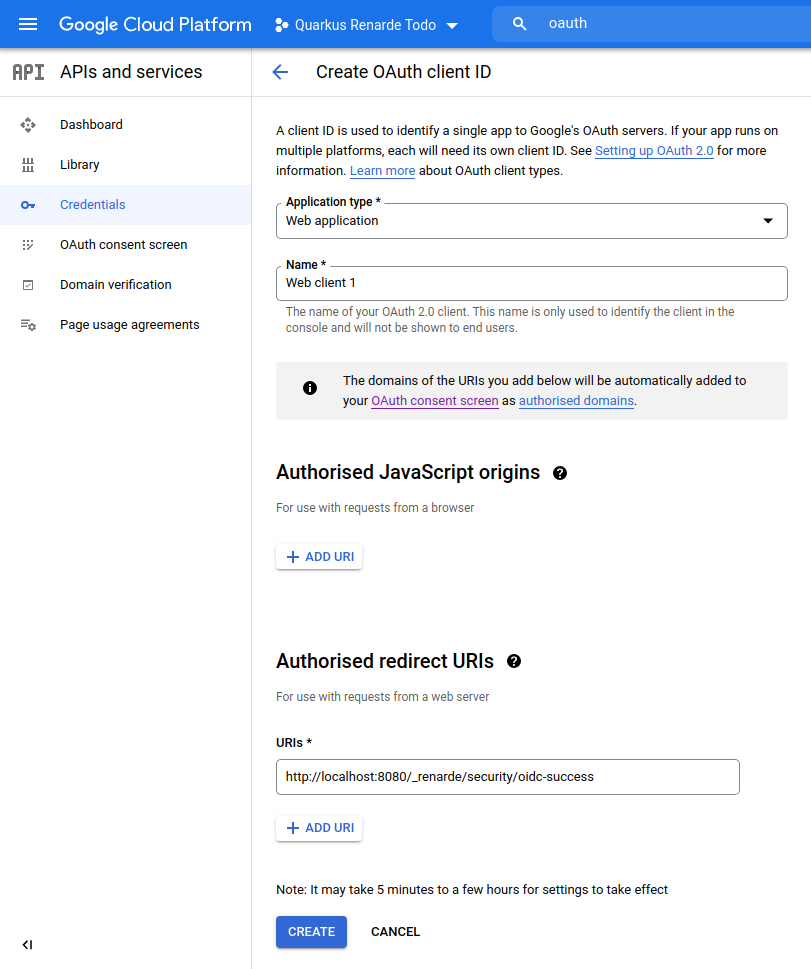
Application type として Web application を選択し、 Authorised redirect URIs リストに http://localhost:8080/_renarde/security/oidc-success を追加して、 CREATE を押します。
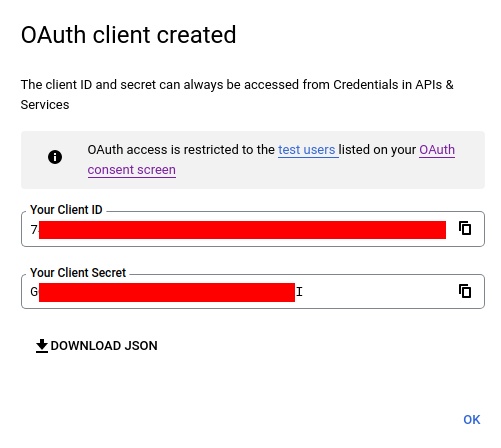
Client ID と Client Secret をコピーします。
これで、 application.properties を設定できます。
quarkus.oidc.provider=google
quarkus.oidc.client-id=<Client ID>
quarkus.oidc.credentials.secret=<Secret>
quarkus.oidc.provider=google will request Google to add openid, email and profile scopes to issued access tokens. For information about overriding these scopes or requesting more scopes, see the プロバイダーのスコープ section.
You can also send access tokens issued by Google to quarkus.oidc.application-type=service or quarkus.oidc.application-type=hybrid Quarkus applications.
|
Mastodon
マストドンアカウント を作成します。 サーバーを選択 する必要があります。例えば、 mastodon.social 。
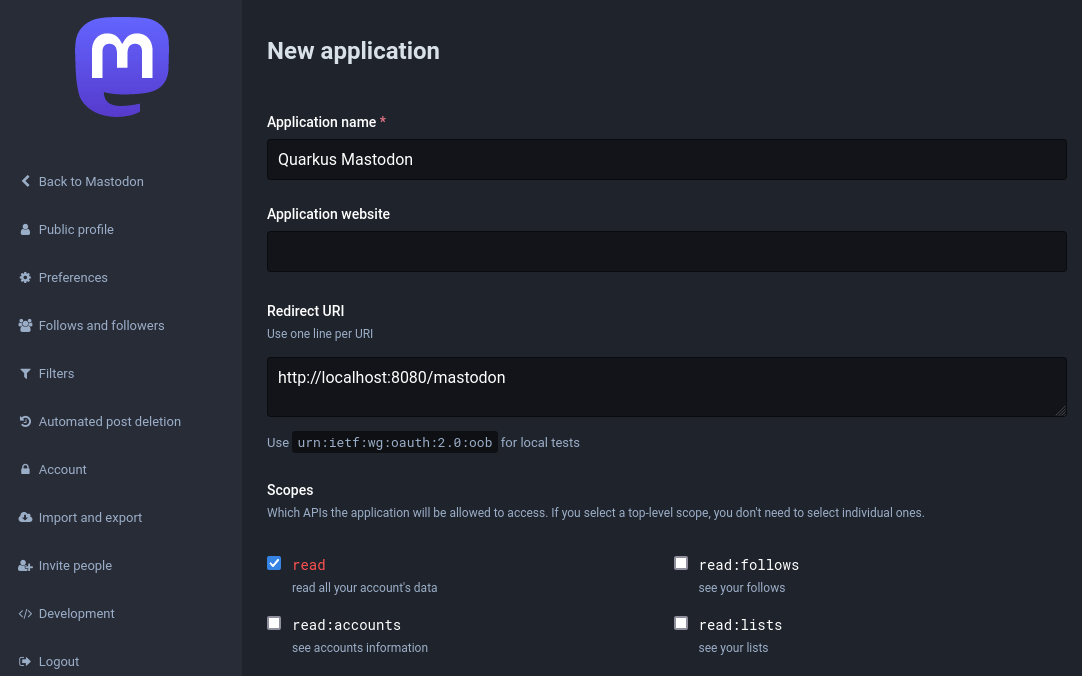
アカウントで Development オプションを選択し、アプリケーションを登録します。例:
登録されているアプリケーションを選択します:
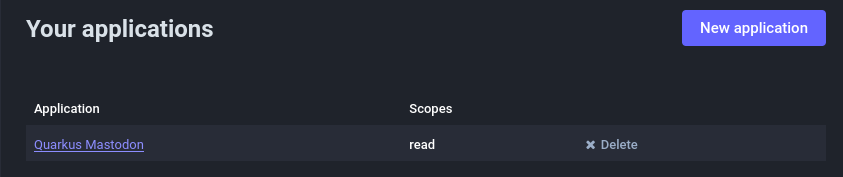
クライアントIDとクライアント・シークレットのプロパティをメモしておき、 application.properties の設定に使用する:
quarkus.oidc.provider=mastodon
quarkus.oidc.client-id=<Client ID>
quarkus.oidc.credentials.client-secret.value=<Client Secret>
デフォルトでは、 quarkus.oidc.provider=mastodon は quarkus.oidc.auth-server-url を https://mastodon.social に設定されます。
他のマストドンサーバーでアカウントを作成した場合など、 quarkus.oidc.auth-server-url を上書きすることができます:
quarkus.oidc.provider=mastodon
quarkus.oidc.auth-server-url=https://infosec.exchange
quarkus.oidc.client-id=<Client ID>
quarkus.oidc.credentials.client-secret.value=<Client Secret>
Microsoft
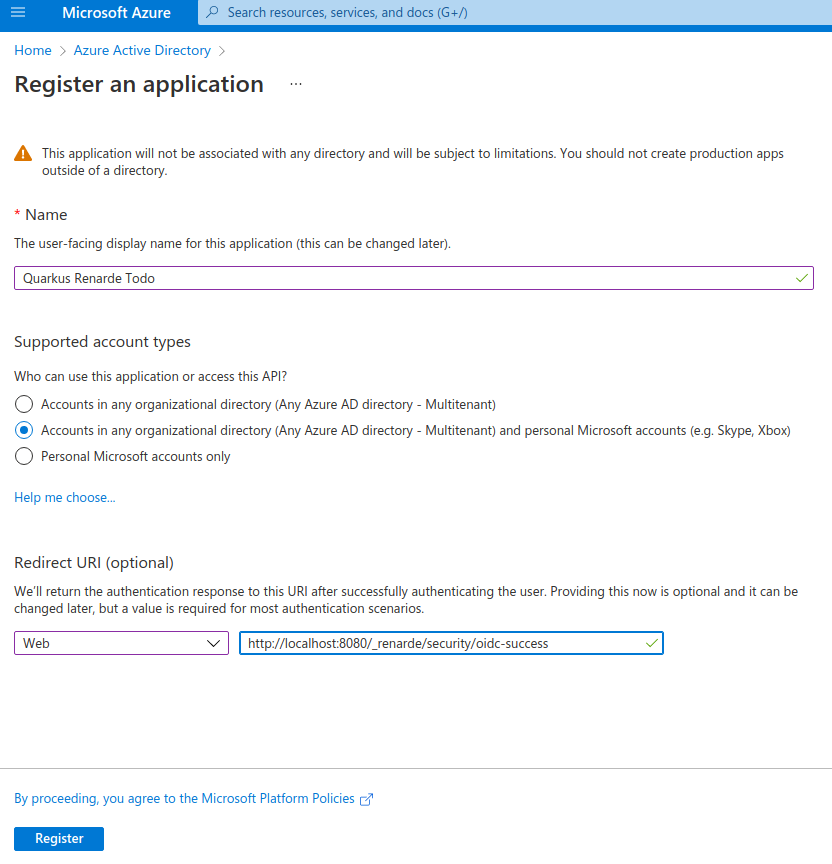
Microsoft 用の OIDC をセットアップするには、 Microsoft Azure Portal にアクセスし、 Azure Active Directory を検索してクリックする必要があります。
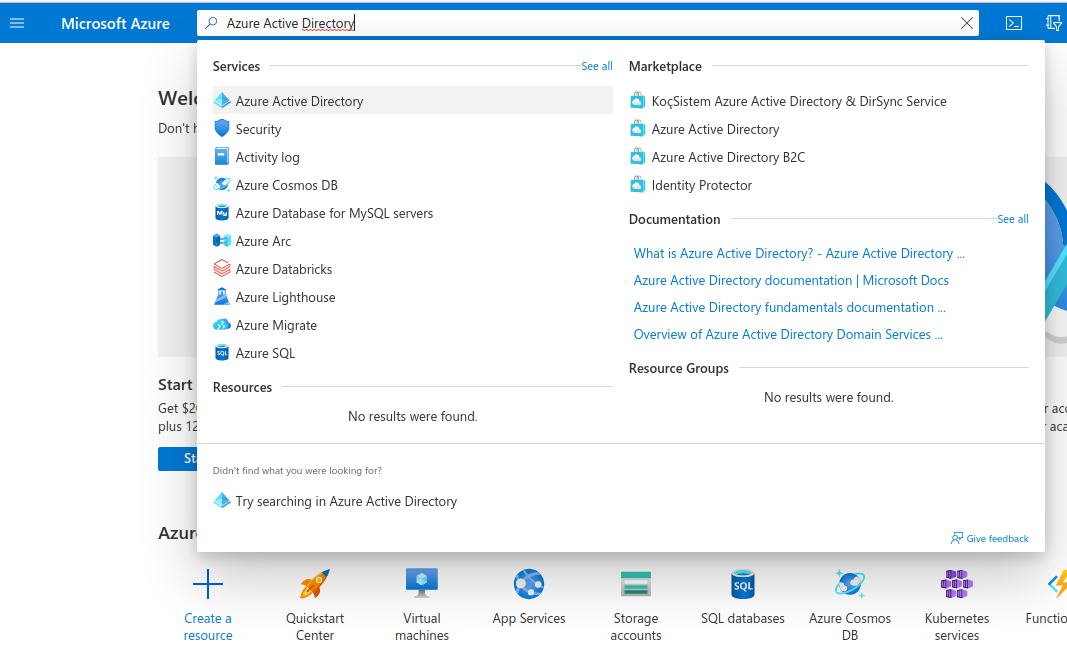
そこで、左側の Manage の下にある App registrations をクリックしてから、 New registration をクリックします。
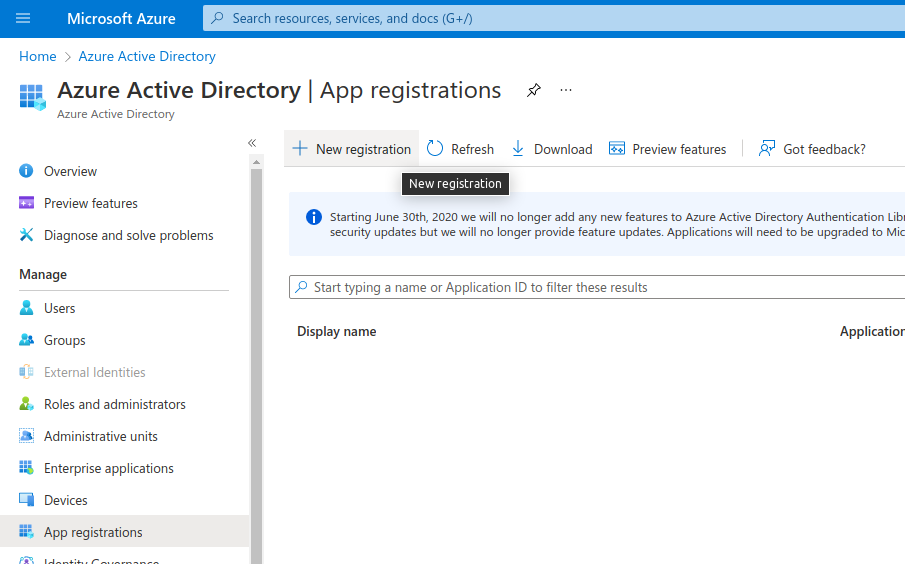
アプリケーション名を入力し、 Accounts in any organizational directory (Any Azure AD directory - Multitenant) and personal Microsoft accounts (e.g. Skype, Xbox) を選択して誰でもログインできるようにし、 Web Redirect URI を http://localhost:8080/_renarde/security/oidc-success として追加してから Register をクリックします。
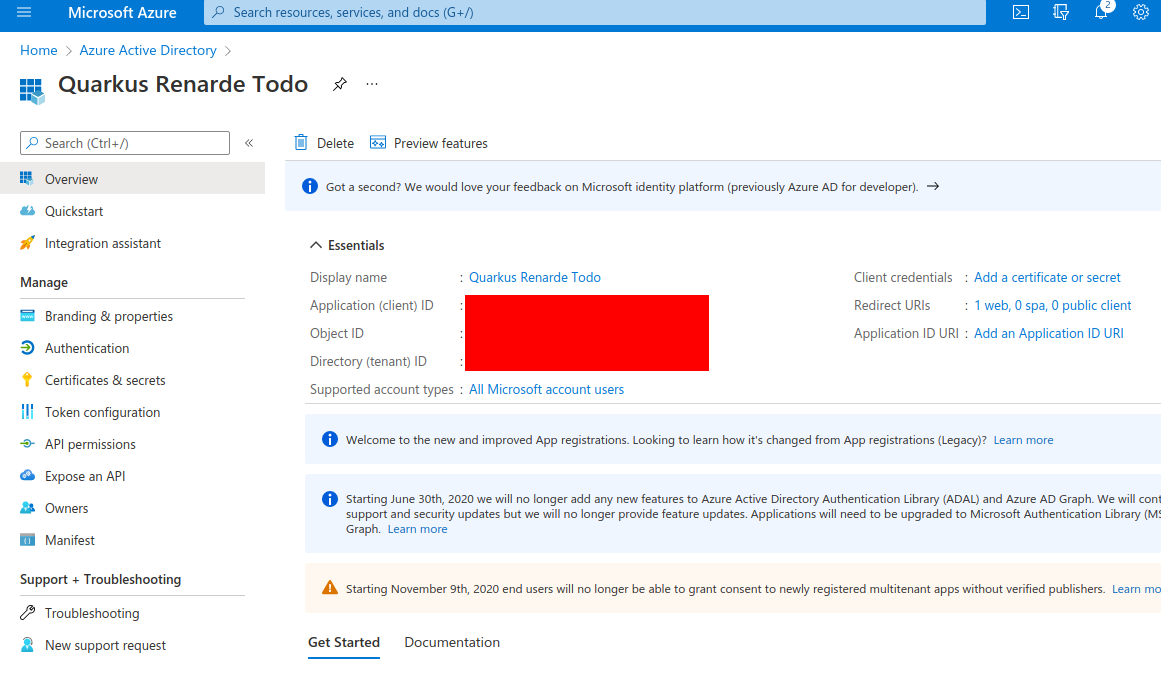
その結果のページで、 Client Id (Application (client) ID の下) をコピーしてから、 Add a certificate or secret をクリックします。
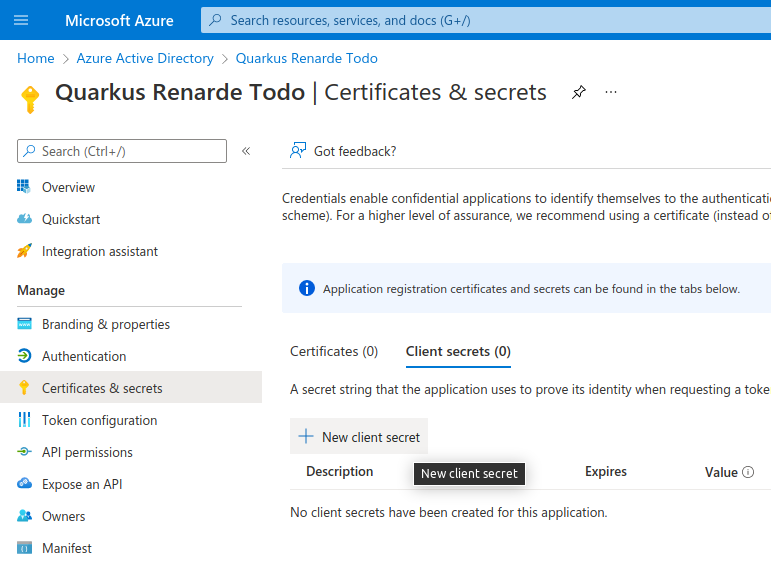
次に、 Client secrets (0) の下にある New client secret をクリックします。
何も変更せずに、そのダイアログで Add をクリックします。
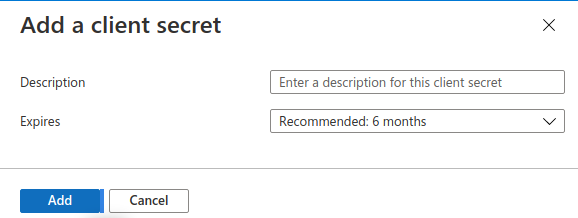
結果のページで、 Secret ID をコピーします。
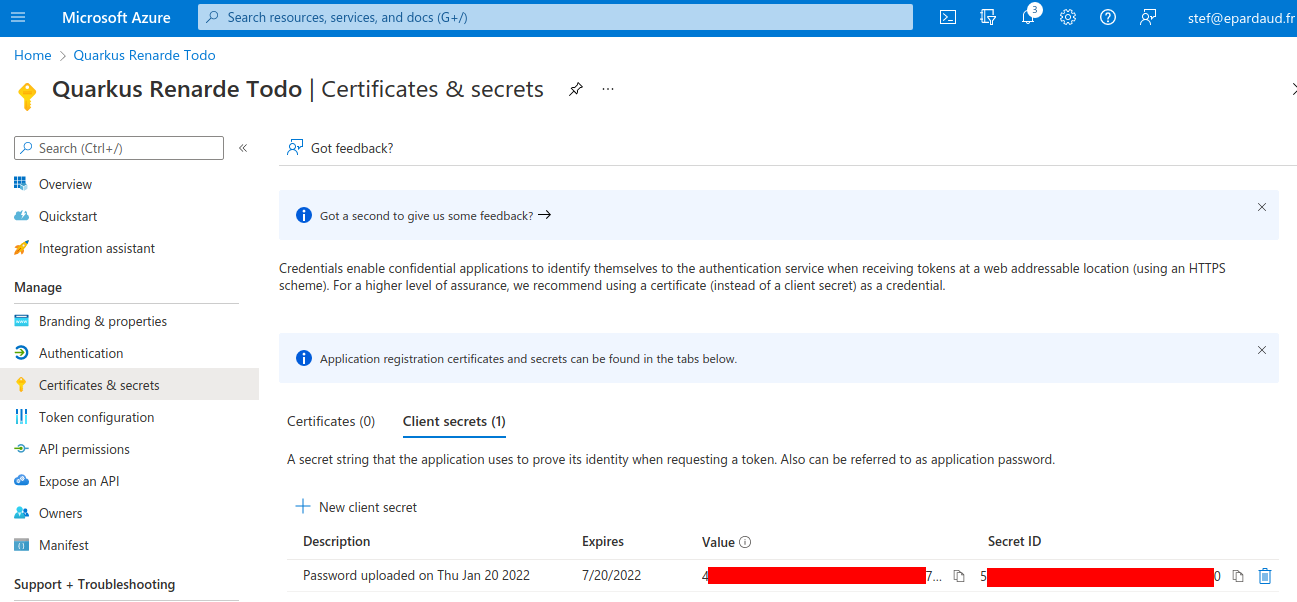
これで、 application.properties を設定できます。
quarkus.oidc.provider=microsoft
quarkus.oidc.client-id=<Client ID>
quarkus.oidc.credentials.secret=<Secret>
quarkus.oidc.provider=microsoft will request Microsoft to add openid, email and profile scopes to issued access tokens. For information about overriding these scopes or requesting more scopes, see the プロバイダーのスコープ section.
You can also send access tokens issued by Microsoft to quarkus.oidc.application-type=service or quarkus.oidc.application-type=hybrid Quarkus applications but you may need to set quarkus.oidc.verify-access-token-with-user-info configuration property to true if access tokens issued by Microsoft are not in JWT format.
|
|
一部の Microsoft サービスでは、現在のトークンの |
Apple
Apple 用の OIDC を設定するには、開発者アカウントを作成し、99 ユーロ/年のプログラムにサインアップする必要がありますが、他のほとんどの OIDC プロバイダーのように localhost でアプリケーションをテストすることはできません。 https で実行して公開する必要があるため、開発目的では https://ngrok.com などのサービスを使用することをお勧めします。
Create a new identifier にアクセスして + を押します
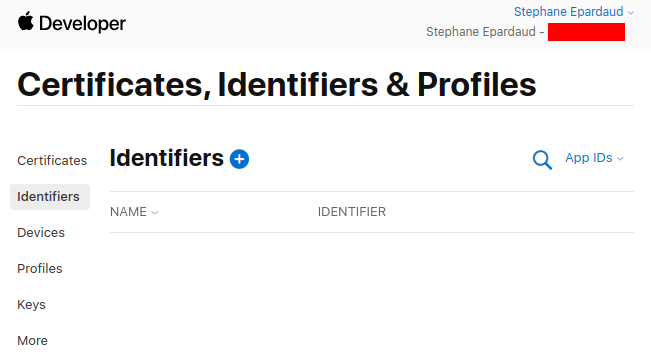
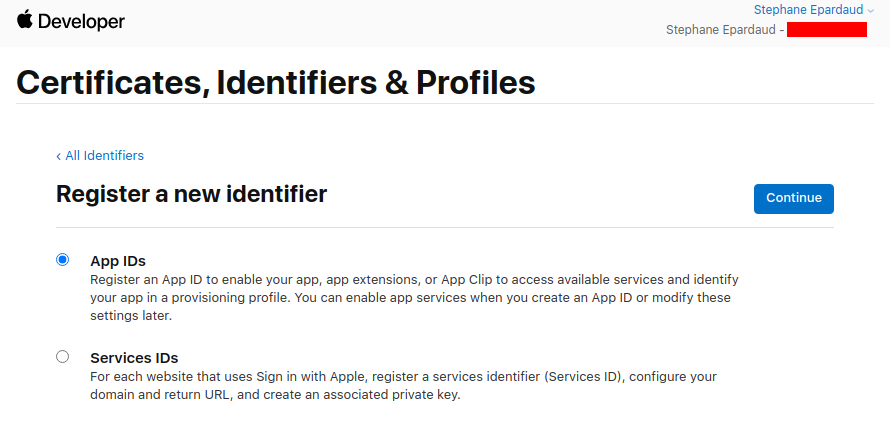
何も触れないで、 App IDs を選択したまま Continue を押します。
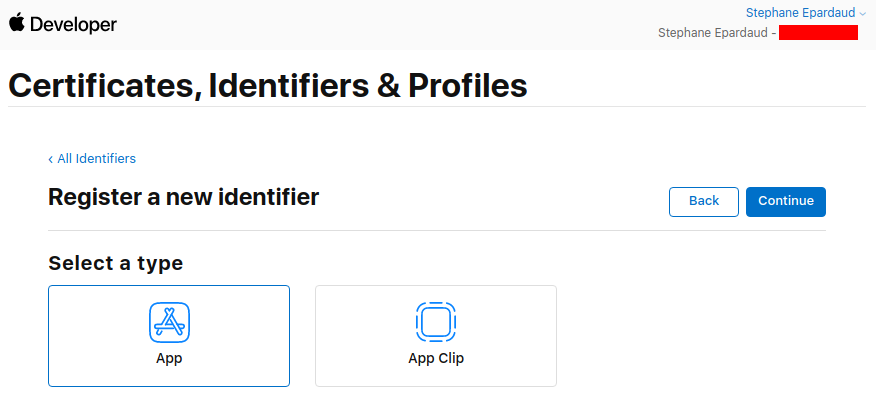
何も触れないで、 App を選択したまま Continue を押します。
説明とバンドル ID を入力します (アプリケーションパッケージ名を使用します)。
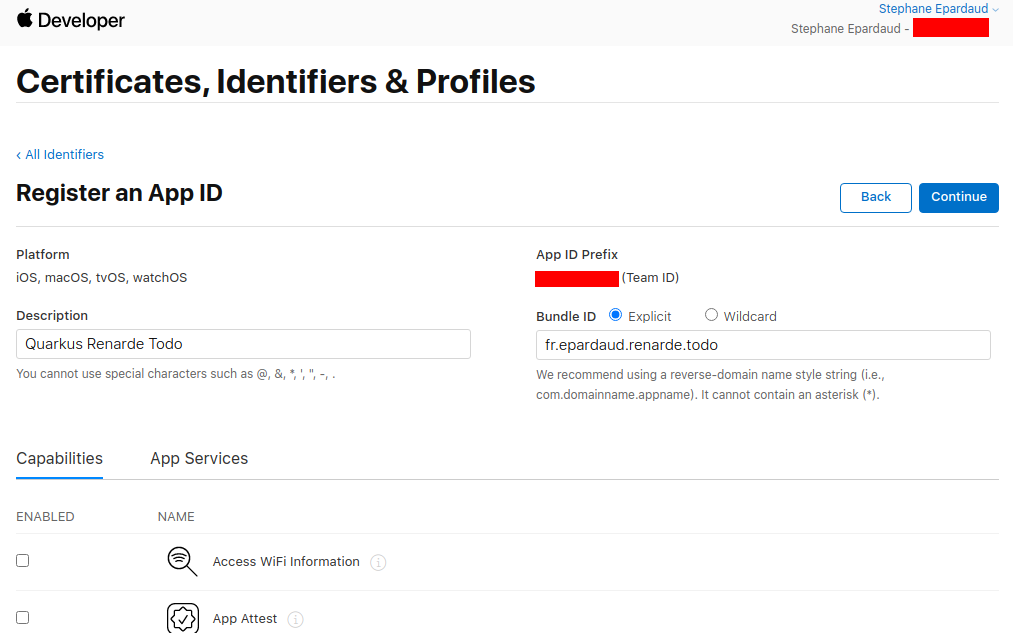
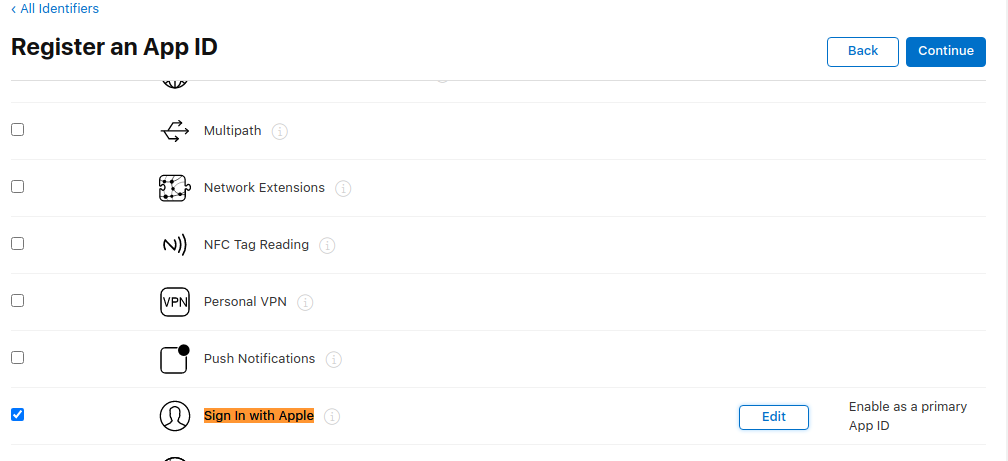
次に、下にスクロールして Sign in with Apple 機能を見つけ、それを選択して、 Continue を押します。
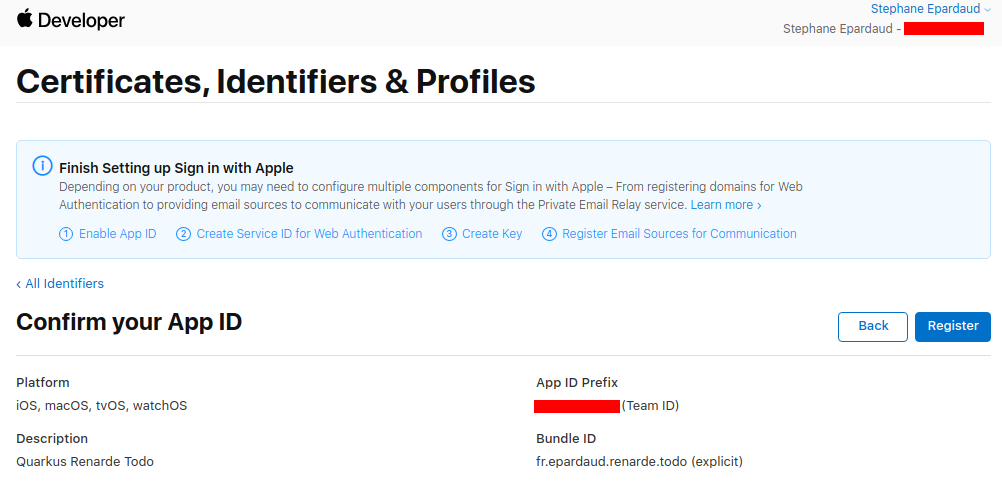
アプリ ID 接頭辞を書き留めてから、 Register を押します。
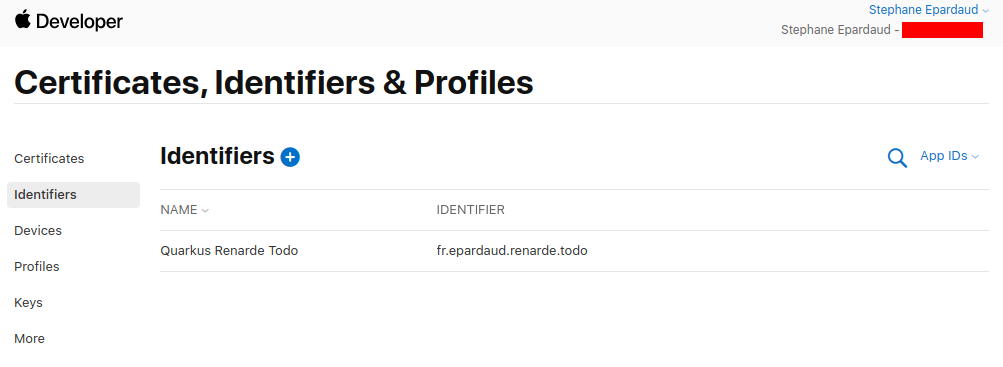
Identifiers ページに戻り、 + を押します。
Service IDs を選択し、 Continue を押します。
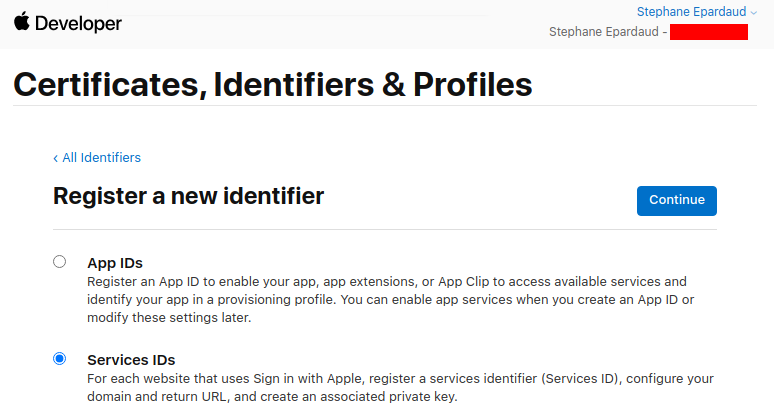
説明とバンドル ID を入力 (アプリケーションパッケージ名を使用) し、 Continue を押します。
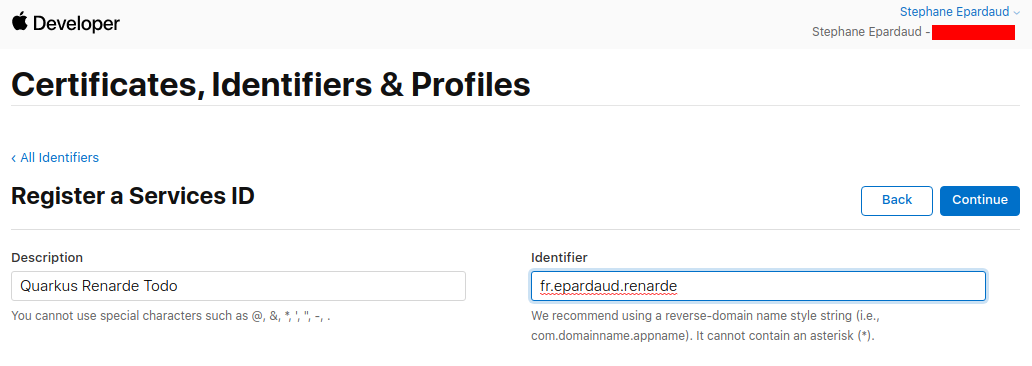
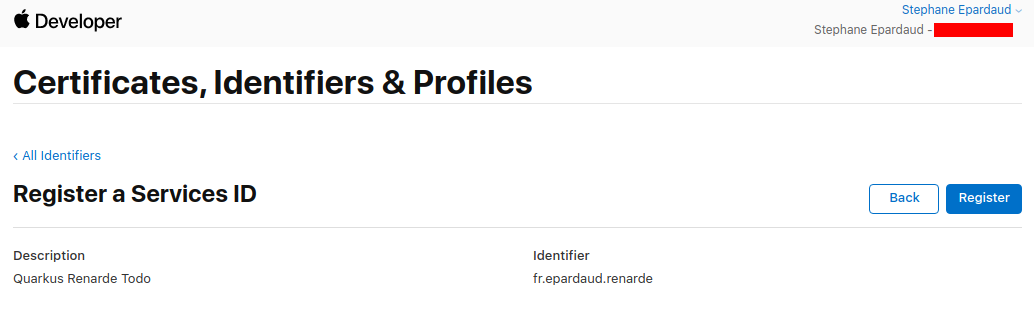
次に、 Register を押します。
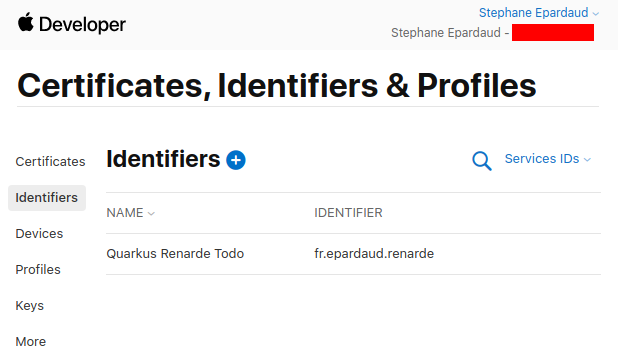
サービスリストに戻り、新しく作成したサービスをクリックします。
Sign in with Apple を有効にして、 Configure を押します。
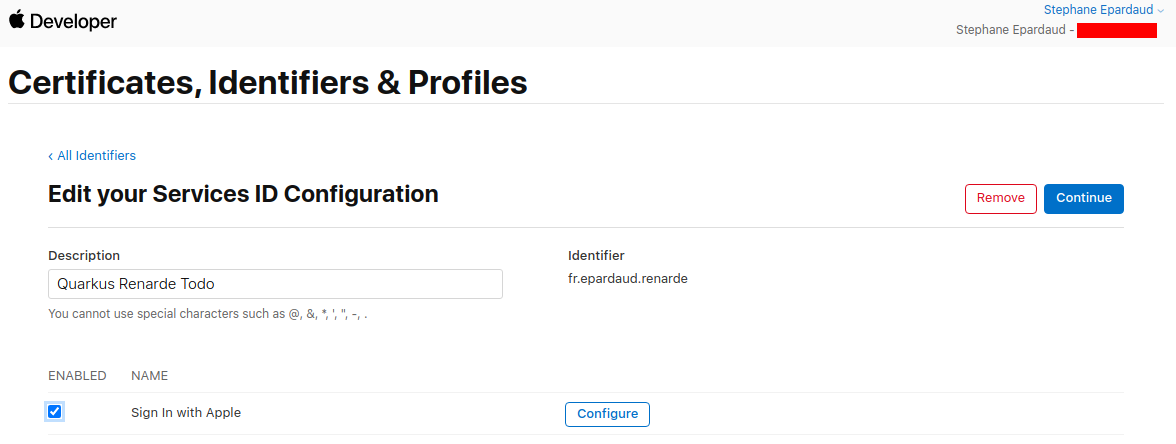
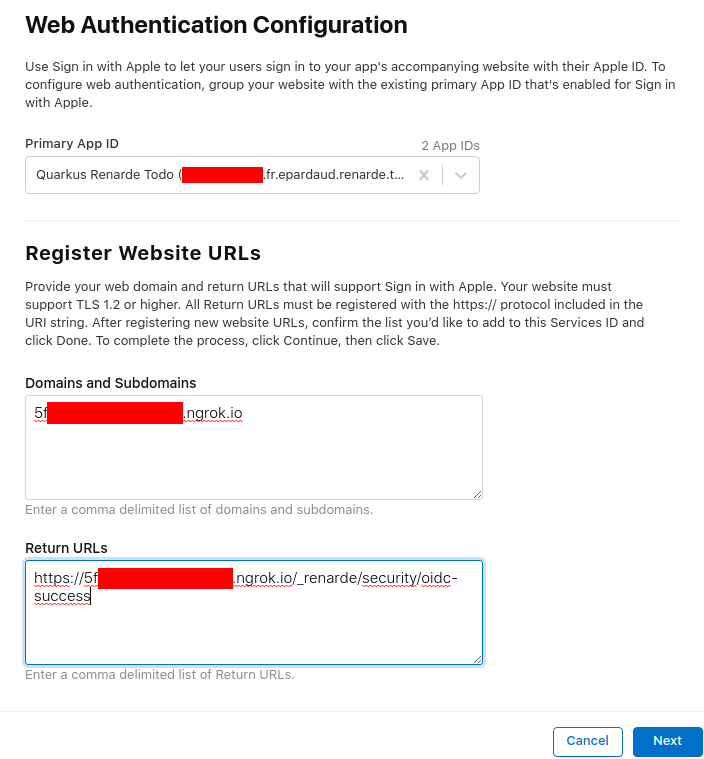
ドメインを追加して URL (<host>/_renarde/security/oidc-success に設定) を返し、 Next を押します。
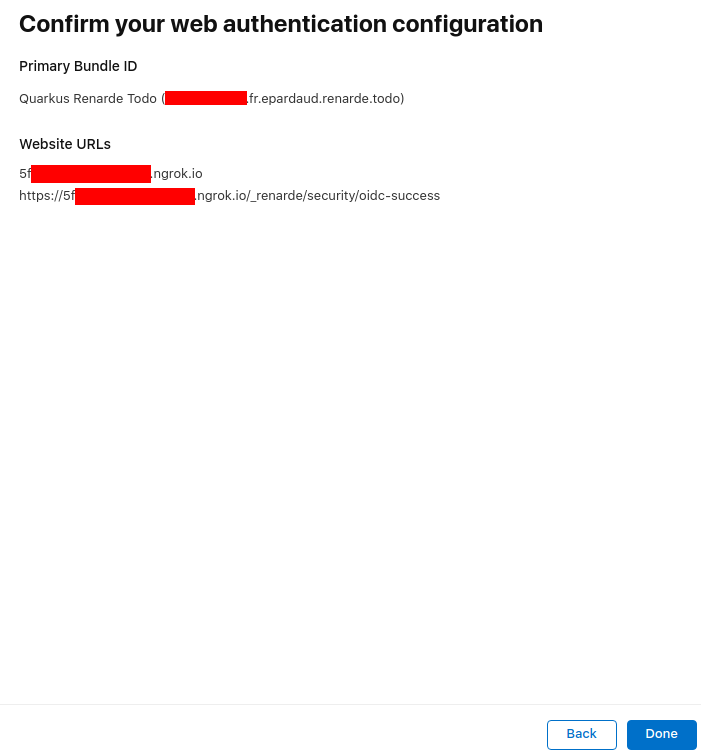
次に Done を押します。
続いて Continue を押します。
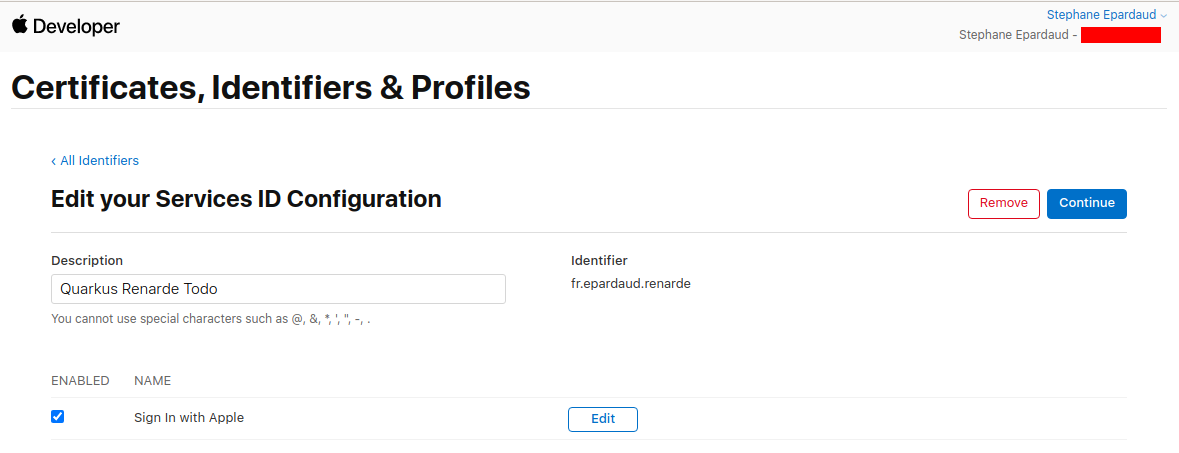
そして、 Save を押します。
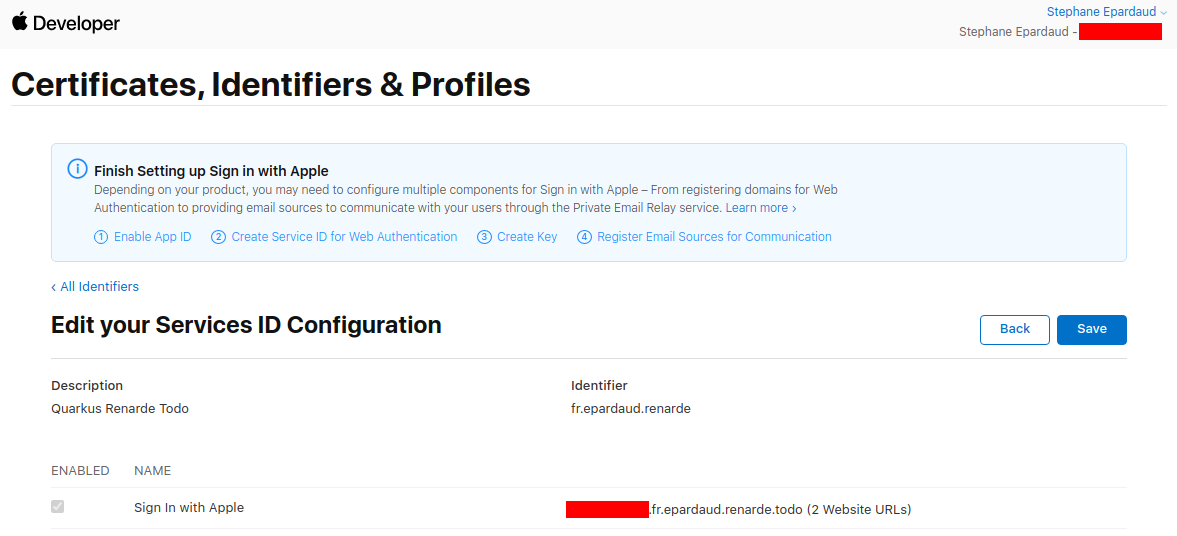
左側のメニューの Keys ページに移動し、 + を押します。
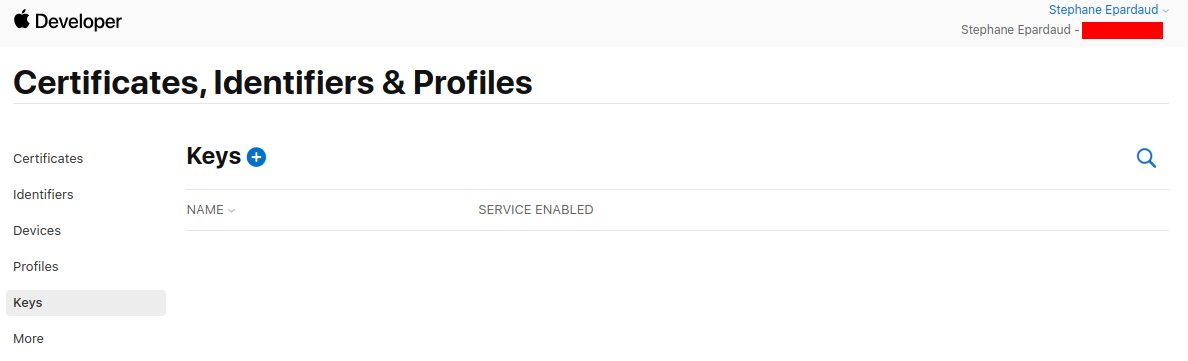
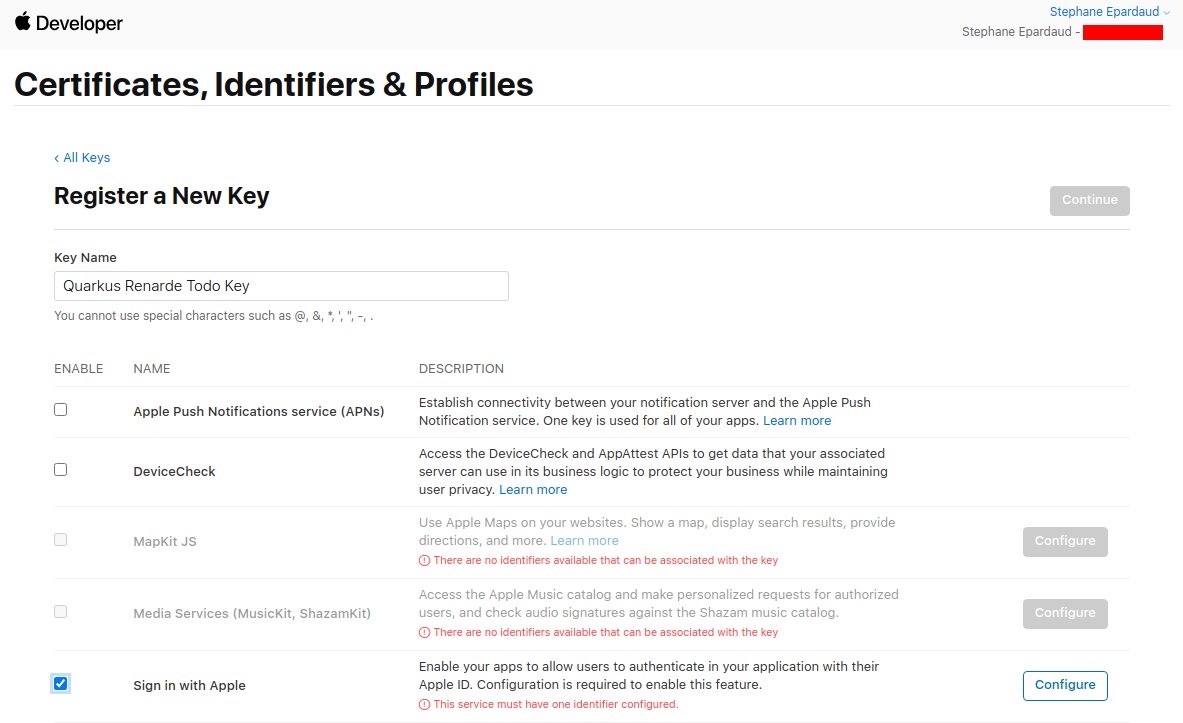
キー名を入力し、 Sign in with Apple を有効にして、 Configure を押します。
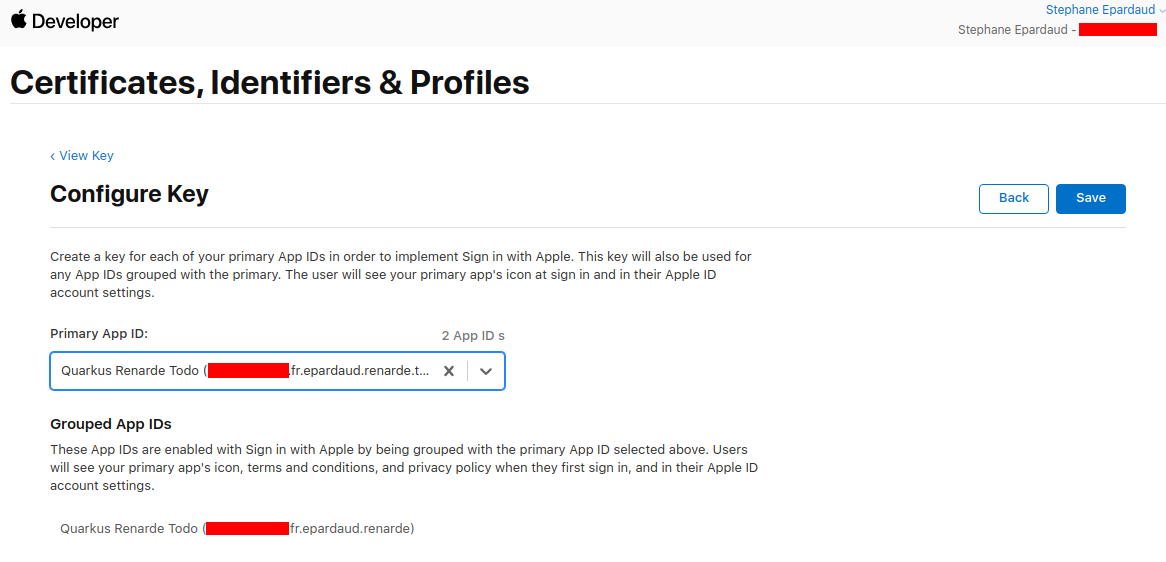
Primary App ID を選択し、 Save を押します。
キーページに戻り、 Continue を押します。
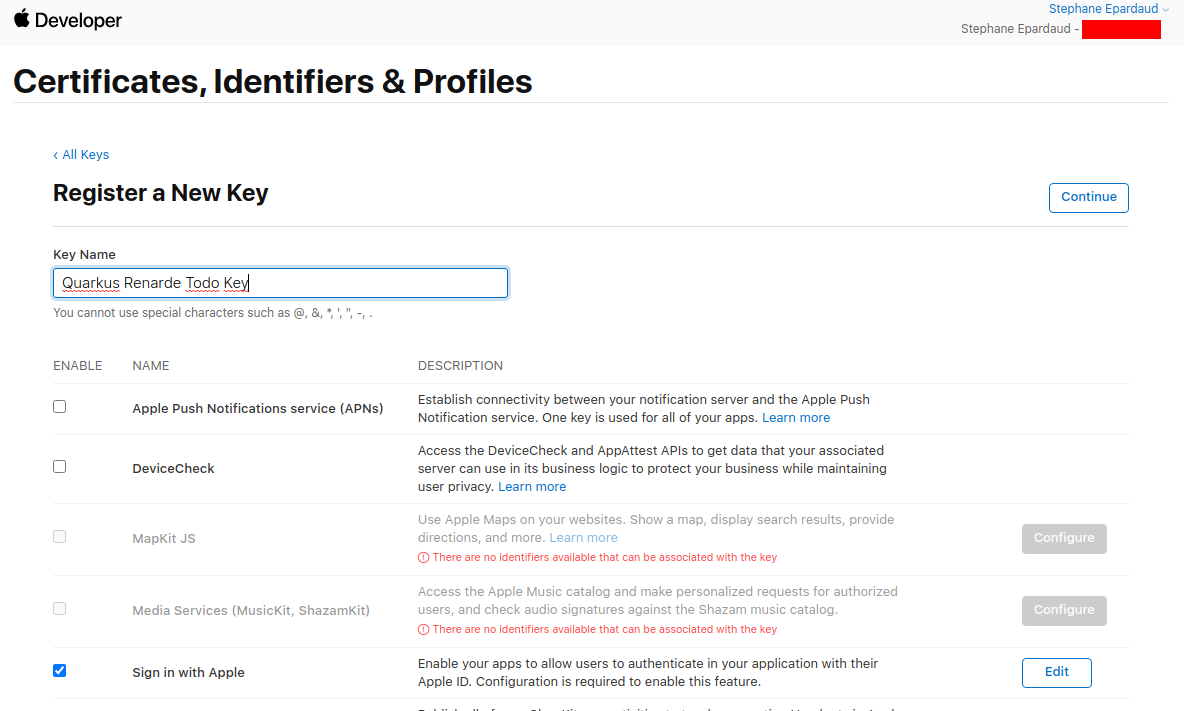
次に、 Register を押します。
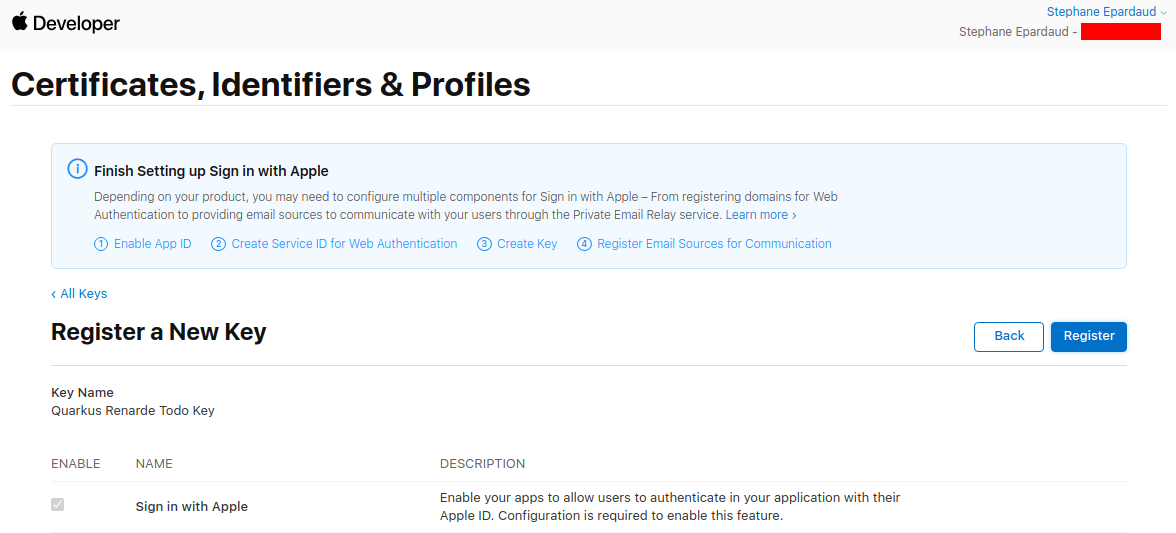
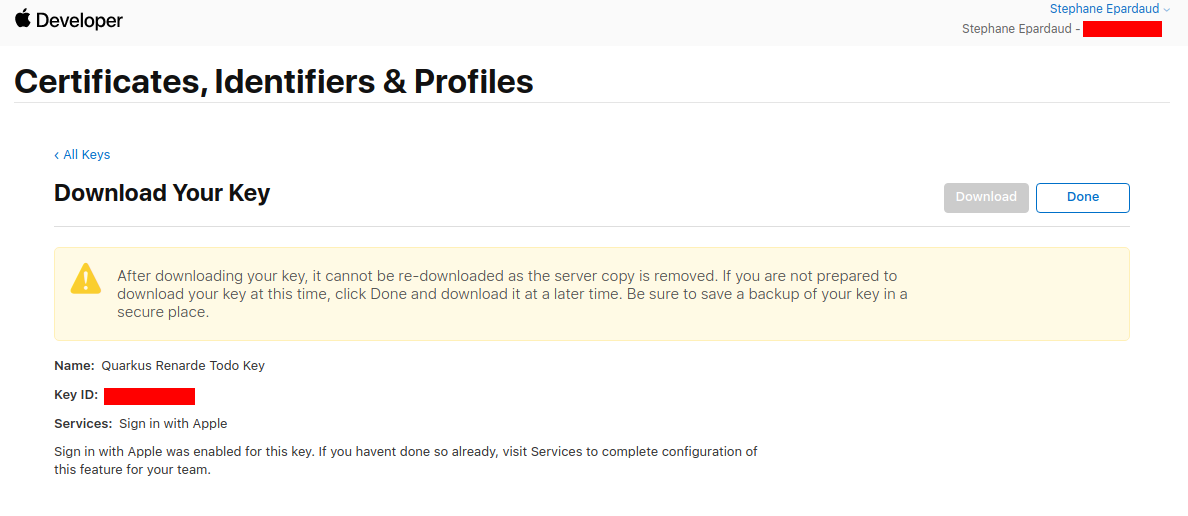
Key ID を書き留めてキーをダウンロードし、 src/main/resources/AuthKey_<KEYID>.p8 の Quarkus アプリケーションに保存します。
これで、 application.properties を設定できます。
quarkus.oidc.provider=apple
quarkus.oidc.client-id=<Bundle ID>
quarkus.oidc.credentials.jwt.key-file=AuthKey_<Key ID>.p8
quarkus.oidc.credentials.jwt.token-key-id=<Key ID>
quarkus.oidc.credentials.jwt.issuer=<App ID Prefix>
quarkus.oidc.credentials.jwt.subject=<Bundle ID}
quarkus.oidc.provider=apple will request Apple to add openid, email and name scopes to issued access tokens. For information about overriding these scopes or requesting more scopes, see the プロバイダーのスコープ section.
Facebook では、他のほとんどの OIDC プロバイダーのように localhost でアプリケーションをテストすることはできません。 https で実行して公開する必要があるため、開発目的では https://ngrok.com などのサービスを使用することをお勧めします。
Facebook 用の OIDC を設定するには、 Creating an application から開始し、アプリのタイプとして None を選択して Next を押します。
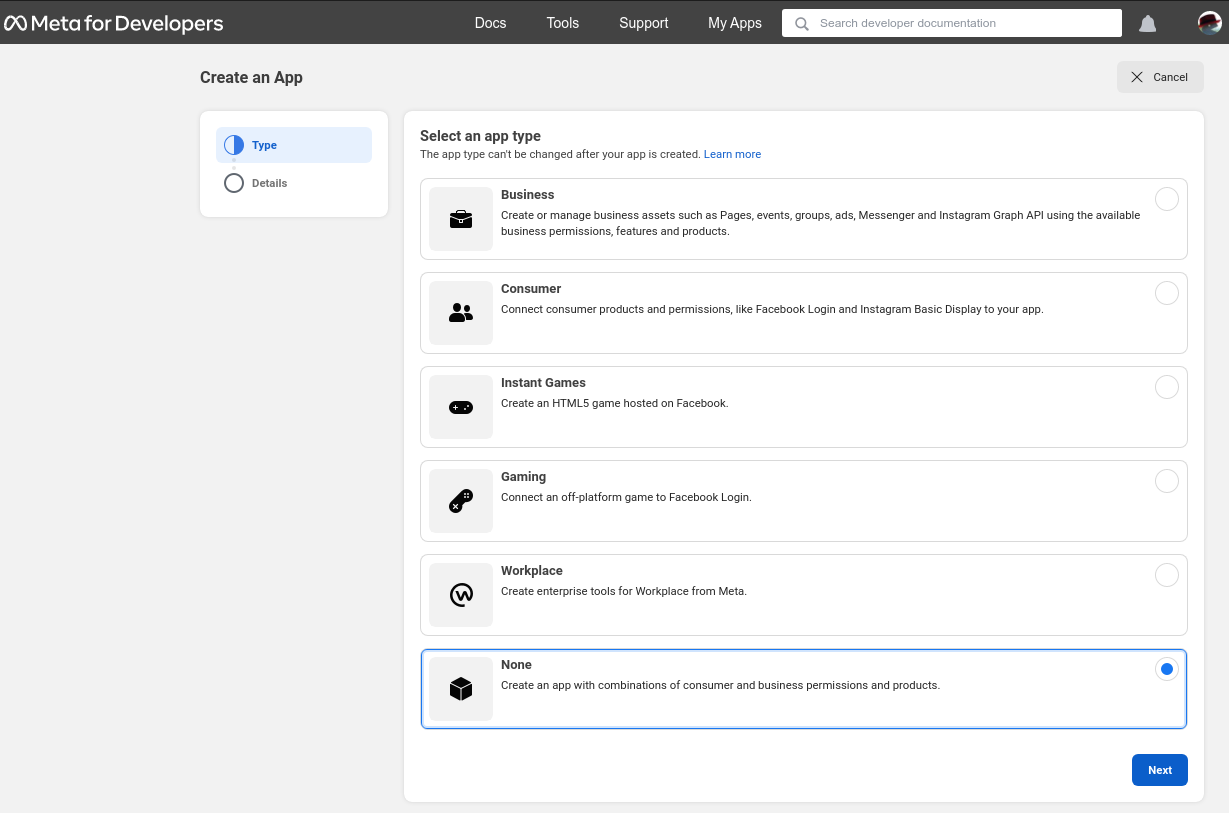
次に、アプリケーション名と連絡先のメールアドレスを入力し、 Create app を押します。
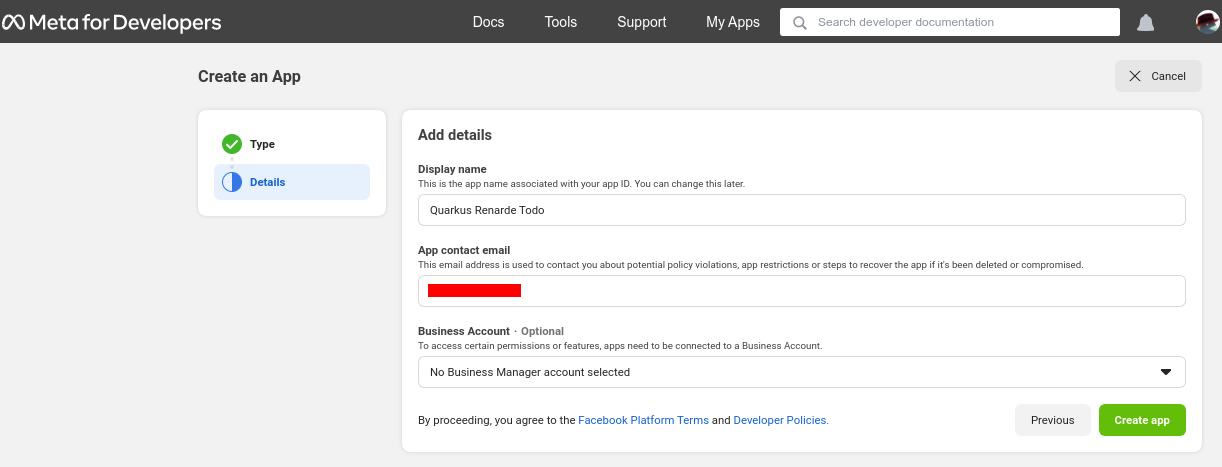
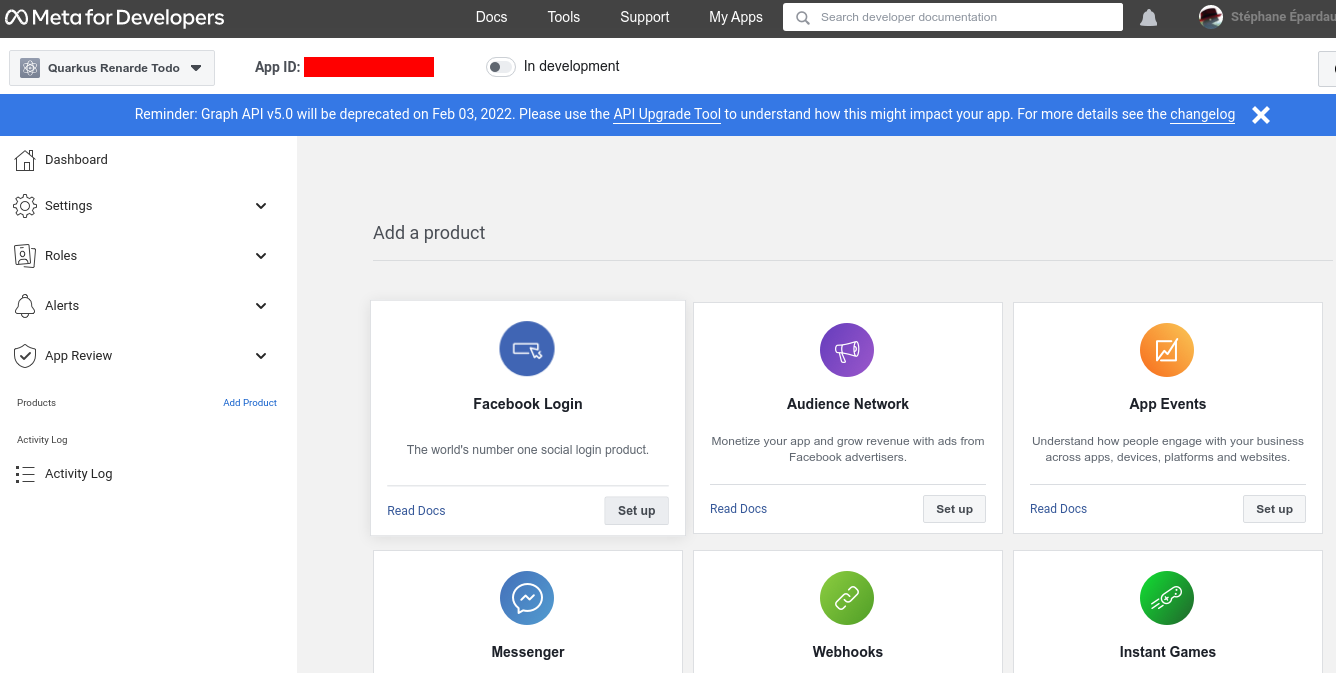
アプリページで、 Facebook login 製品の Set up をクリックします。
Quickstarts ページをクイックし、左側のメニューの Facebook login > Settings をクリックします。
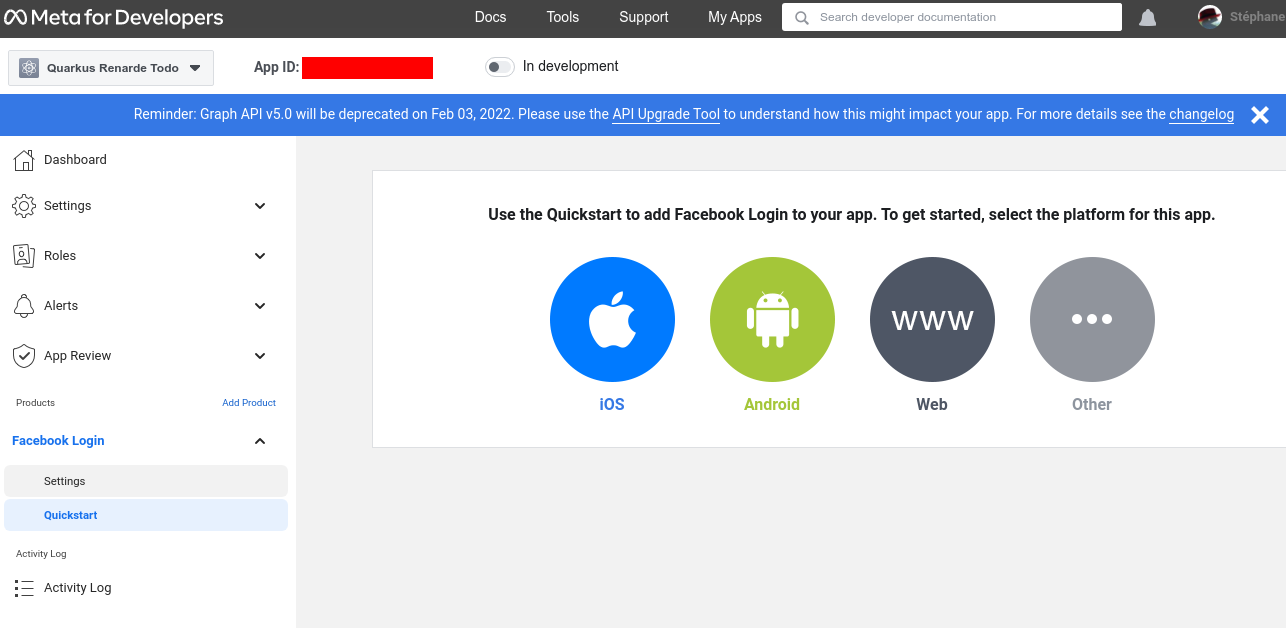
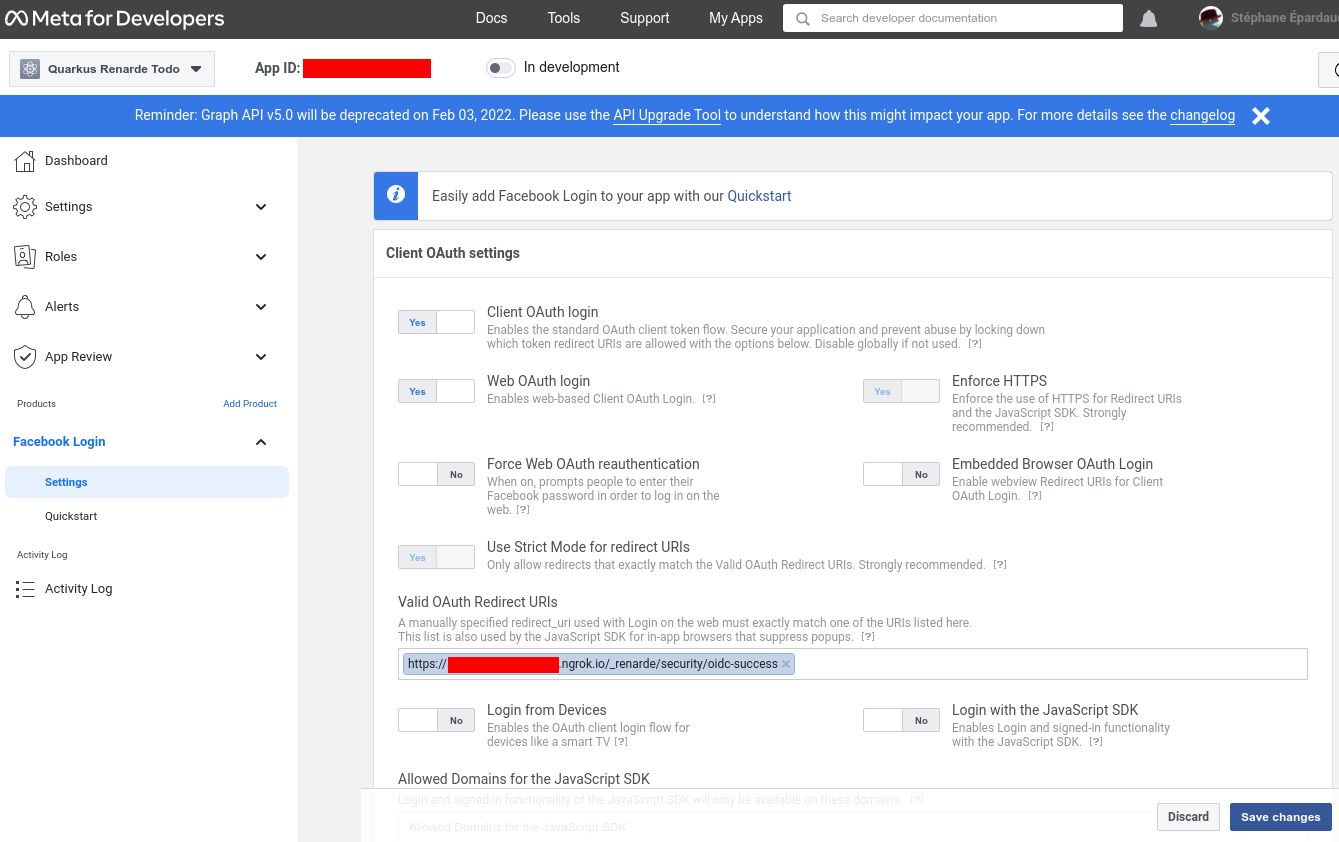
Redirect URIs を入力 (<host>/_renarde/security/oidc-success に設定) し、 Save changes を押します:
次に、左側のメニューの Settings > Basic に移動し、 App ID と App secret を書き留めます。
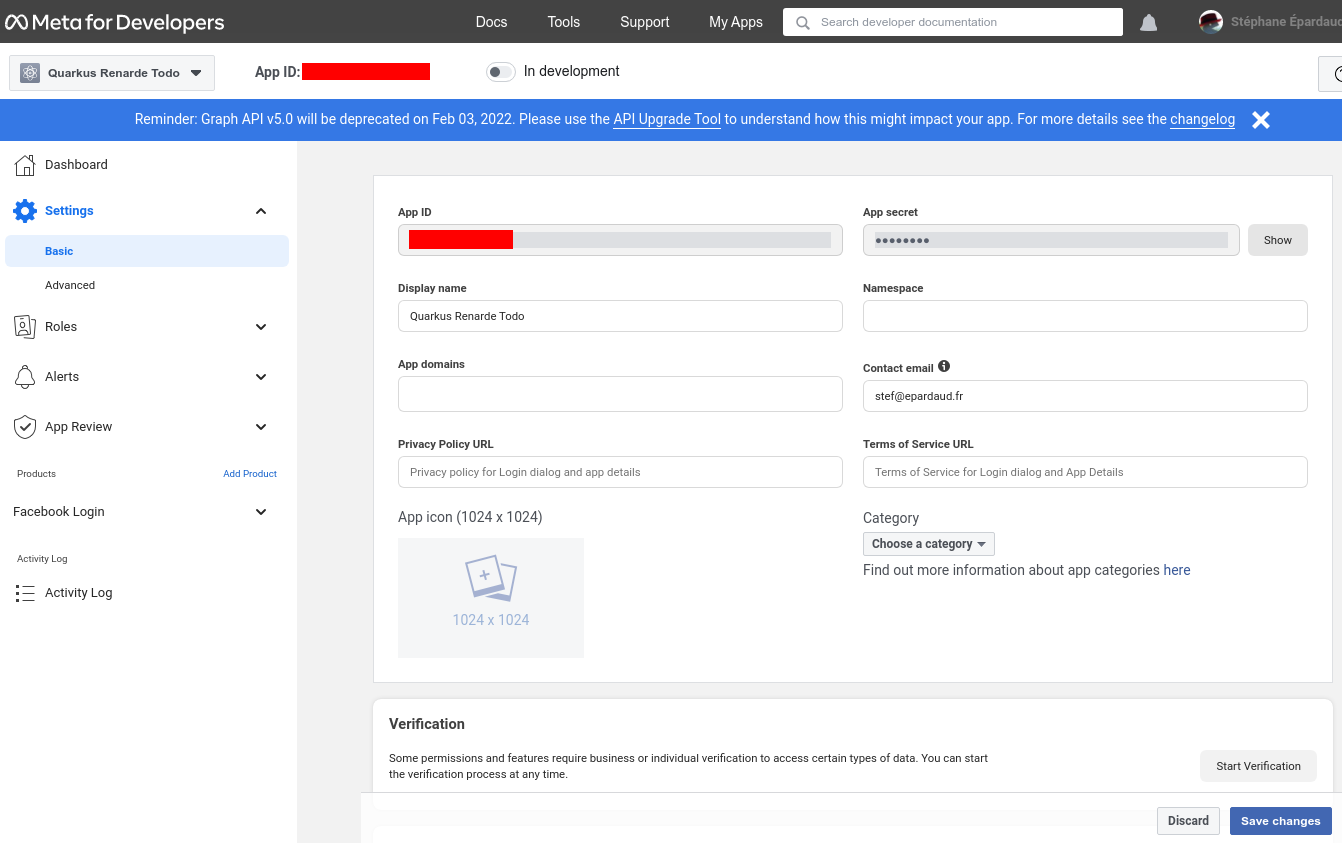
これで、 application.properties を設定できます。
quarkus.oidc.provider=facebook
quarkus.oidc.client-id=<App ID>
quarkus.oidc.credentials.secret=<App secret>
quarkus.oidc.provider=facebook will request Facebook to add email and public_profile scopes to issued access tokens. For information about overriding these scopes or requesting more scopes, see the プロバイダーのスコープ section.
OIDC ログインには Twitter を使用できますが、現時点では、ユーザーのメールへのアクセスが制限されているため、ご自身で Twitter を取得して確認する必要があります。
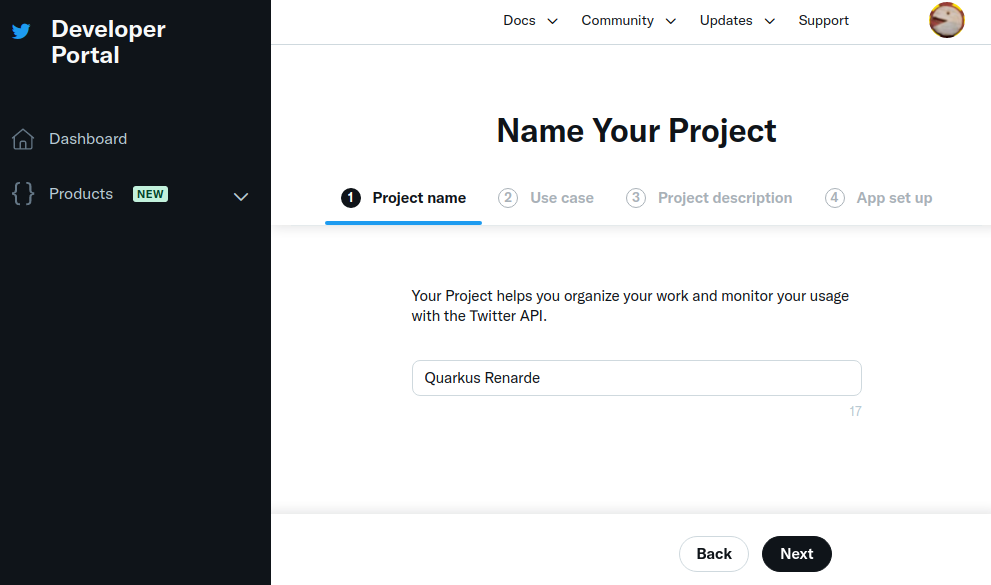
Twitter 用の OIDC を設定するには、 Creating a project で開始し、プロジェクト名を入力して、 Next を押します。
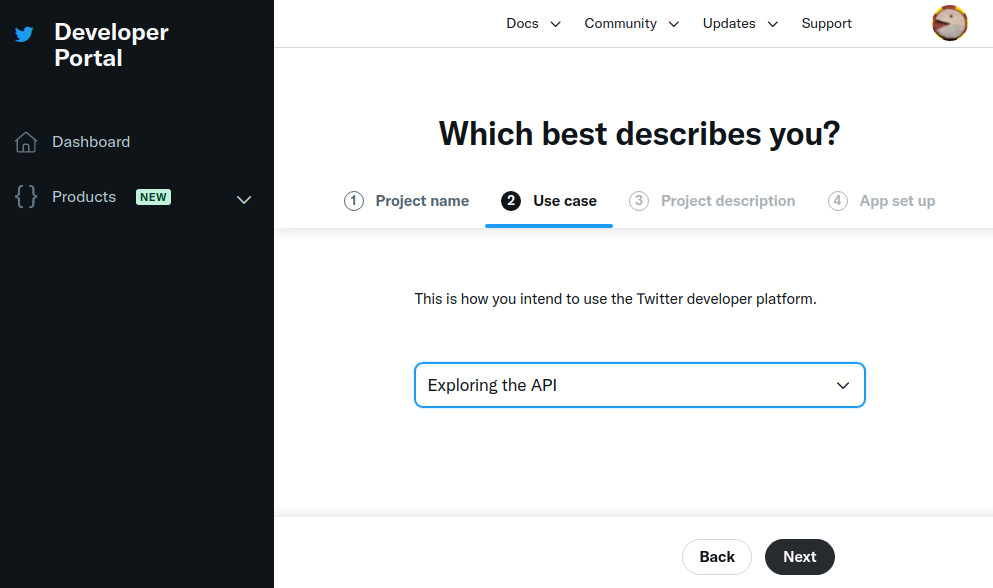
ユースケースを入力し、 Next を押します。
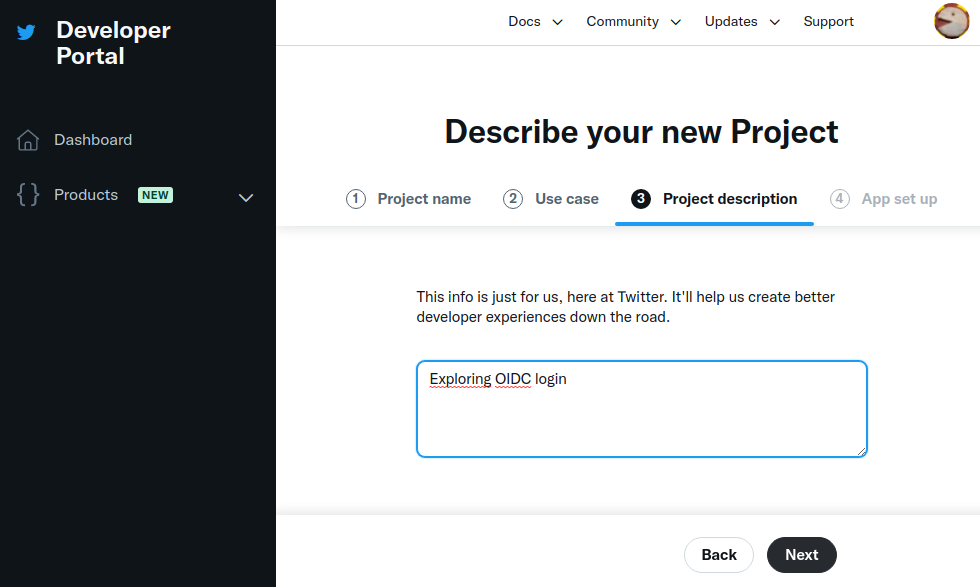
プロジェクトの説明を入力し、 Next を押します。
次に、アプリケーション名を入力して、 Next を押します。
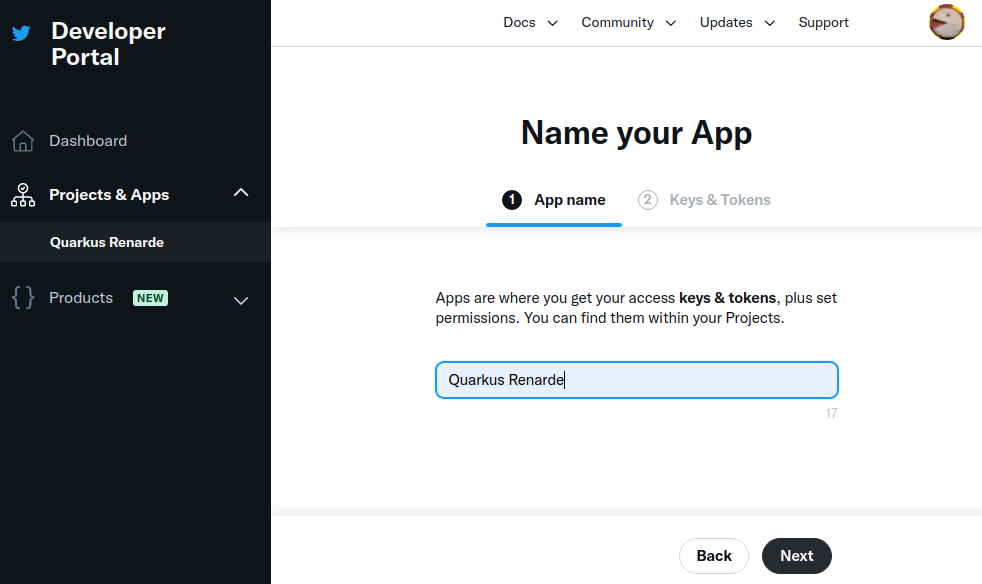
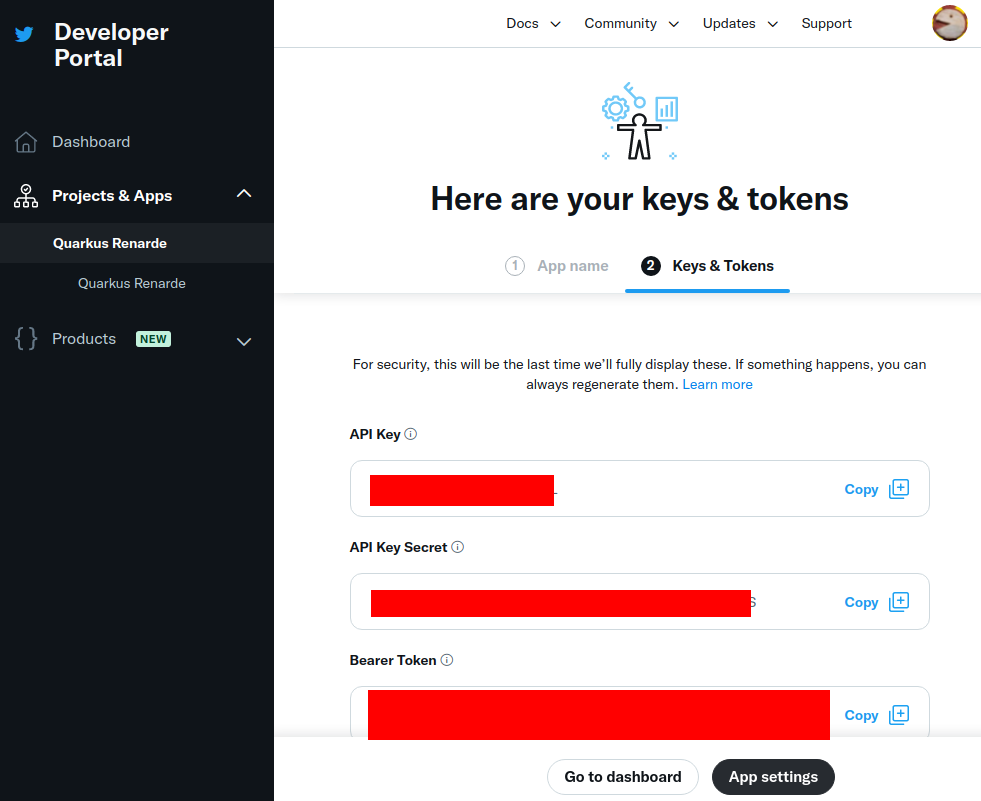
キーは再び表示されないので書き留めて、 App Settings を押します。
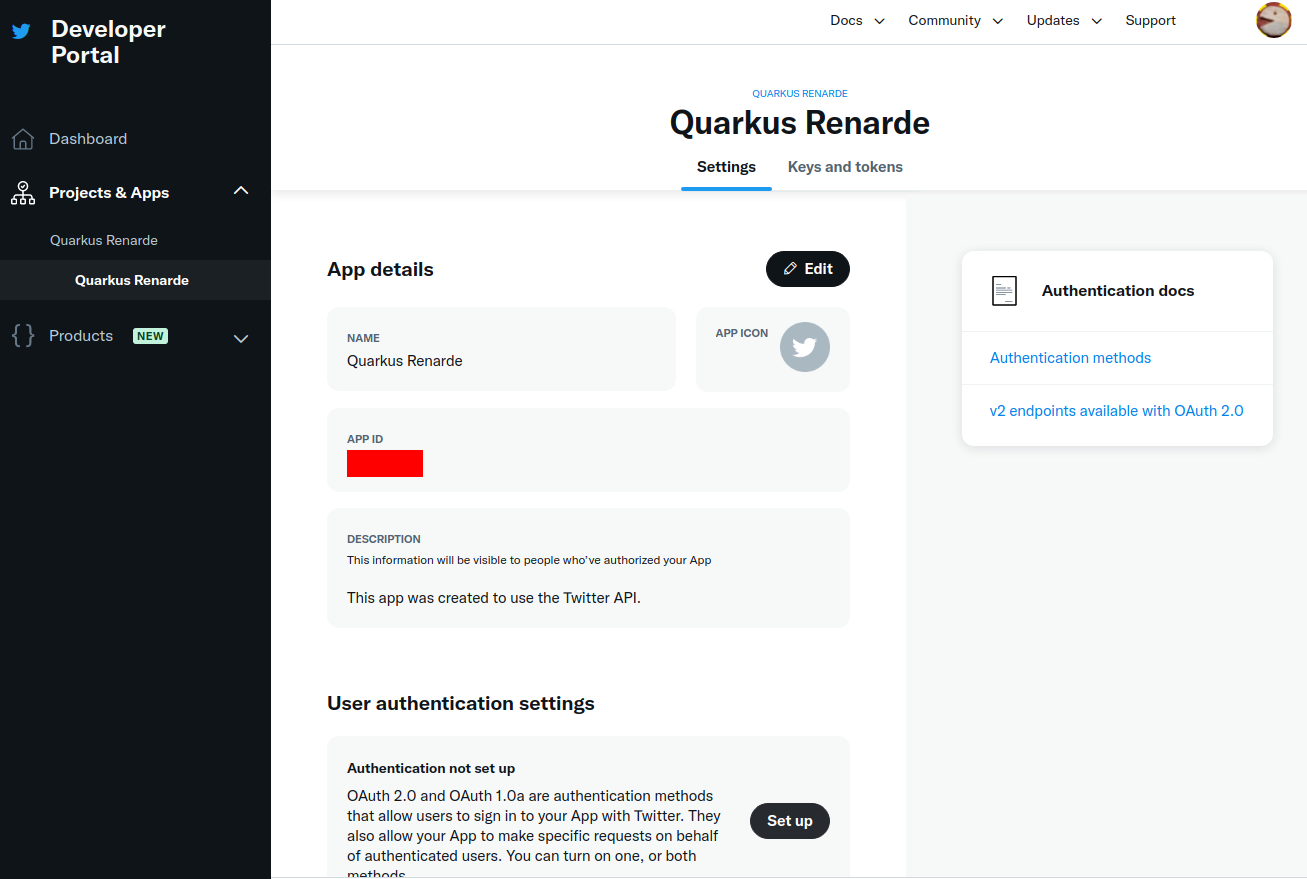
User authentication settings セクションに移動し、 Set up を押します。
OAuth 2.0 チェックボックスをオンにします。
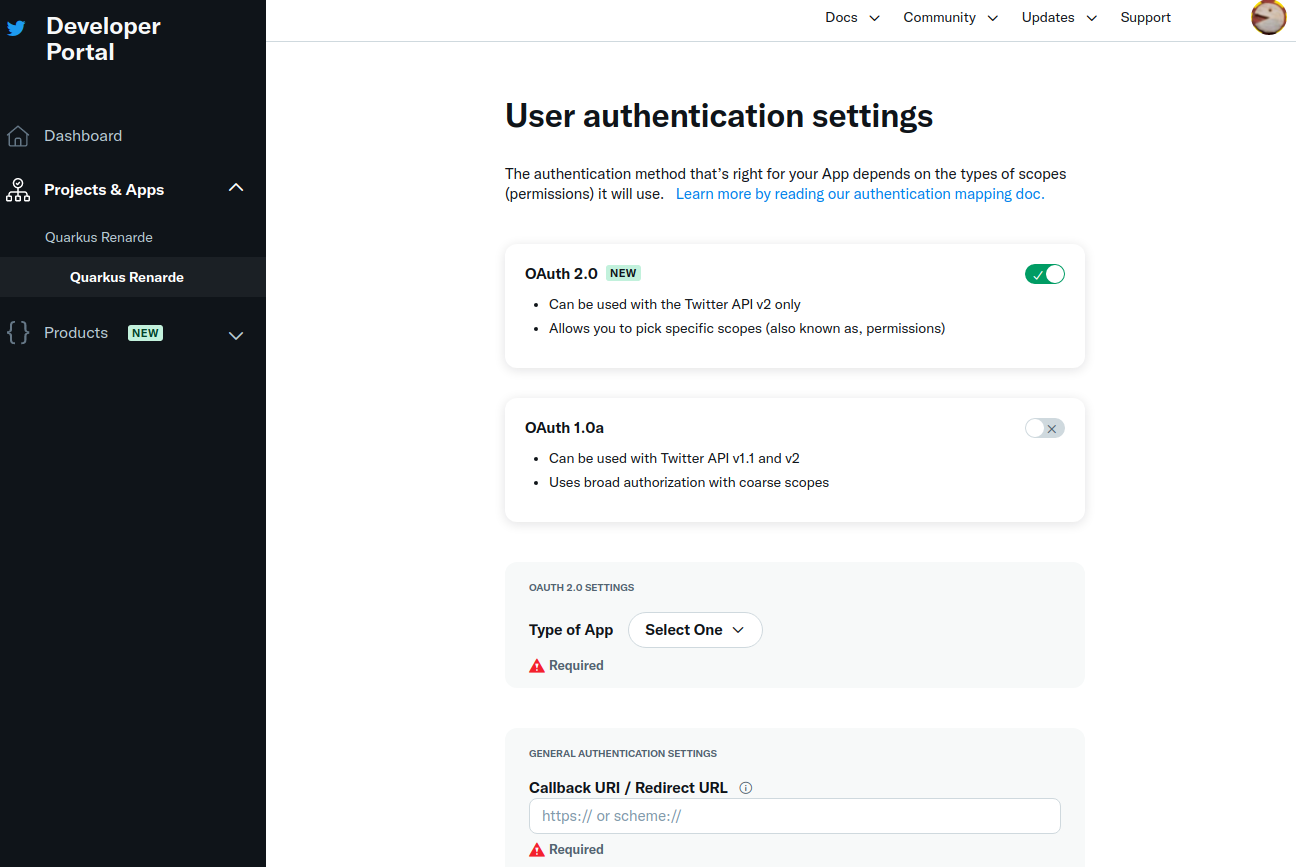
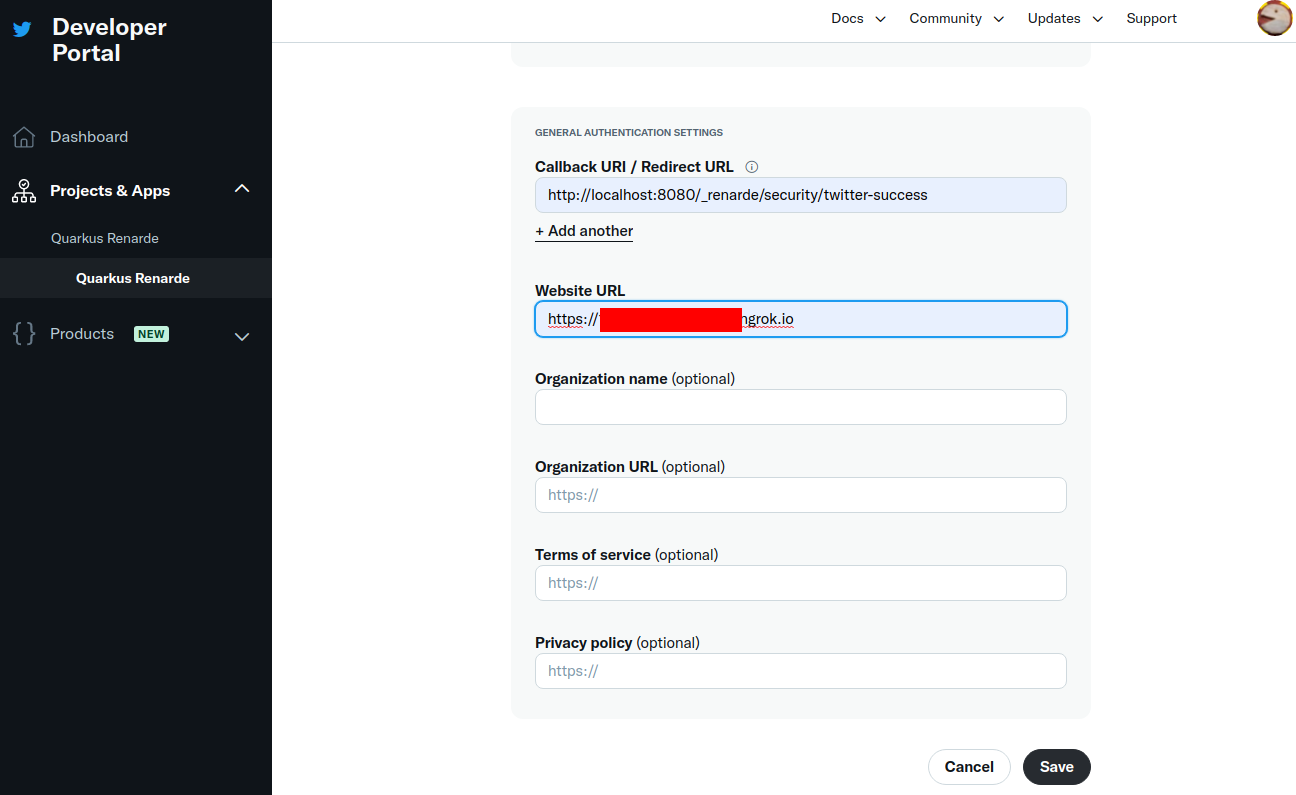
アプリケーションタイプとして Web App を選択し、アプリケーションの詳細を入力します (Callback URI の場合は <host>/_renarde/security/twitter-success を使用)。
Twitter は実際には https を使用する必要はありませんが、https がないと Website URL を受け入れないため、ngrok を引き続き使用できます。
|
次に、 Save を押します。
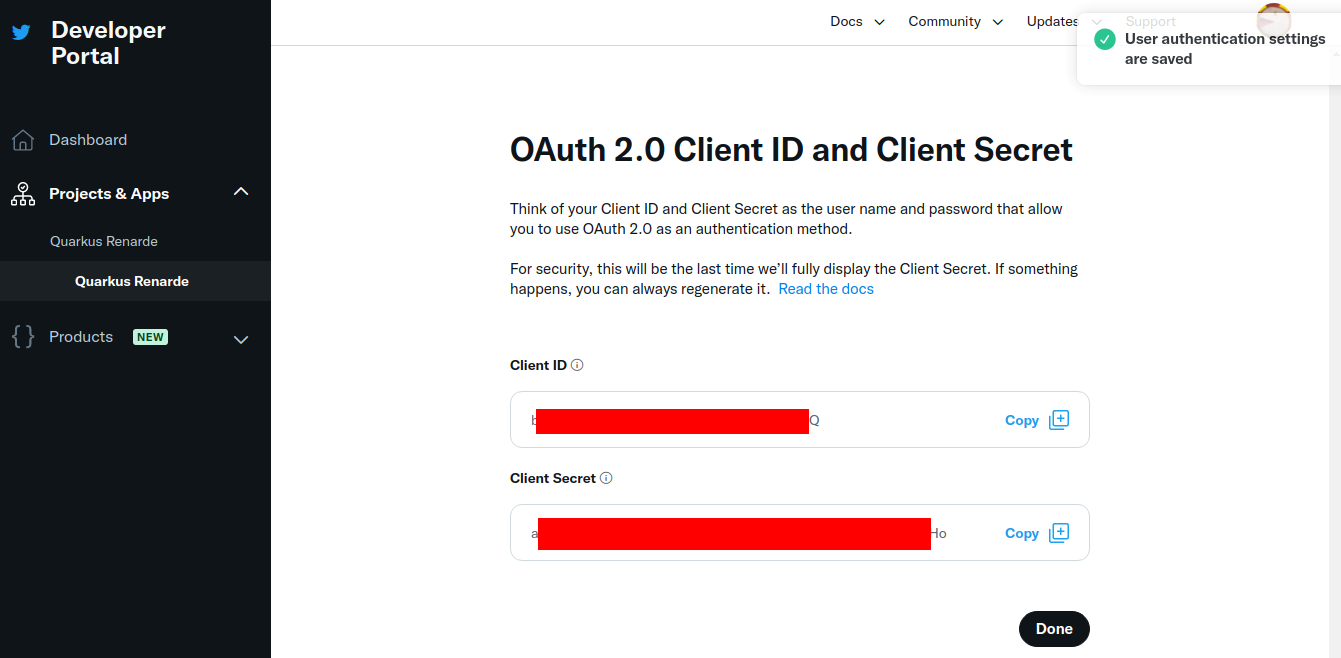
これで、 Client ID および Client Secret をコピーして Done を押すことができます。
これで、 application.properties を設定できます。
quarkus.oidc.provider=twitter
quarkus.oidc.client-id=<Client ID>
quarkus.oidc.credentials.secret=<Client Secret>
quarkus.oidc.provider=twitter will request Twitter to add offline.access, tweet.read and users.read scopes to issued access tokens. For information about overriding these scopes or requesting more scopes, see the プロバイダーのスコープ section.
|
Twitter provider requires Proof Key for Code Exchange (PKCE) which is supported by the `quarkus.oidc.authentication.state-secret`プロパティーを使用して、PKCE コード検証を暗号化する独自の秘密鍵を提供することもできますが、 このシークレットの長さは 32 文字である必要があり、16 文字未満の場合、エラーが報告されることに注意してください。 |
|
|
X
X は Twitter の新しい名前です。現在、 quarkus.oidc.provider=x または quarkus.oidc.provider=twitter のどちらかを使用することができますが、将来的には quarkus.oidc.provider=x のみがサポートされるようになるかもしれません。
Please see Twitter for more information about registering your Quarkus application in X (Twitter).
Spotify
Spotify application を作成します。
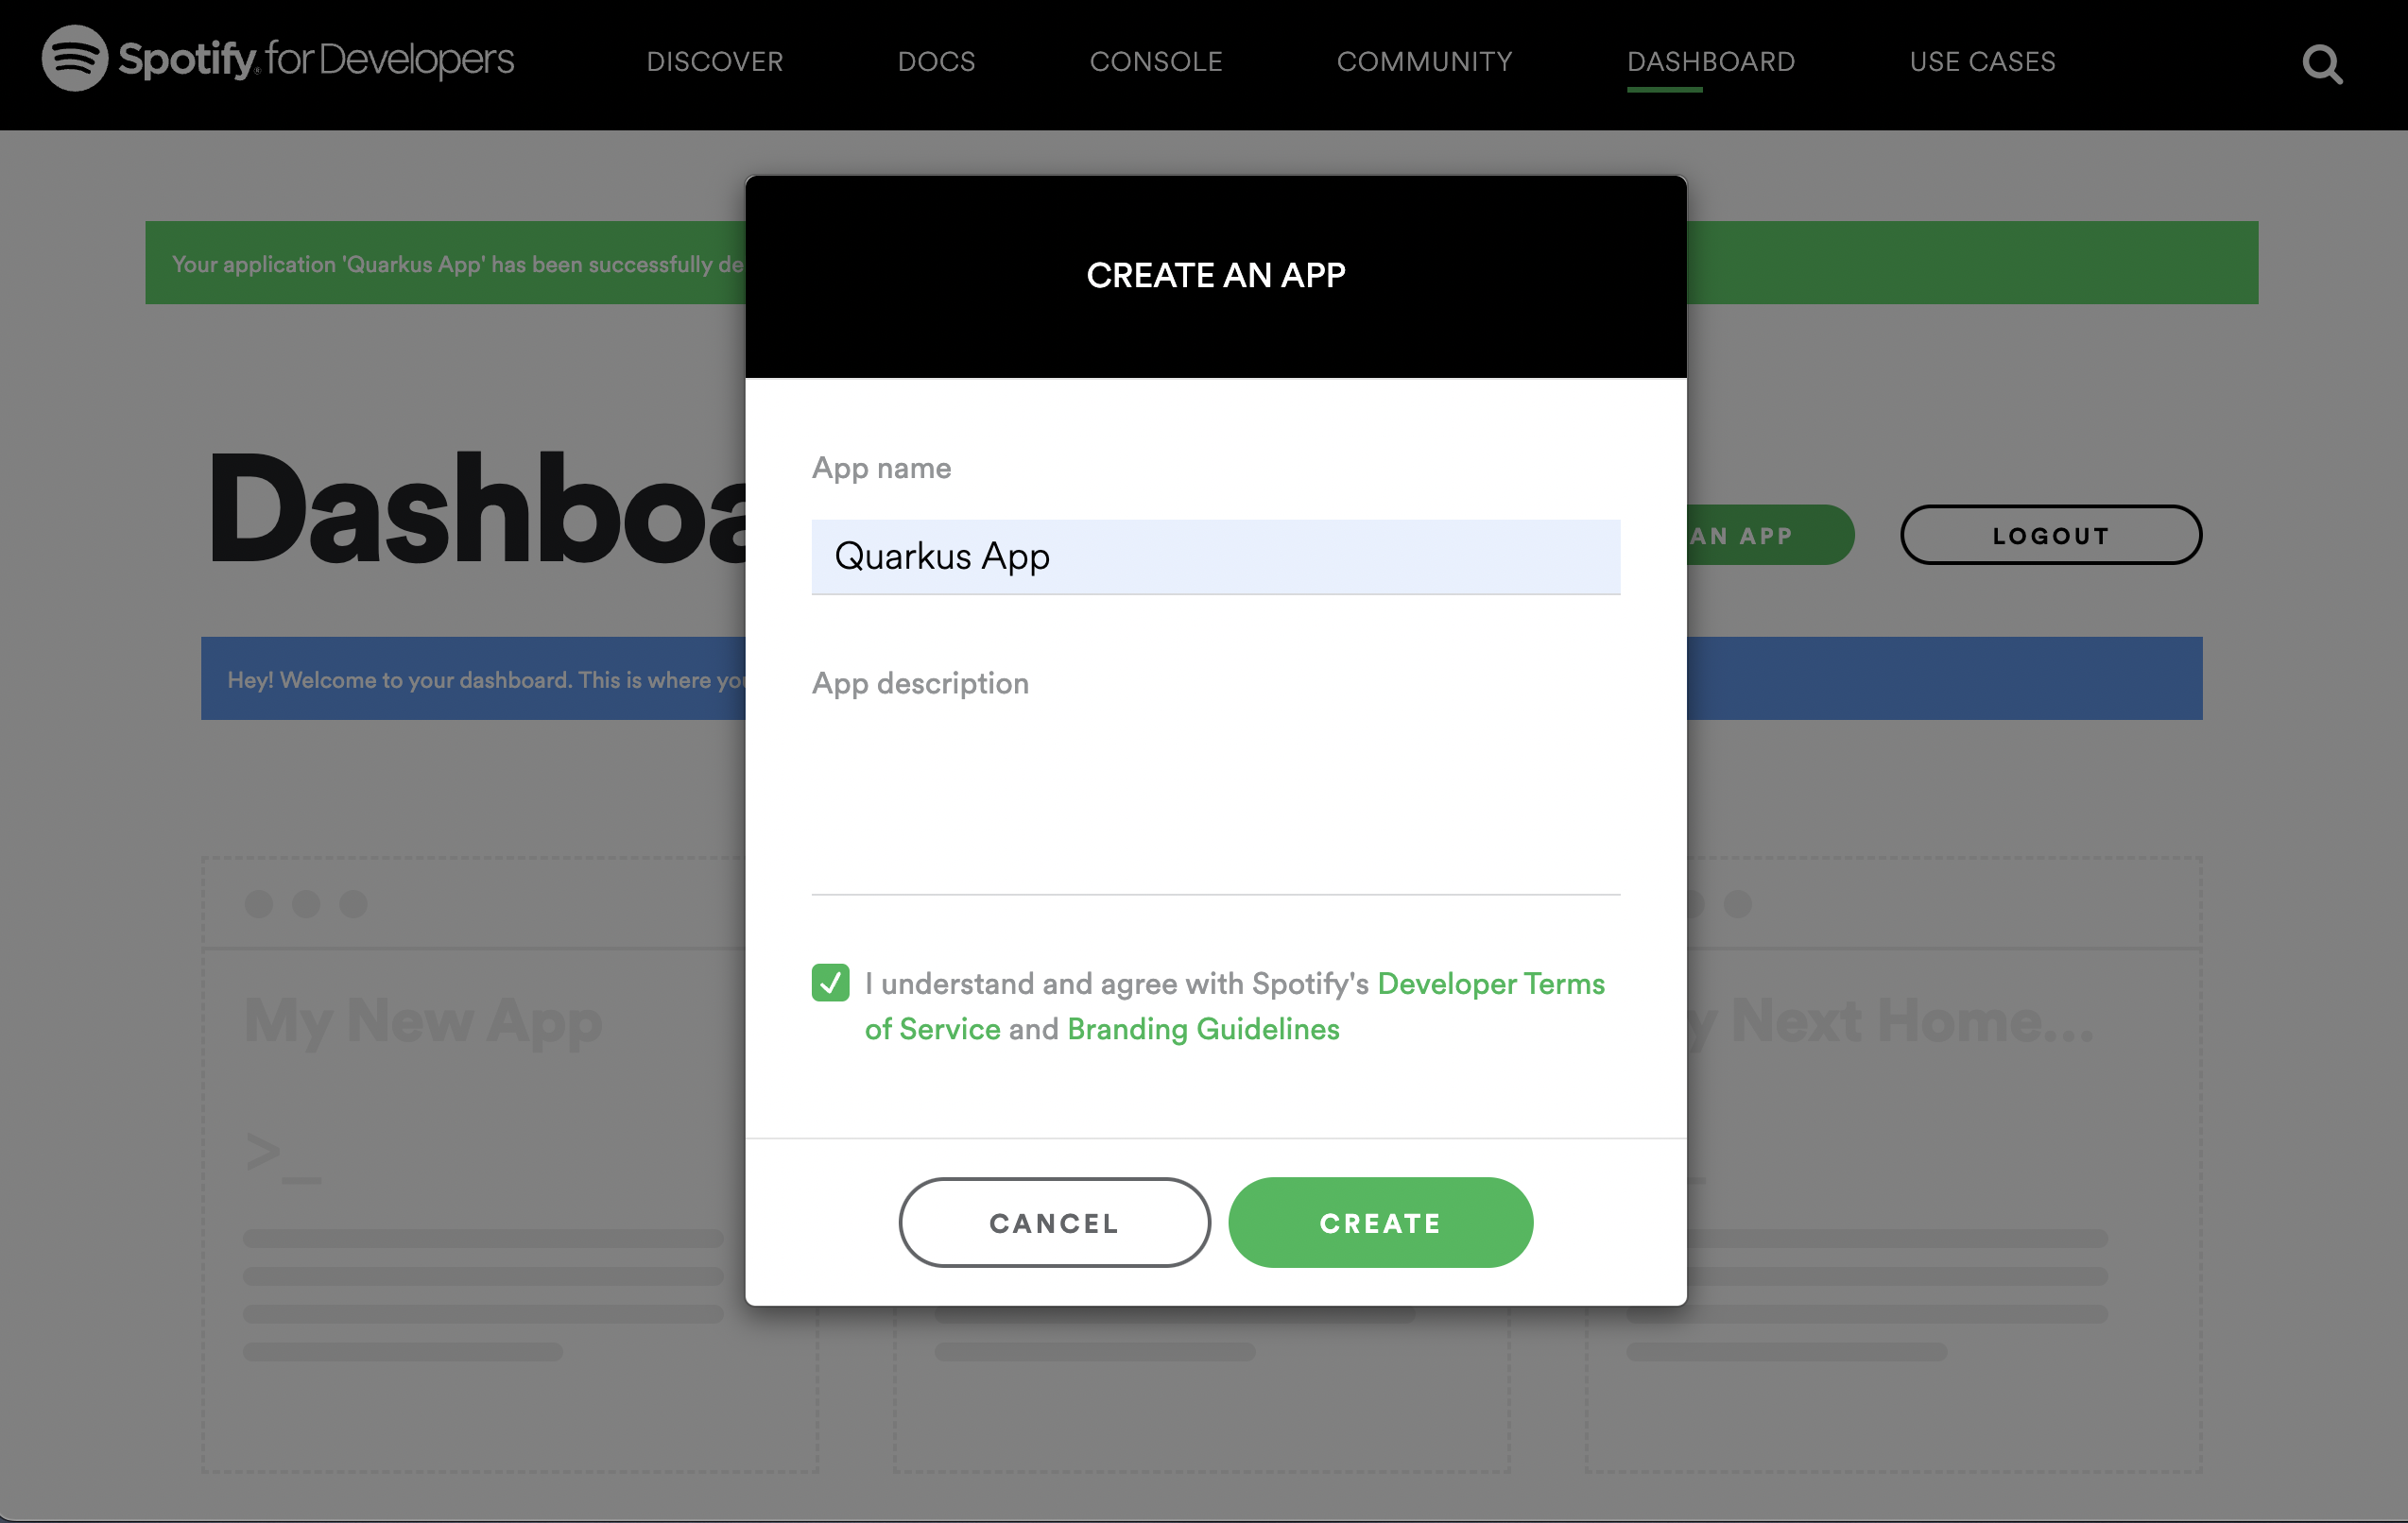
開発目的のテスト用に、リダイレクト URI として http://localhost:8080 を追加することを忘れないでください。Spotify アプリケーションのセットアップが完了すると、クライアント ID とシークレットが生成されます。以下に例を示します。
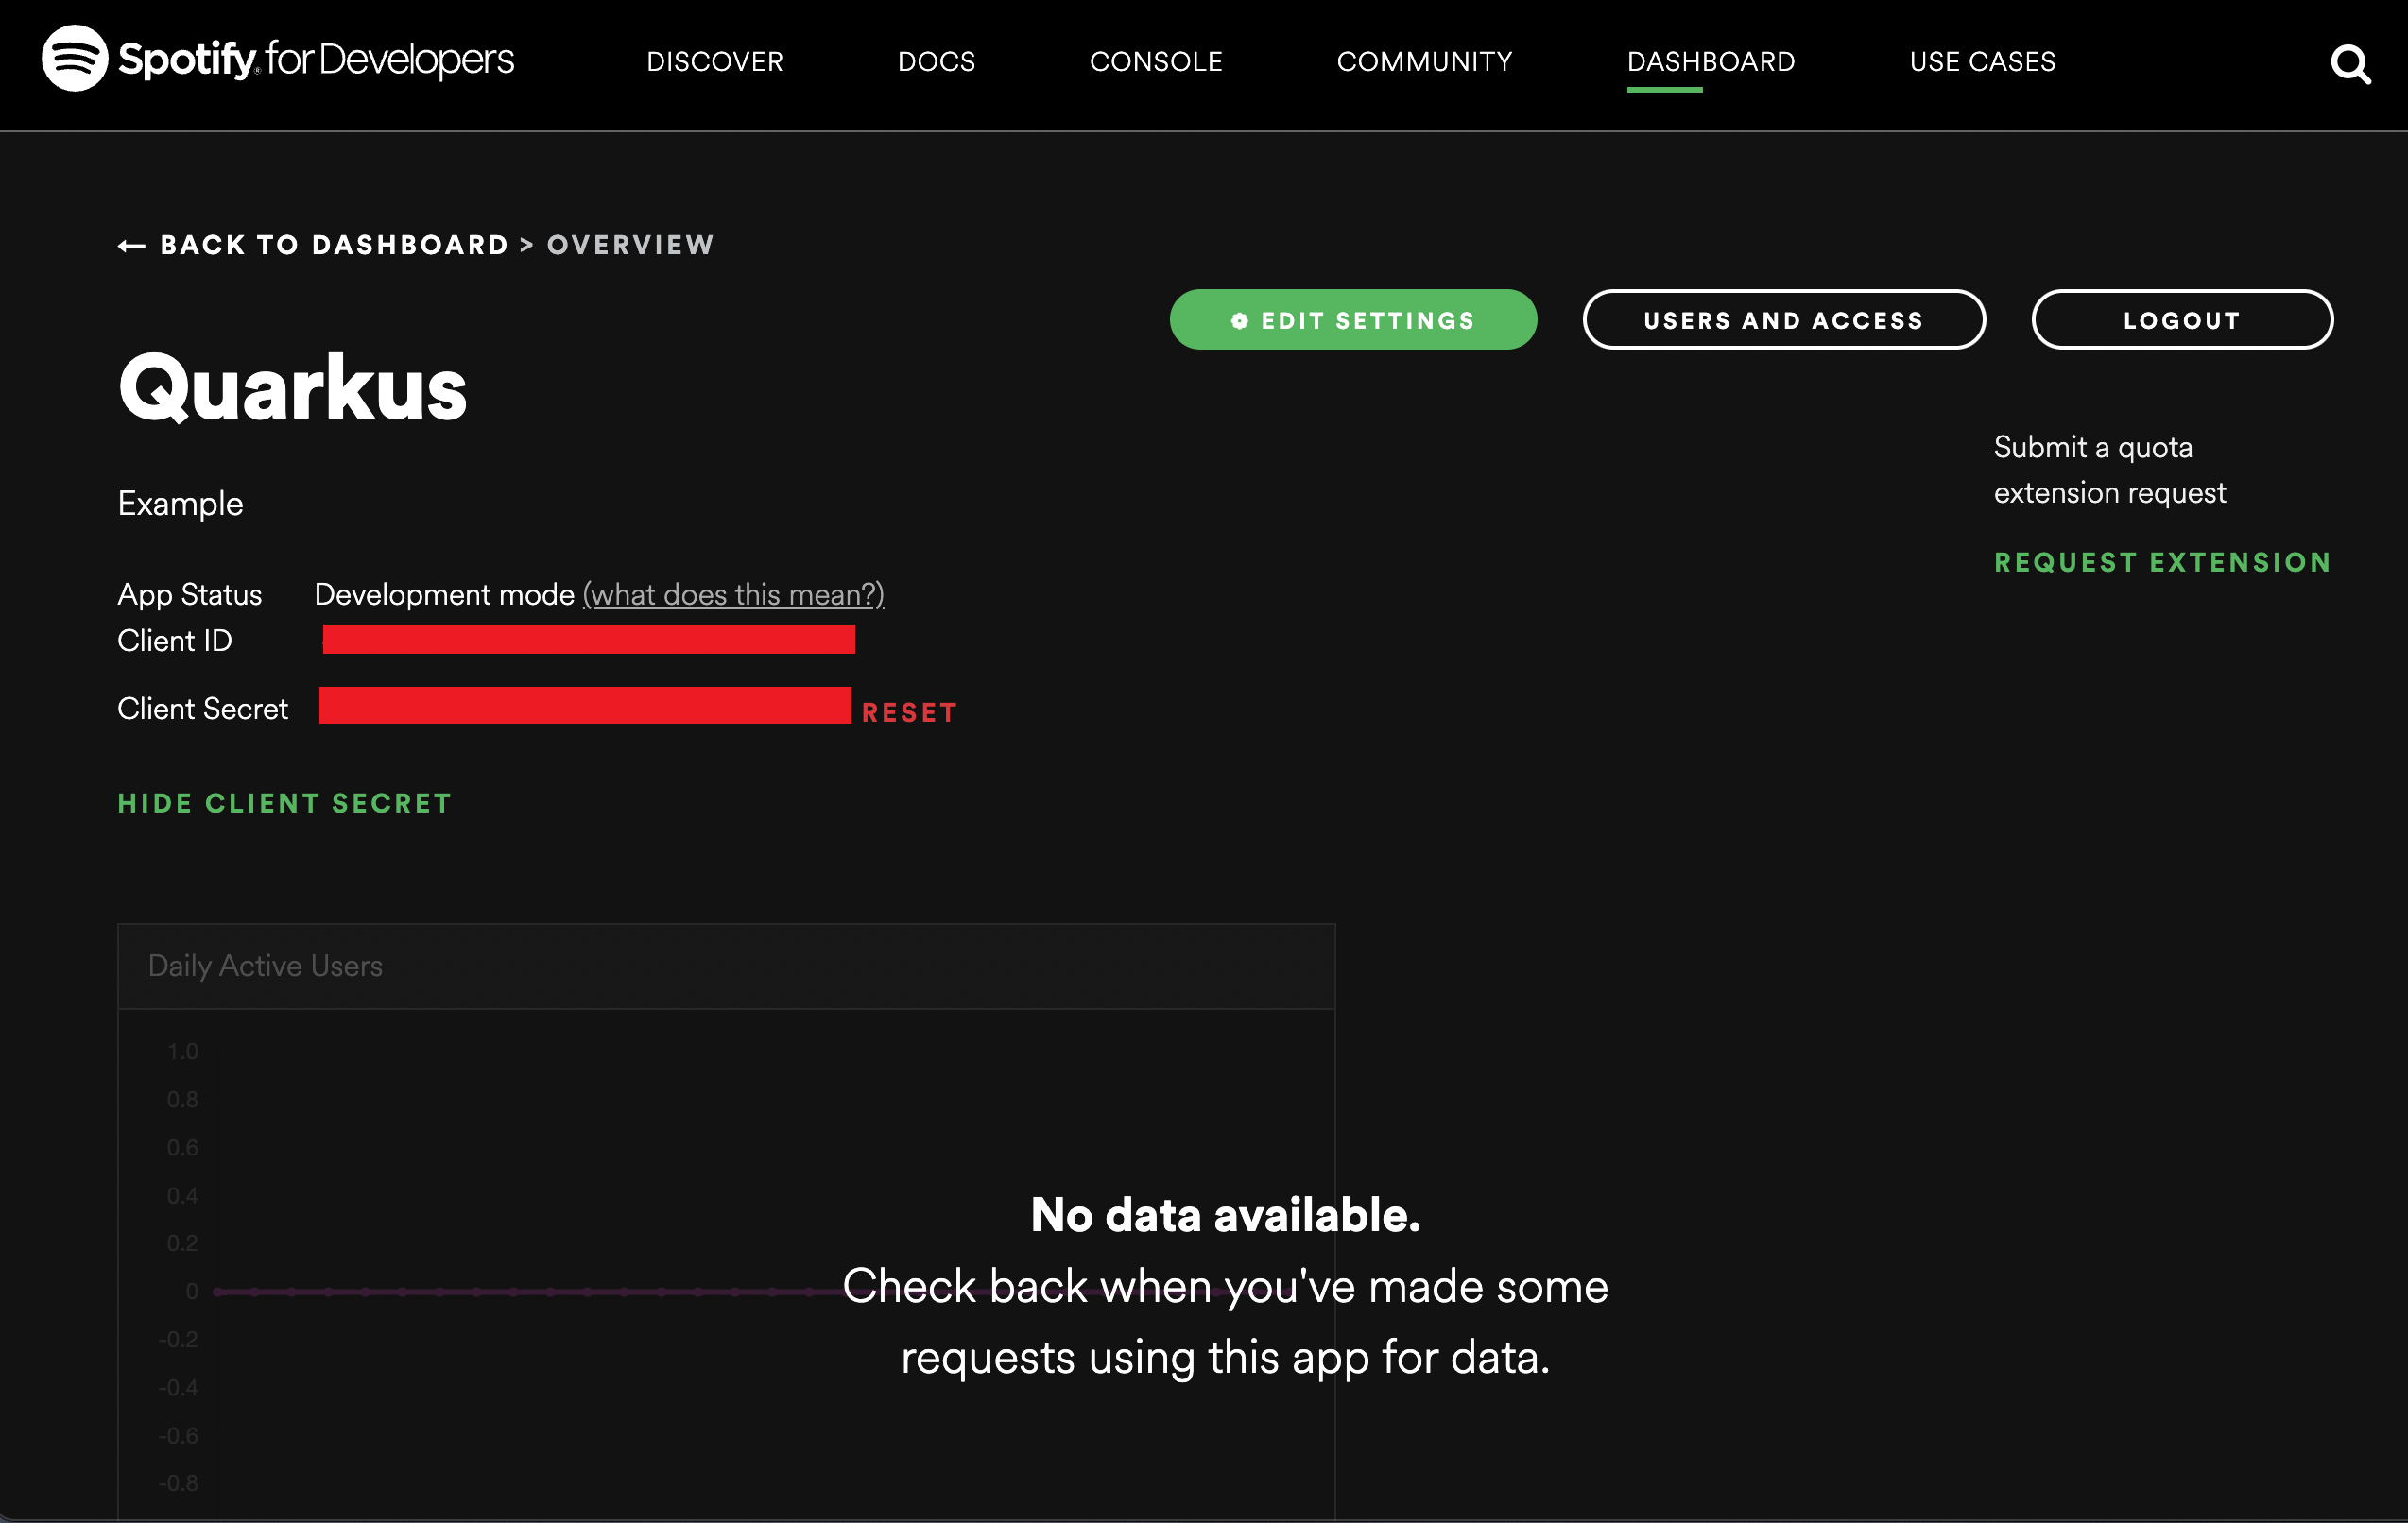
これで、 application.properties を設定できます。
quarkus.oidc.provider=spotify
quarkus.oidc.client-id=<Client ID>
quarkus.oidc.credentials.secret=<Client Secret>
quarkus.oidc.provider=spotiify will request Spotify to add user-read-private and user-read-email scopes to issued access tokens. For information about overriding these scopes or requesting more scopes, see the プロバイダーのスコープ section.
Twitch
Twitchアプリケーション を作成する:
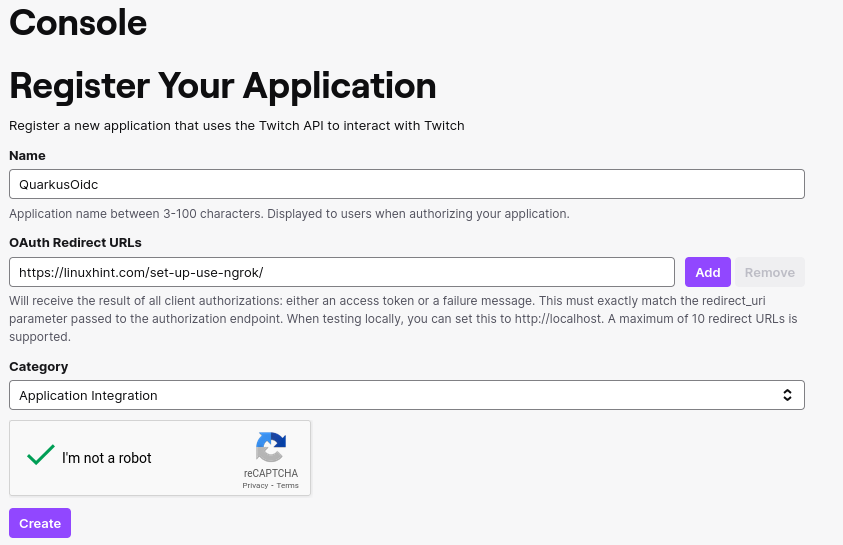
これで、 application.properties を設定できます。
quarkus.oidc.provider=twitch
quarkus.oidc.client-id=<Client ID>
quarkus.oidc.credentials.client-secret.value=<Client Secret>
Discord
Discord アプリケーション を作成します。
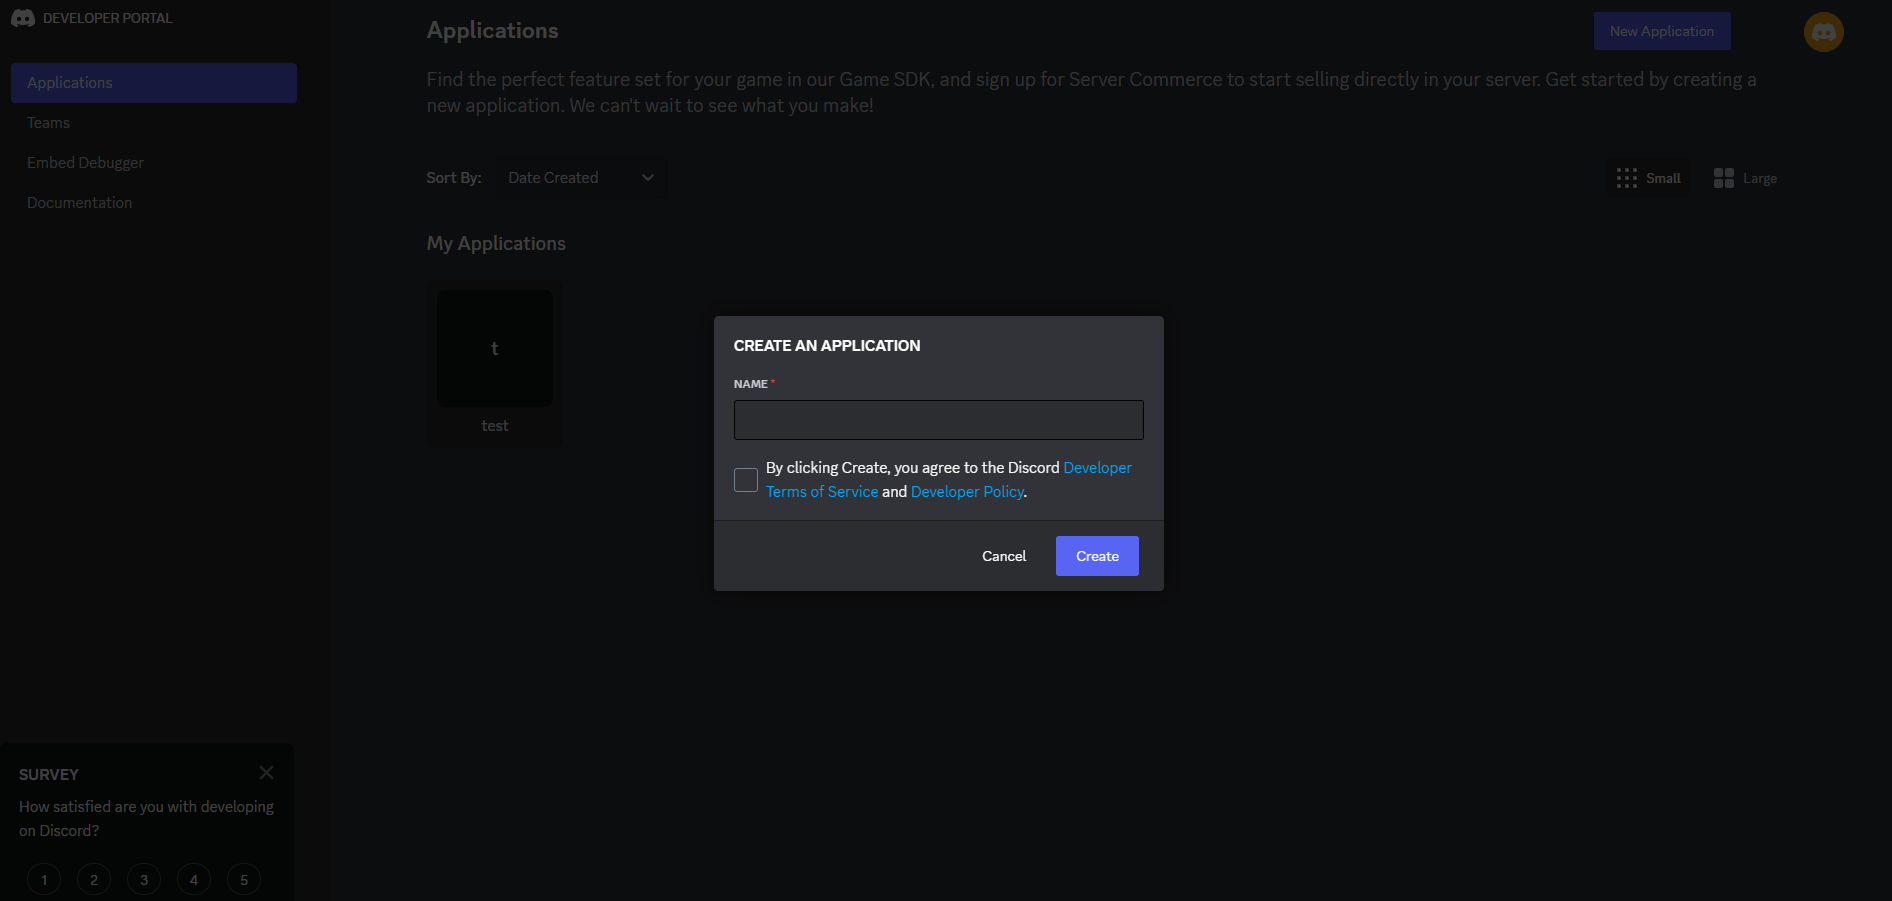
これでクライアント ID とシークレットを取得できます。
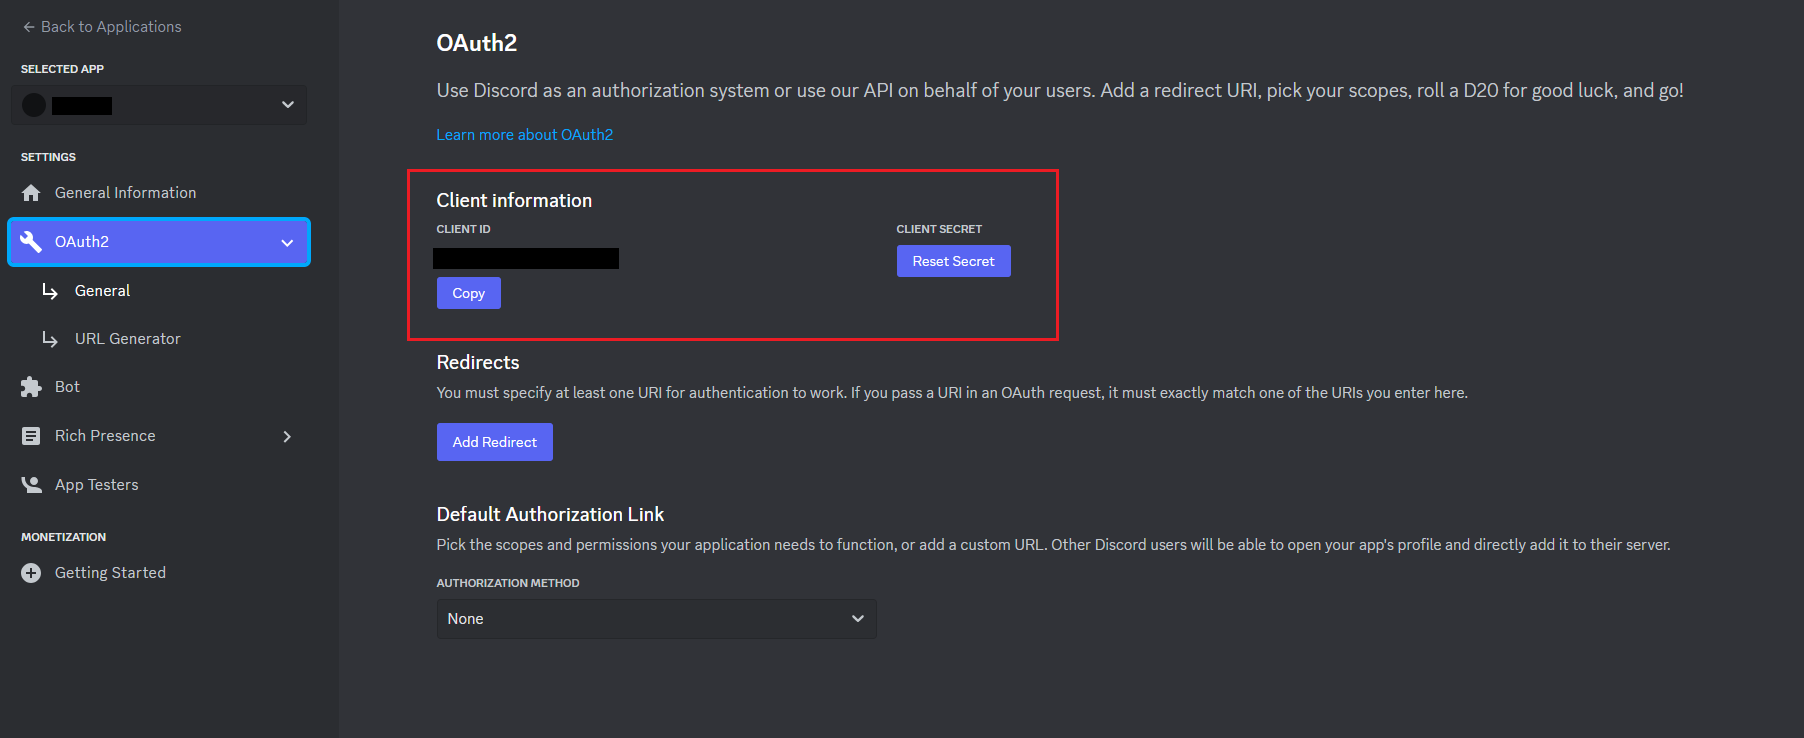
これで、 application.properties を設定できます。
quarkus.oidc.provider=discord
quarkus.oidc.client-id=<Client ID>
quarkus.oidc.credentials.client-secret=<Client Secret>
LinkedIn アプリケーション を作成します。
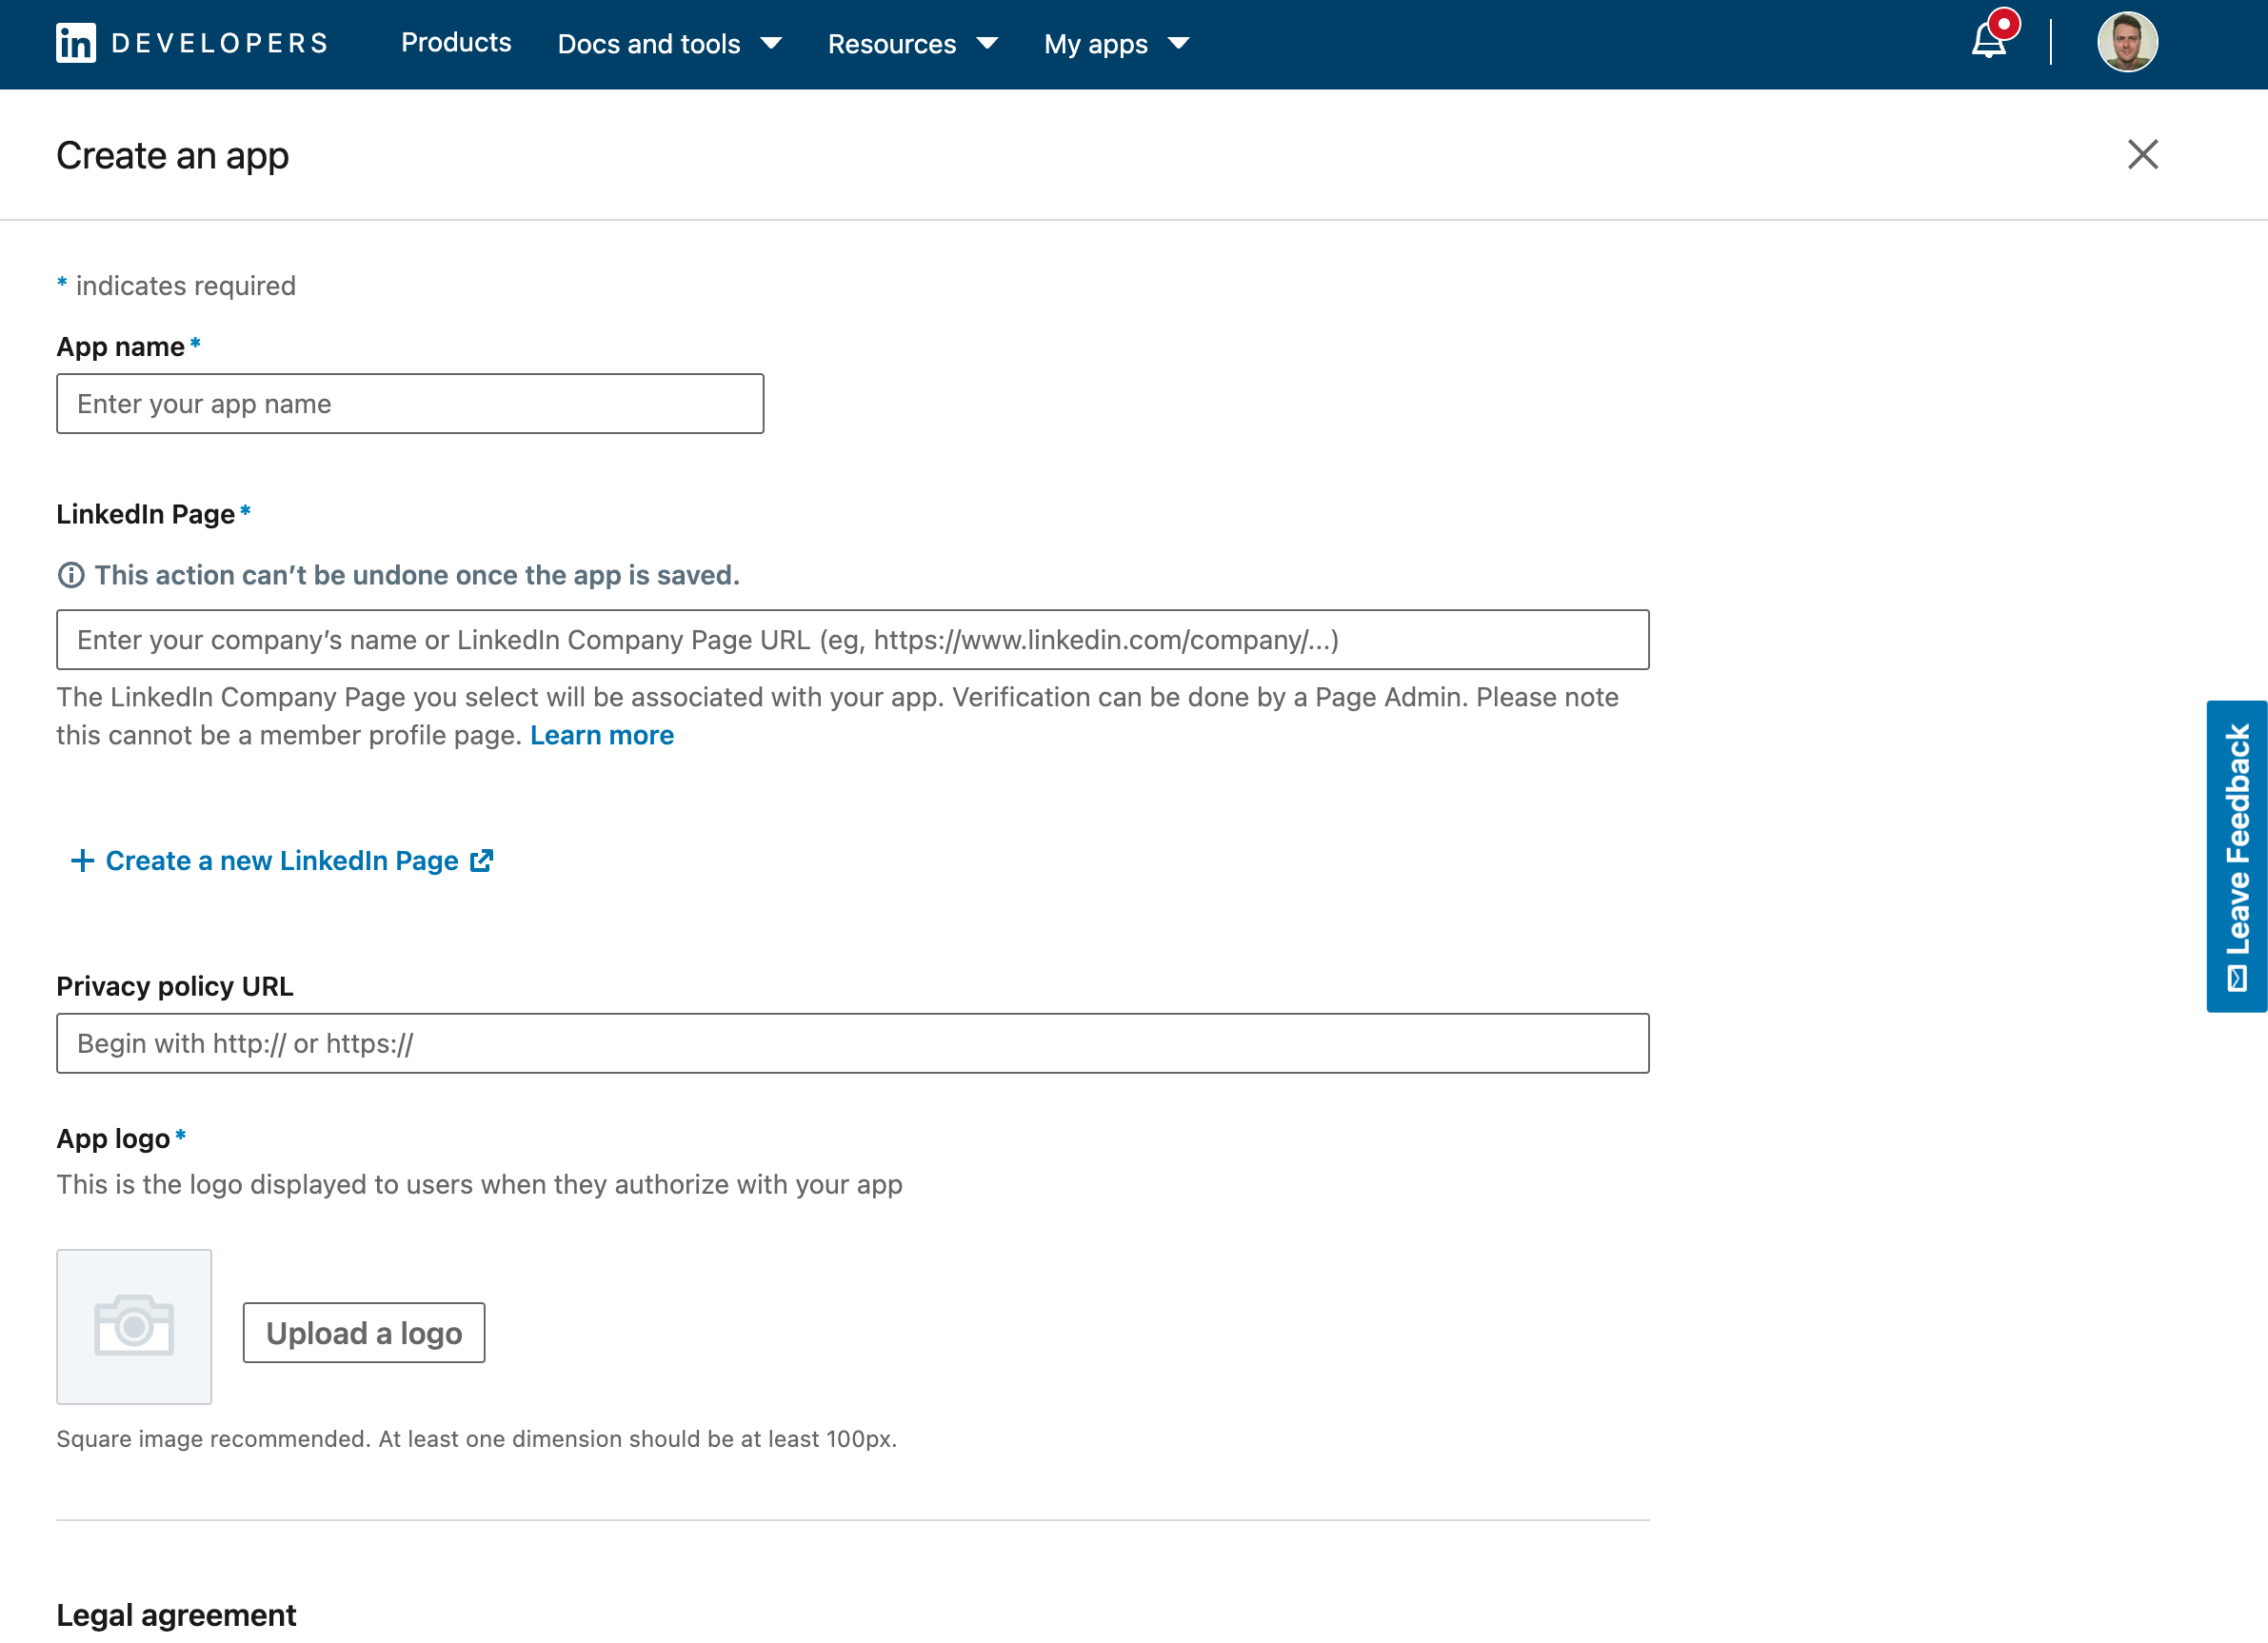
OpenId Connect を使用して LinkedIn でサインイン製品を追加します。
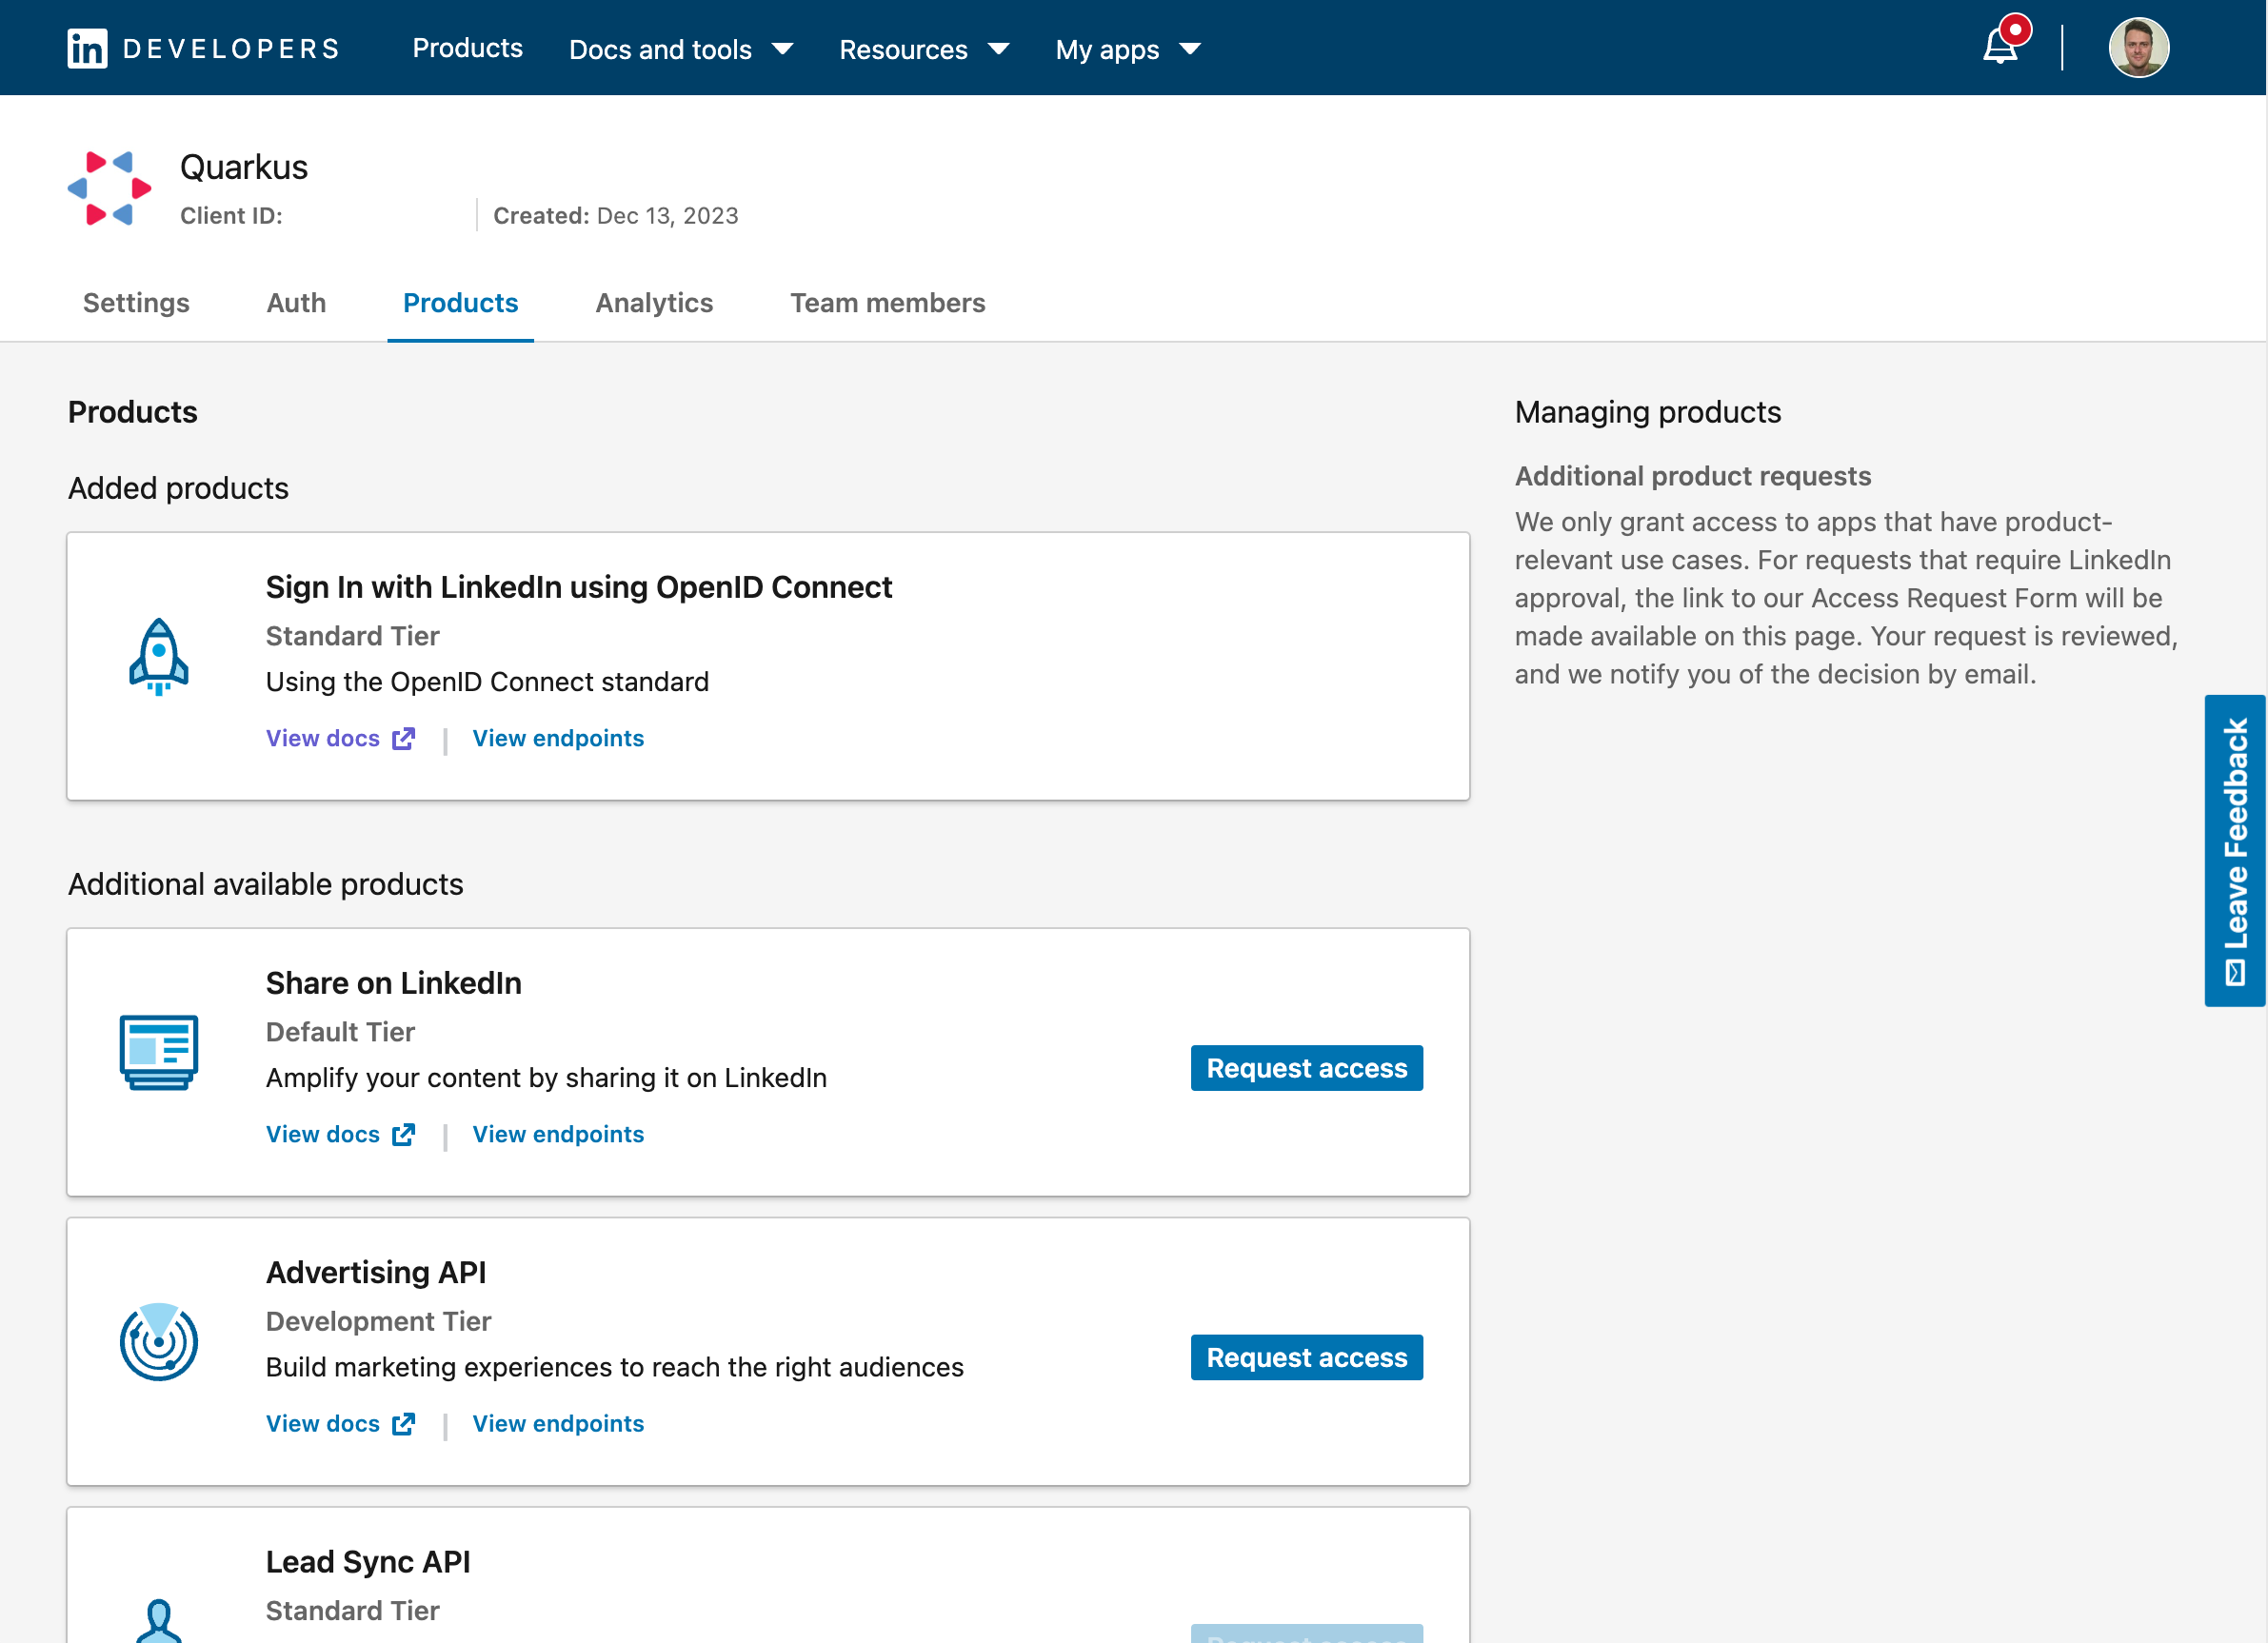
これでクライアント ID とシークレットを取得できます。アプリケーションの承認済みリダイレクト URL も追加することを忘れないでください。
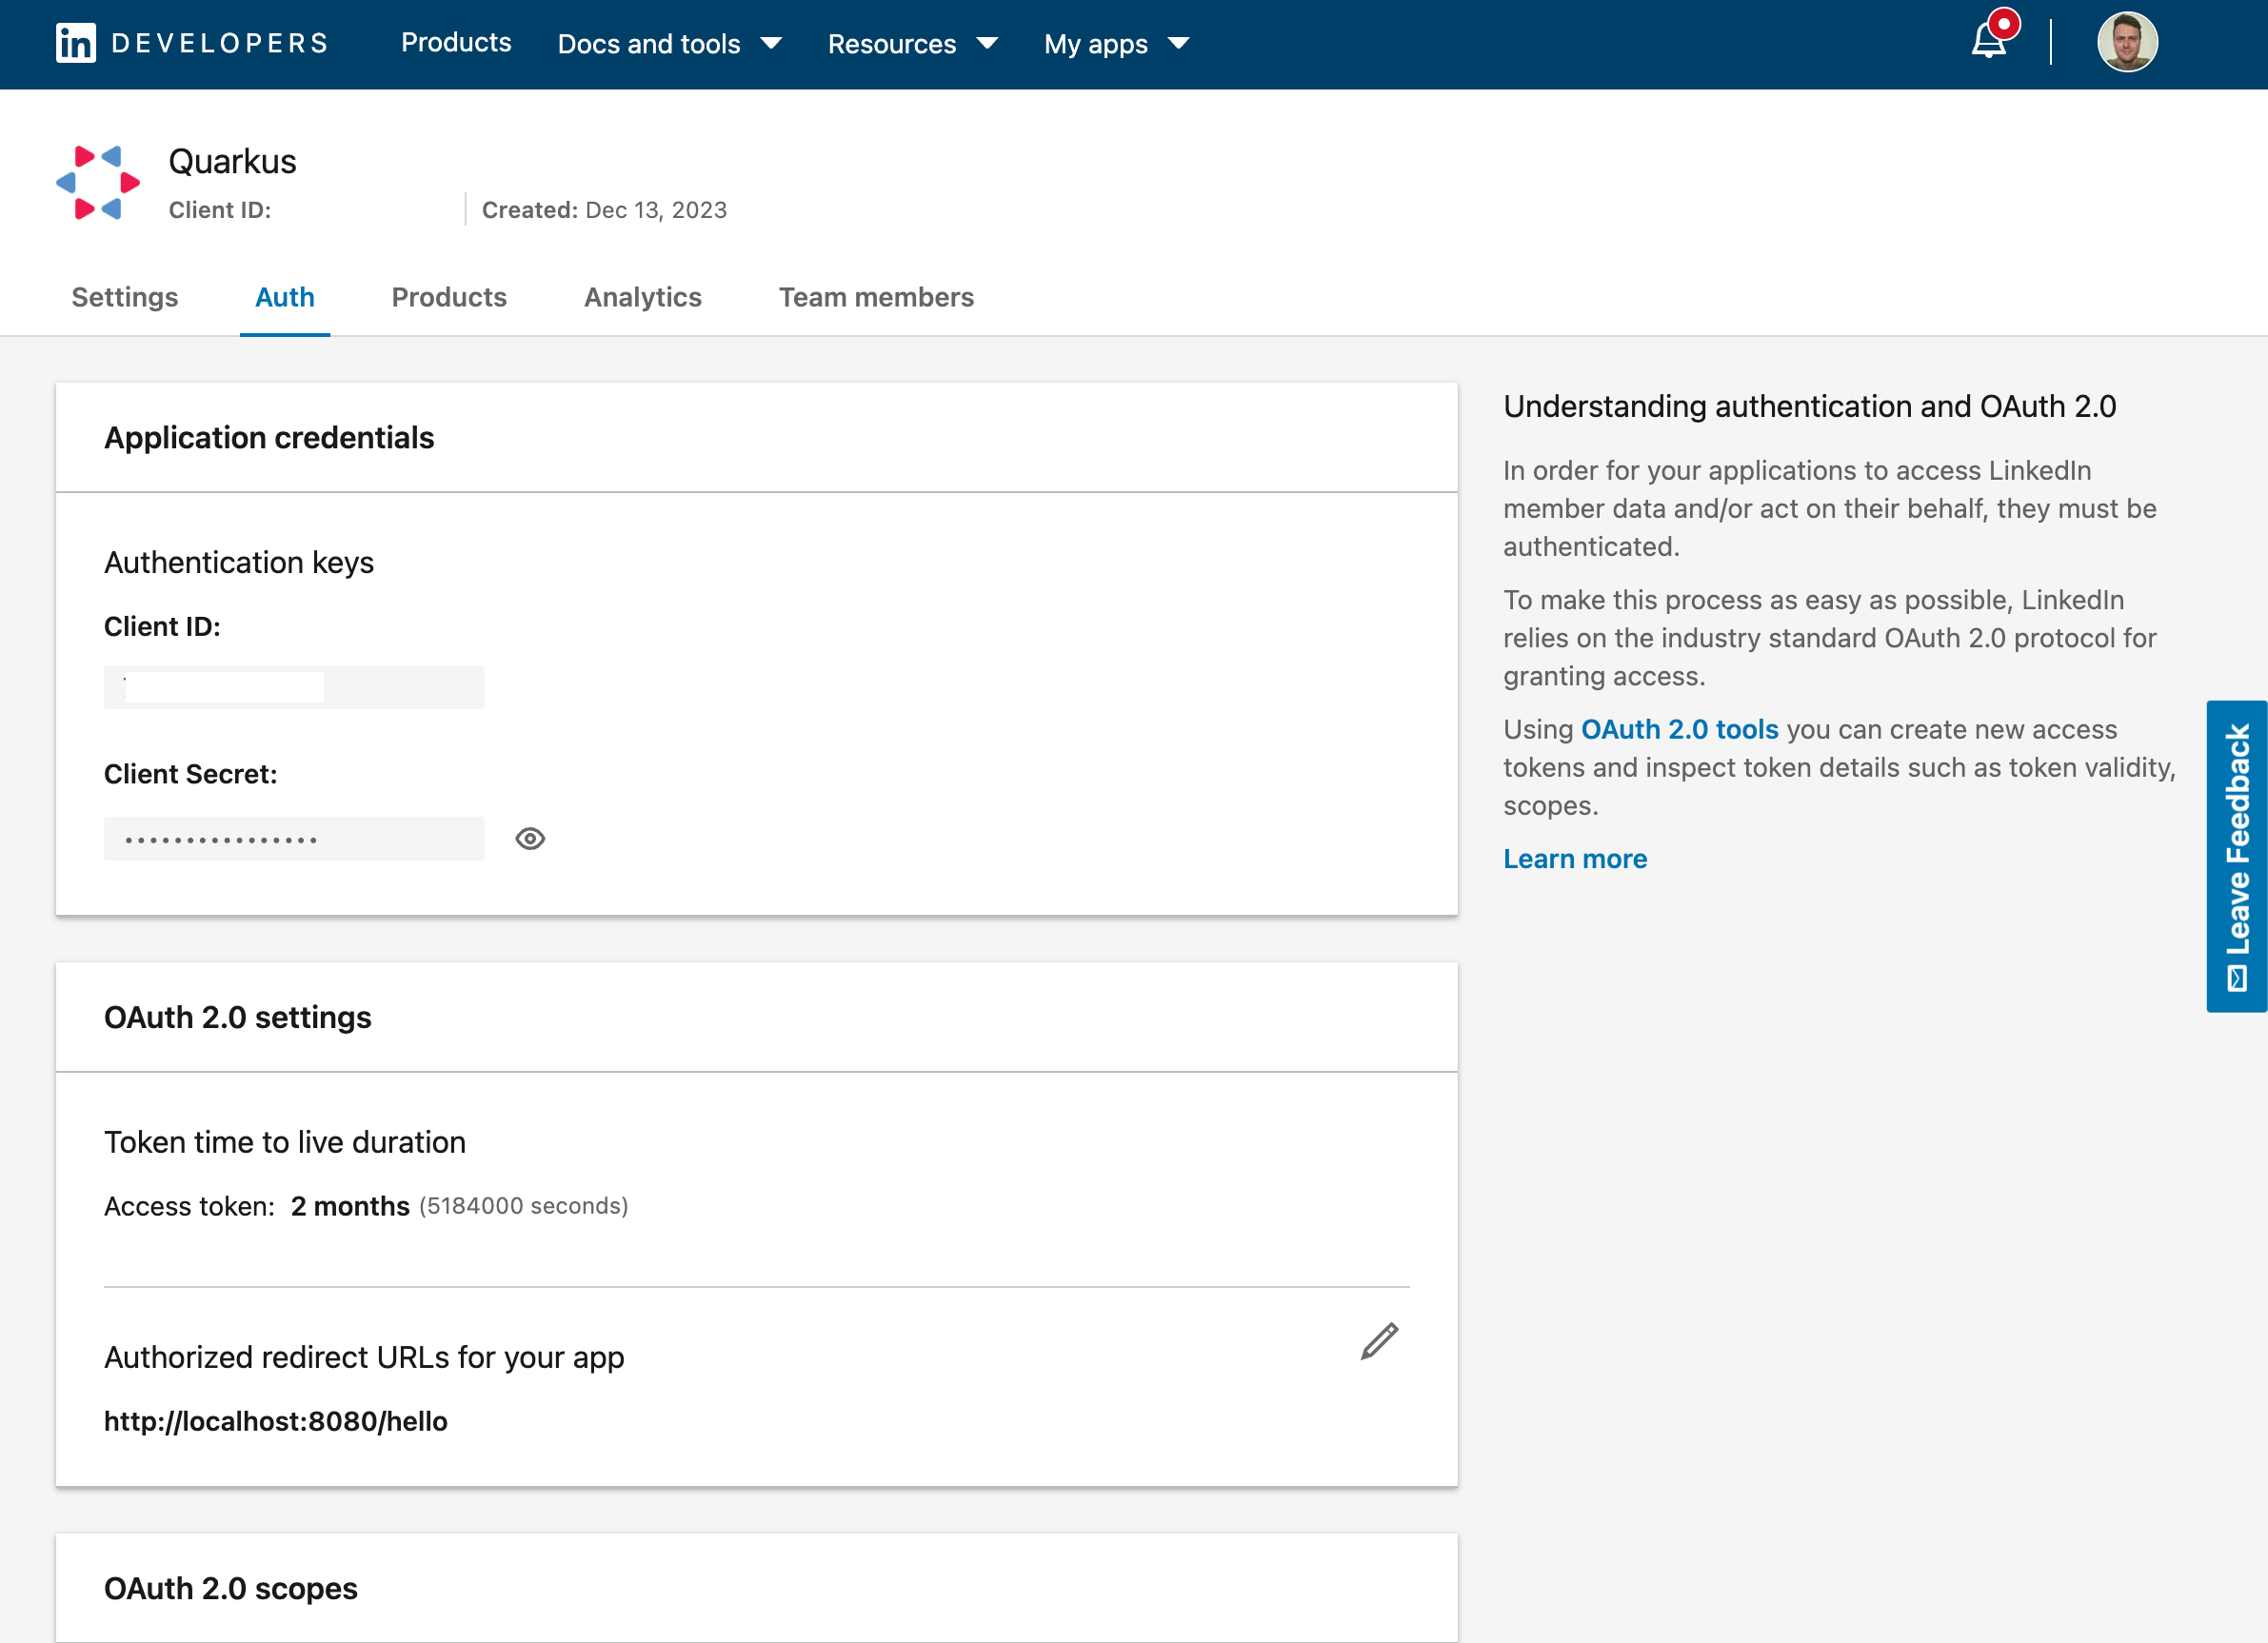
これで、 application.properties を設定できます。
quarkus.oidc.provider=linkedin
quarkus.oidc.client-id=<Client ID>
quarkus.oidc.credentials.client-secret=<Client Secret>
Strava
Strava アプリケーション を作成します。
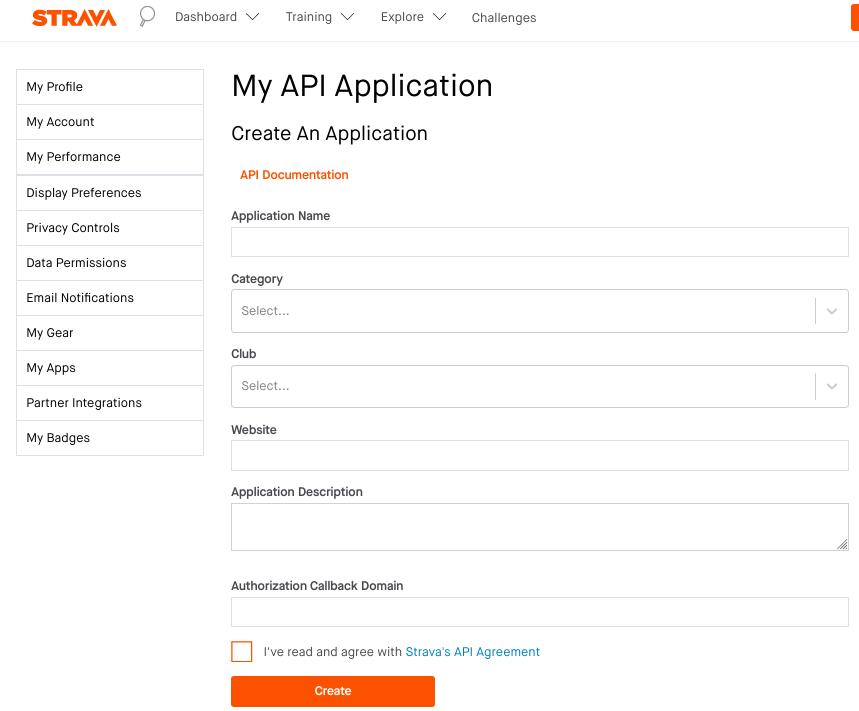
たとえば、 Category を SocialMotivation に設定し、 ApplicationCallbackDomain を `localhost`または Ngrok によって提供されるドメイン名に設定します。詳細は HTTPS リダイレクトURI を参照してください。
これで、 application.properties を設定できます。
quarkus.oidc.provider=strava
quarkus.oidc.client-id=<Client ID>
quarkus.oidc.credentials.client-secret=<Client Secret>
# default value is '/strava'
quarkus.oidc.authentication.redirect-path=/fitness/welcome (1)| 1 | Strava does not enforce that the redirect (callback) URI which is provided as an authorization code flow parameter is equal to the URI registered in the Strava application because it only requires configuring ApplicationCallbackDomain. For example, if ApplicationCallbackDomain is set to www.my-strava-example.com, Strava will accept redirect URIs such as www.my-strava-example.com/a, www.my-strava-example.com/path/a, which is not recommended by OAuth2 best security practices, see Insufficent redirect_uri validation for more information.
Therefore you must configure a redirect path when working with the Strava provider and Quarkus will enforce that the current request path matches the configured quarkus.oidc.authentication.redirect-path value before completing the authotization code flow. See the リダイレクト URI の完全一致 for more information. |
プロバイダーのスコープ
各プロバイダー宣言は、特定のプロバイダーによって発行されたアクセストークンに追加される 1 つ以上のトークンスコープを要求します。たとえば、 quarkus.oidc.provider=google は、 Google に openid、 email、および profile スコープを追加するように要求します。
たとえば、 Google を使用していて、アクセストークンに email スコープを追加しない場合は、 quarkus.oidc.authentication.scopes プロパティーを使用してこれらのスコープをオーバーライドできます。
quarkus.oidc.provider=google
quarkus.oidc.authentication.scopes=oidc,profile
デフォルトで要求されるスコープに加えて、1 つ以上のスコープを追加することもできます。たとえば、 Google が発行したアクセストークンを使用して Google Calendar サービスにアクセスする場合は、次のようにします。
quarkus.oidc.provider=google
quarkus.oidc.authentication.extra-params.scope=https://www.googleapis.com/auth/calendar
quarkus.oidc.authentication.scopes を使用して新しいスコープを追加するよりも簡単です。 quarkus.oidc.authentication.scopes はプロバイダー宣言によってすでに設定されているスコープをオーバーライドするため、この場合は必要なスコープをすべてリストする必要があります。
quarkus.oidc.provider=google
quarkus.oidc.authentication.scopes=oidc,email,profile,https://www.googleapis.com/auth/calendar
複数プロバイダーのサポート
複数のプロバイダーによるユーザー認証をサポートする場合は、プロバイダー固有のテナント設定解決をサポートする必要があります。
詳細は、Quarkus の OpenID Connect (OIDC) マルチテナンシーの使用 ガイドを参照してください。
トークン伝搬によるプロバイダーサービスへのアクセス
場合によっては、ソーシャルプロバイダーを使用してユーザーを認証するだけでは不十分なことがあります。
現在認証されているユーザーに代わってプロバイダーサービスからデータを取得または更新するには、Quarkus OIDC web-app アプリケーションでプロバイダー固有のサービスにアクセスする必要があります。
Web アプリケーションを保護するための OIDC コードフローメカニズム ガイドに記載されているように、ID とアクセストークンは認可コードフローが完了した後に返されますが、 GitHub などの一部のプロバイダーはアクセストークンのみを返します。
現在認証されているユーザーが Google カレンダーや Spotify プレイリストなどのサービスを使用できるようにするには、このアクセストークンをこれらのサービスに伝播する必要があります。
You do not have to bring provider-specific libraries in order to achieve this, but instead you can use a reactive Token Propagation filter, which can be bound to a given REST client with a simple annotation.
For more information, see the Quarkus Access token propagation guide.
たとえば、Google プロバイダーの場合、次の例に示すように、REST クライアントを使用して、ユーザーの Google カレンダーにイベントを追加できます。
package org.acme.calendar;

import org.eclipse.microprofile.rest.client.inject.RegisterRestClient;

import io.quarkus.oidc.token.propagation.AccessToken;
import io.smallrye.mutiny.Uni;
import jakarta.ws.rs.Consumes;
import jakarta.ws.rs.POST;
import jakarta.ws.rs.Path;
import jakarta.ws.rs.Produces;
import jakarta.ws.rs.core.MediaType;

@RegisterRestClient(configKey="google-calendar-api")
@AccessToken  (1)
@Path("/calendars/primary")
public interface GoogleCalendarClient {
    @POST
    @Path("events")
    @Consumes(MediaType.APPLICATION_JSON)
    @Produces(MediaType.APPLICATION_JSON)
    Uni<String> addEvent(Event event);
    public static class Event {
        public String summary;
        public String kind = "calendar#event";
        public Time start;
        public Time end
    }

    public static class Time {
        public String dateTime;
        public String timeZone = "Europe/CET";
        public Time() {
        }
        public Time(String value) {
            dateTime = value;
	}
    }
}| 1 | @AccessToken アノテーションは、ターゲットサービスへのアクセストークンの伝播を可能にします。 |
最後に、次の例に示すように、Google カレンダーのアドレスを設定し、アクセストークンの Google カレンダースコープを要求する必要があります。
quarkus.oidc.provider=google
quarkus.oidc.client-id=<Client ID>
quarkus.oidc.credentials.secret=<Secret>

# Add a required calendar scope
quarkus.oidc.authentication.extra-params.scope=https://www.googleapis.com/auth/calendar

# Point REST client to Google Calendar endpoint
quarkus.rest-client.google-calendar-api.url=https://www.googleapis.com/calendar/v3
これで、ユーザーをGoogleで認証させ、例えば彼らの代わりに Google カレンダーの更新をサポートする準備が整いました:
package org.acme.calendar;

import org.eclipse.microprofile.jwt.JsonWebToken;
import org.eclipse.microprofile.rest.client.inject.RestClient;

import io.quarkus.oidc.IdToken;
import io.quarkus.security.Authenticated;
import io.smallrye.mutiny.Uni;
import jakarta.inject.Inject;
import jakarta.ws.rs.GET;
import jakarta.ws.rs.Path;
import jakarta.ws.rs.Produces;

@Path("/calendar")
@Authenticated
public class CalendarService {

    @Inject
    @IdToken
    JsonWebToken jwt;

    @Inject
    @RestClient
    GoogleCalendarClient calendarClient;

    @GET
    @Path("/event")
    @Produces("text/plain")
    public Uni<String> get() {
        return calendarClient.addEvent(new Event()).onItem()
           .transform(c -> ("Hello " + jwt.getName() + ", new event: " + c));
    }
}このエンドポイントをローカルホストでテストしたい場合は、Google プロバイダに登録するアプリケーションを更新して、認可されたリダイレクト URI のひとつとして http://localhost:8080/calendar/event を認可されたリダイレクト URI の一つとしてリストアップするように Google プロバイダに登録されたアプリケーションを更新する必要があります。
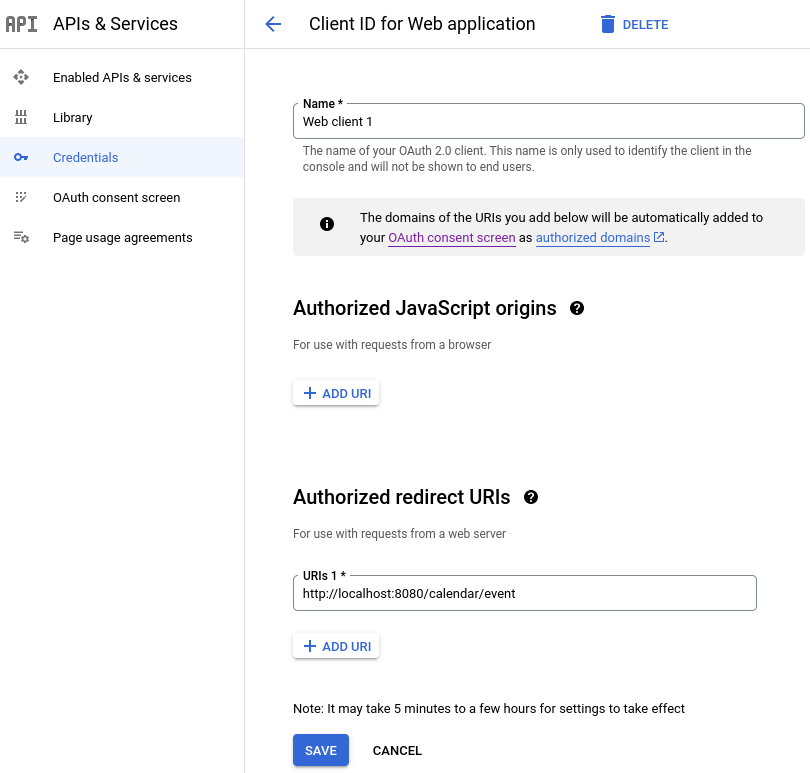
また、1人以上のテストユーザーを登録する必要があるかもしれません:
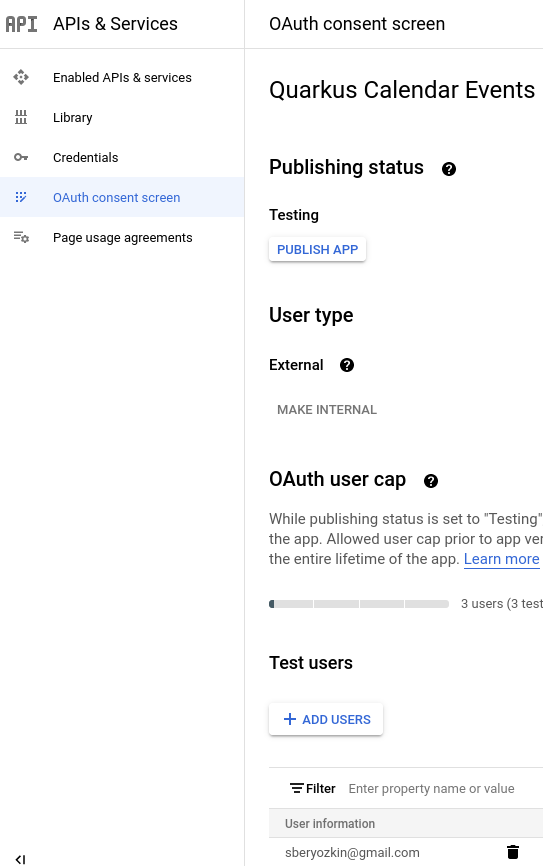
エンドポイントが他のGoogleサービスにアクセスする必要がある場合も、同じ方法でアクセスする。
エンドポイントは、IDトークンかUserInfo(特に GitHub のようなOAuth2のみのプロバイダが使用されている場合)を使用して、現在認証されているユーザーに関する情報を取得し、アクセストークンを使用して、このユーザーに代わって下流のサービス(プロバイダまたはアプリケーション固有のもの)にアクセスするという、所定のプロバイダで認証を行うパターンは、アプリケーションの安全性を確保するためにどのプロバイダが使用されているかに関係なく、普遍的に適用できます。
リダイレクト URI の完全一致
ほとんどの OIDC および OAuth2 プロバイダー (Strava 以外) は、リダイレクト URI が特定のプロバイダーのダッシュボードで設定されたリダイレクト URI と正確に一致する場合に限り、認可コードフローを完了できるようにします。
実用的な観点から言えば、Quarkus エンドポイントでは、 quarkus.oidc.authentication.redirect-path 相対パスプロパティーを、すべての認証済みユーザーの初期エントリーパスに設定する必要があります (例: quarkus.oidc.authentication.redirect-path=/authenticated)。つまり、アプリケーションのセキュリティー保護されたエントリーポイントの数や、最初にアクセスしたセキュリティー保護されたリソースに関係なく、新しく認証されたユーザーは /authenticated ページに移動します。
これは、多くの OIDC web-app アプリケーションに共通するフローです。ユーザーが最初のセキュリティー保護されたページにアクセスすると、アプリケーションは、ユーザーをアプリケーションの他の部分に誘導するリンクを使用する HTML ページを返すか、JAX-RS API を利用してユーザーを他のアプリケーションリソースにすぐにリダイレクトできます。
必要に応じて、認証が完了した後に元のリクエスト URI を復元するように Quarkus を設定できます。例:
quarkus.oidc.provider=strava (1)
quarkus.oidc.client-id=<Client ID>
quarkus.oidc.credentials.secret=<Secret>
quarkus.oidc.authentication.restore-path-after-redirect=true (2)| 1 | strava プロバイダー設定は、唯一のサポートされている設定で、 /strava パスを使用するように quarkus.oidc.authentication.redirect-path プロパティーを 強制します。このパスは、 /fitness などの別のパスで上書きできます。 |
| 2 | ユーザーが認証前に /run エンドポイントにアクセスした場合、認証後に /strava など、設定されたリダイレクトパスにリダイレクトされると、元のリクエストの /run パスに移動します。 |
quarkus.oidc.authentication.redirect-path をすぐに設定する必要はありません。その理由として quarkus.oidc.authentication.redirect-path が設定されていない場合、Quarkus は現在のリクエスト URL が認可コードフローのリダイレクト URL であると想定するためです。たとえば、Google 認証が機能している場合は、Quarkus エンドポイントを /google でリッスンし、Google ダッシュボードを更新して http://localhost:8080/google リダイレクト URI がサポートされていることを確認できます。保護されたアプリケーションの URL スペースが増大すると、 quarkus.oidc.authentication.redirect-path プロパティーの設定が必要になります。
レート制限
開発者 API サブスクリプションレベルによっては、一部のプロバイダーがかなり厳格なリクエストレート制限ポリシーを適用する場合があります。
Quarkus が、Google プロバイダーなどの OIDC 準拠のプロバイダーから公開検証鍵を取得し、これらの鍵を使用してユーザーセッションをローカルで検証し続ける場合は問題にならないかもしれませんが、アクセストークンのみが利用でき、認証済みユーザーから要求があるたびに、プロバイダーエンドポイントから UserInfo を要求して間接的に検証する必要があるピュア OAuth2 プロバイダーの場合には問題となる可能性があります。
In such cases consider caching UserInfo, using either a default or custom cache implementation or even embedding UserInfo in an internally generated ID token which is encrypted by default, for example:
quarkus.oidc.provider=x
quarkus.oidc.client-id=<Client ID>
quarkus.oidc.credentials.secret=<Secret>
quarkus.oidc.authentication.extra-params.scope=tweet.write
quarkus.rest-client.twitter-client.url=https://api.twitter.com/2

quarkus.oidc.cache-user-info-in-idtoken=true (1)| 1 | Cache UserInfo by embedding it in the internally generated ID token |

